-
How to convert JVC Everio HD footages to editable format with flawless quality?
“How do I convert this file without any quality loss to be able to edit within Premiere Pro CS4?” A good question! The JVC Everio cameras, like GZ-HD620, GZ-HD500, GZ-HM300 etc, shoot at full HD (1920x1080) in MTS or TOD format, which are rejected by most editing software, and you have to convert them to common and editable format before importing to non-linear editing application. Although all the Everio models come with software that allows you to do some simple editing, turns out to be helpless if you want to transcode the footages with it. You got to seek other application to deal with these HD files. The en-decoding process, as we all know, will definitely leads to quality loss of the video. You can hardly expect the converted video clip as perfect as the original footages. Is there any software that can convert MTS file to be editable and keep the original video quality? Well, Pavtube HD Converter is worth trying. In the following guide I will show you how to convert JVC MTS and TOD files to editable video clips without quality loss.
Access the software:
You may check more information about Pavtube HD Video Converter or download a trial version to try it out.
Step through:
Step one. Run Pavtube HD Converter. Click ‘Add’ button, browse to the footages and load them to the converter.
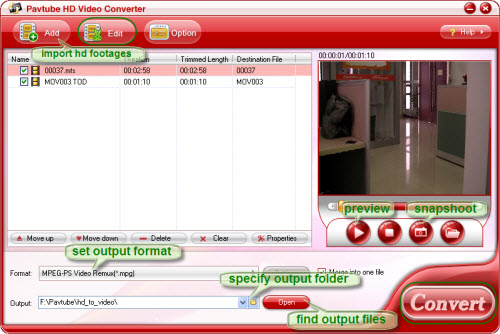
Step two. Select the items to be converted, and click on ‘Format’ bar. Select Remux-> MPEG-PS Video Remux (*.mpg). For burning onto blu-ray disc, MPEG-TS would be a nice choice.
Step three. Click the folder icon at the end of ‘Output’ field to select a location for the output video files.
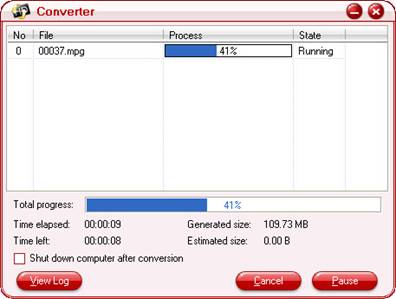
Step four. Click the ‘Convert’ button to start conversion. After conversion you can click the ‘Open’ button to locate converted video files. The converted files will be as big as the source footages, without any quality degradation. Now you can import these HD MPG files to Premiere CS4 and any other editing software for editing.
Small Tips:
- Preview the video- select it in file list and click ‘Preview’ button.
- Thumbnail- click ‘Snapshoot’ button when previewing the video. Click ‘Option’ to set the image format of screenshots.
- Deinterlace- click ‘Editor’, switch to ‘Effect’ tab, find ‘Deinterlacing’ box, and check it.
- Combine files together- check the files to be merged in file list and check ‘Merge into one’ box beside ‘Settings’ button.
- Trim- click ‘Editor’, switch to ‘Effect’ tab and input time point in start and end box.
- The HD files bite much hard drive space. You can compress the files with the HD Converter to free some space when it is necessary.
Guide
- Convert M2TS to HD MP4
- Convert MTS/M2TS to Apple TV
- Convert MTS/M2TS to iPhone
- Convert MTS/M2TS to iPod
- Convert Video to DV AVI
- Convert MKV to MP4
- Convert MKV to MPEG
- Convert MKV to WMV
- Convert HD to SD
- Convert MOD to MPEG
- Convert MOD to MP4
- Convert MOD to WMV
- Convert MOD to WAV
- Convert MOD to AVI
- Convert AVCHD to AVI
- Convert AVCHD to iPod
- Convert AVCHD to SD
- Convert AVCHD Video
- Blu-Ray to 3GP
- Blu-Ray to Blackberry
- Blu-Ray to DVD
- Blu-Ray to iPod Nano
- Blu-Ray to iPod Touch
- Copy Blu Ray to Hard Disk
- DVD to Apple TV
- DVD to AVI
- DVD to Blackberry
- Blu-Ray to Divx
- Blu Ray to Xvid AVI
- Capture Blu-Ray Screenshot
- Extract MP3, WMA from Blu-Ray
- Rip Blu-Ray to audio
- Rip Blu-Ray to PC