
 Home
HomeIf you have a number of file folders stored on your AVCHD camera or camcorder, you might consider using Pavtube Media Magician for Mac to batch manage them on your Mac for further editing with NLEs, or just making backup copies for local storage. As a camcorder companion tool for Mac OS X, the Media Magician for Mac application features simple but powerful capabilities to mange camcorder videos on Mac in batch, as well as filter and backup desired camera clips to local HDD by Year, Month, Date, and File Type.
How to Batch Manage AVCHD MTS/M2TS Camcorder Footage at One Time on Mac?
This article presents detailed procedures on how to manage multiple camera AVCHD folders on Mac at one time by using Pavtube Media Magician for Mac. You can read Media Magician Review to learn more about this program or download its free trial version to have a better understanding of this camcorder footage managing tool.
![]()
The free trial version of Pavtube Media Magician for Mac has the following limitations:
1. It will add Pavtube logo watermark in output file(s).
2. Lossless output has a file size limit of 5 minutes.
If the free trial version does what you want, you can click Buy Now button below to purchase its full version to bypass the above mentioned free trial limitations.
![]() ($45.00)
($45.00)
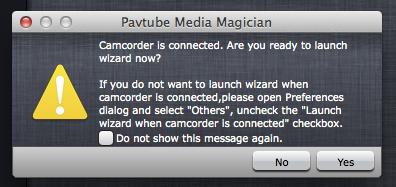
Soon after you connected your AVCHD camcorder with your Mac computer and run Pavtube Media Magician for Mac, a smart camcorder wizard in this program will pop up and ask “Camcorder is connected. Are you ready to launch wizard now?” Click “Yes” to confirm.
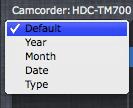
Then the following window appears with all the AVCHD file folders in your camcorder displayed. You can choose to filter and display them by Year, Month, Date, and File Type if necessary, or the program will show all the folders in your camera by default.
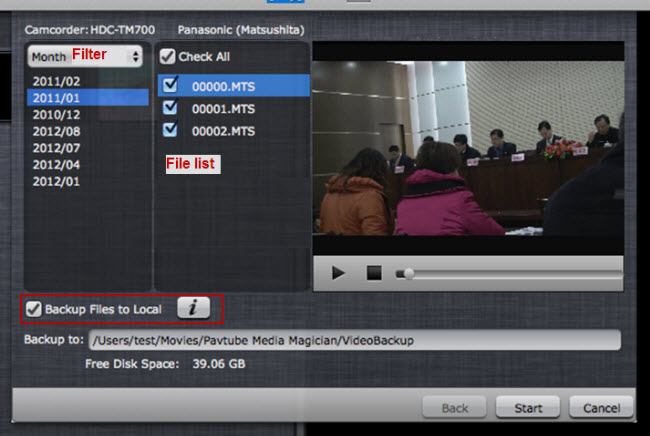
You can also decide which .MTS clips in the file list should be imported and backed up. All clips are checked by default, if you needn’t use some of them, simple uncheck them. Then tick off the checkbox before “Backup Files to Local” to directly copy the MTS files you selected from your camera to your local hard disk drive. Afterwards, click “Start” to begin. In this way, Pavtube Media Magician for Mac captures all Camcorder folders to Mac in batch at one time.
Tips:
If choose backup video files to local, videos will be imported into Media Magician for Mac from local after backup completes, otherwise videos will be imported directly from camera/camcorder so that you can edit and convert them. And the camera/camcorder must be kept connecting in the whole import and output process. Unexpected disconnection will cause unpredictable results.
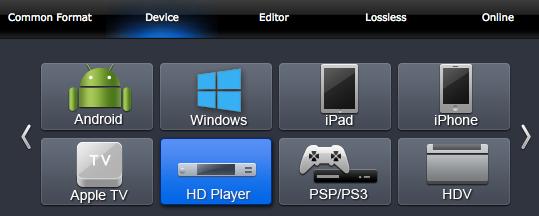
When MTS flies are loaded into Media Magician for Mac, you can split/trim multiple MTS clips in accurate frames without re-encoding at a time, or export files best suited for playing on Android devices, Windows devices, iPad, iPhone, Apple TV, HD Player, PSP/PS3, and HDV.
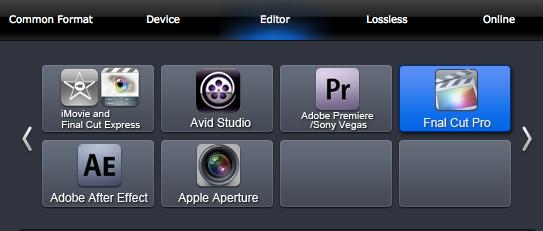
You can also directly upload MTS camera videos onto YouTube without additional steps, or create videos for editing with Final Cut Pro, iMovie, FCE, Avid Studio, Adobe Premiere, Sony Vegas, Adobe After Effects, and Apple Aperture.
Best of all, you are allowed to process multiple conversion tasks at a time, that means you can transcode/convert the same sources placed on timeline into different file formats simultaneously.
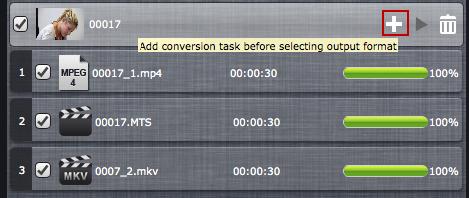
Convert a clip placed on timeline into different file formats simultaneously
 Free Trial Media Magician for Mac

Useful Tips
- How to convert AVCHD MTS/M2TS to MKV?
- Convert AVCHD (MTS/M2TS) Videos for Playing on iPhone
- Convert AVCHD/AVCHD Lite Footage to Apple ProRes 422 Encoded Files for Final Cut Pro
- Sony M2TS to Windows Movie Maker Converter
- Canon Vixia MTS to Windows Movie Maker Converter
- Convert 1080p MTS Videos to Windows Movie Maker


