Sony rates the Cyber-shot TF1 camera as able to be used at depths of up to 10 meters (33 feet) for as long as one hour, and shockproof to a height of 1.5 meters. And since you may be wearing gloves when using the camera in freezing conditions or underwater, the design features large buttons and a chunky grip that should make for easier handling in gloved hands. Of course, even if you're not the outdoors type, all of this will still be equally useful when at the beach or pool, or you're prone to dropping your gadgets.
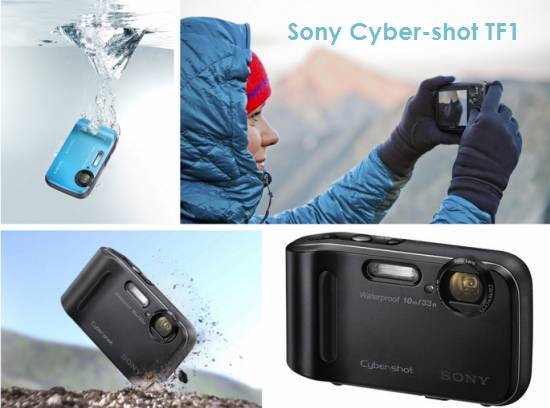
The Sony Cyber-shot TF1 camera packs a 2.7-inch LCD, a 16.1-megapixel sensor, a 25mm 4x optical zoom lens, a top sensitivity of ISO 3200 and a 1 frame-per-second burst mode. It lets you shoot gorgeous HD videos so you can relive every ounce of the action in glorious high definition (records in 29-minute segments). In 720p AVI movie mode, you can record 1280 x 720 HD movies at 30 fps for high-quality clips perfect for viewing and editing on your Mac or PC, or uploading to sites like YouTube and Facebook.

Sony Cyber-shot TF1 Video Format: AVI (Motion JPEG)
Sony Cyber-shot TF1 Video Mode: 720 (1280 x 720) / VGA (640 x 480) / QVGA (320 x 240)
If you have shot videos with the Cyber-shot TF1 camera and want to edit the Motion JPEG AVI footage on your Mac computer using FCP X, iMovie, Avid, FCE, or Premiere Pro, you may have the needs to convert the MJPEG .avi files to a format that is well suited for your editorial applications. See a user question below:
“I have a Sony Cyber-shot TF1 digital camera and it takes movies in the avi/motion jpeg format. My problem is I need to convert the avi format into mov so I can edit them in iMovie or FCP X. I have tried avi2mov, but I get audio and no video when I play it. Any idea why? I’m hoping there is an easy to use Mac conversion tool out there that can help me. BTW, I’m on a Mac platform using Mountain lion 10.8.”
Here comes a solution to show you the Sony Cyber-shot TF1 workflow on Mac.
How to import and edit TF1 MJPEG AVI video with FCP X, iMovie, Avid, FCE, and Premiere Pro?
Required software
Pavtube Media Magician for Mac
Step 1: ![]() Free download Media Magician for Mac Trial Version, install and launch it
Free download Media Magician for Mac Trial Version, install and launch it
Notes: The free trial version of Pavtube Media Magician for Mac has the following limitations:
1. It will add Pavtube logo watermark in output file(s).
2. Lossless output has a file size limit of 5 minutes.
If the free trial version does what you want, you can click Buy Now here to purchase its full version to bypass the above mentioned free trial limitations.
Step 2: Add Sony Cyber-shot TF1 AVI files into Media Magician for Mac
There are two ways available to import source media files:
1) Import from camera/camcorder
Connect your camera with your Mac computer and run Pavtube Media Magician for Mac. This Sony camcorder companion tool will detect your camera automatically and ask “Camcorder is connected. Are you ready to launch wizard now?” Click “Yes” to confirm.
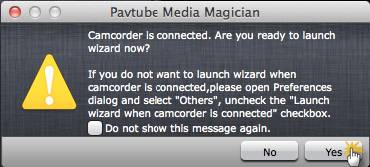
In the mean time, you are allowed to backup Sony Cyber-shot TF1 AVI footage directly from camera to local computer. Also, you can click the camera icon to load camcorder videos as well.
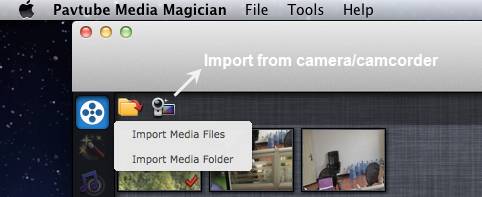
2) Import from local computer
If you already have stored MJPEG AVI clips shot by your Sony Cyber-shot TF1 camera on your computer’s HDD, you can choose to “Import Media Files” or “Import Media Folder” to browse and load your source files from computer.
Step 3: Drag and drop AVI clips captured by a Sony TF1 camera onto Timeline
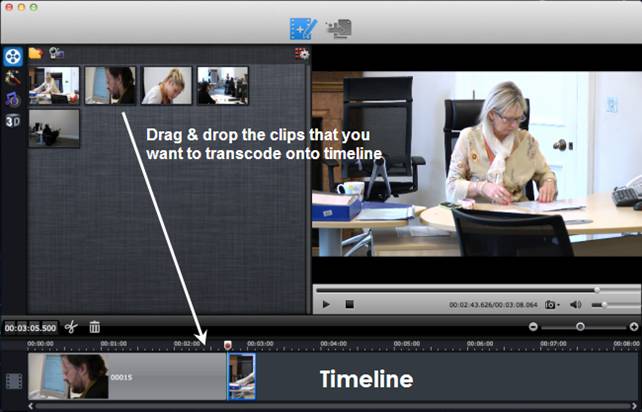
After source AVI clips are imported into the Media Magician for Mac program, you need to drag and drop the clips that you want to transcode onto timeline.
Step 4: Split/Cut/Reorder/Merge Sony Cyber-shot TF1 AVI clips (Optional)
If you would like to cut off unwanted parts of your AVI clips, rearrange them in your wanted order, or merge them into one file, you can use the control buttons on timeline to do this.
The control buttons on timeline help you locate frames accurately so that you can cut, trim, delete, and merge video clips in a much easier way.

Control buttons on Timeline
1. Time Display Controller: Move your mouse cursor on timeline, the opposite time point will be displayed here. Once you entered a time point into the time display box and click enter, the Preview Window and Timeline will switch to the frame of this time point. This helps to locate to the accurate frame that you want.
2. Zoom in and Zoom out: Drag the bar on top-right of timeline to Zoom in or out for better view.
3. Preview: Highlight a clip on timeline and click Play button, you can preview. Double click on a clip can also begin preview.
4. Trim: Put your cursor to the start or end point of a clip on timeline until it changes to trimmer. Drag the trimmer and you can trim off unwanted starting or ending.
5. Cut: Drag the pointer to the right place; Put your cursor to process bar under preview window and select the right frame; Click the Scissors button and you can cut the clip. And then you can rearrange order or delete.
6. Delete: Highlight the unwanted clip on timeline, and click Delete button. You can also delete it with right-click menu.
7. Rearrange order: Drag and hold a clip to the right place until the place line shows. Drop the clip and it will be placed right there.
8. Merge and join: All files placed on timeline will be output as one file. So if you want to merge and join several clips, just drag them to timeline in right order.
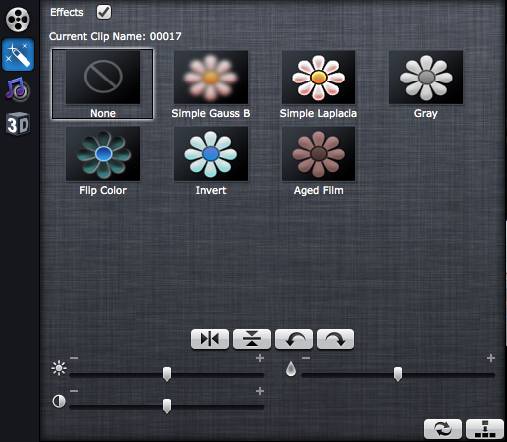
Furthermore, you can add 3D effects, special effects (e.g. Simple Gauss Blur, Flip Color, Invert, Aged Film, and Gray), or adjust volume, contrast, saturation, brightness of selected clips. You can also flip video horizontally, vertically, and rotate clockwise and counter-clockwise as you like.
Step 5: Transcode AVI shootings for FCP X, iMovie, Avid, FCE, and Premiere Pro
Choose “Output” in the main interface, and click “Plus” icon to add conversion task before selecting output format. Here we take converting AVI to AIC for iMovie and FCE for instance:
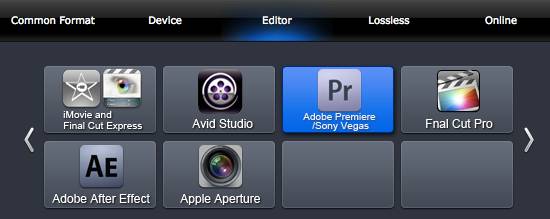
Switch to “Editor” > “iMovie and Final Cut Express” and click “Start” to begin encoding Sony Cyber-shot MJPEG AVI footage to AIC for iMovie and Final Cut Express.
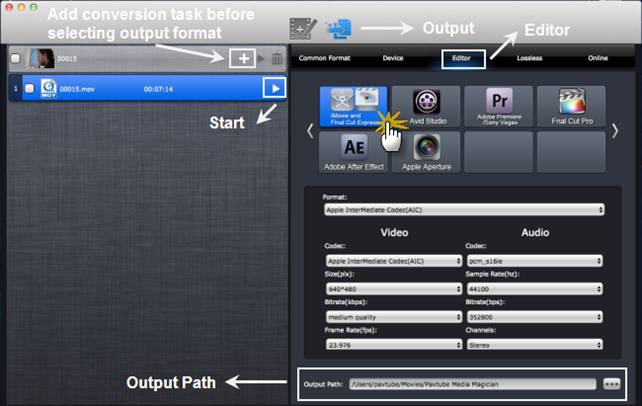
This Sony TF1 camera companion software will specify a default folder to save the converted videos. If you’d like to change the output location (output path), please click ![]() to navigate to the folder you’d like to save videos to.
to navigate to the folder you’d like to save videos to.
When conversion task finished, you can right click on the task list and check “Find Target” to get the generated AIC MOV files for editing use with iMovie or Final Cut Express.
Tips:
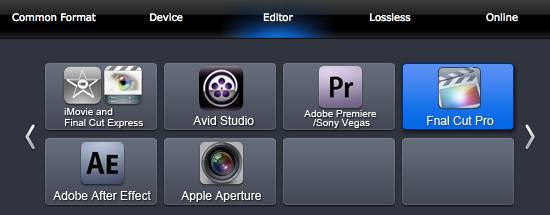
1. If you need to edit Sony Cyber-shot TF1 AVI footage with FCP X, you should select “Final Cut Pro” as target format.
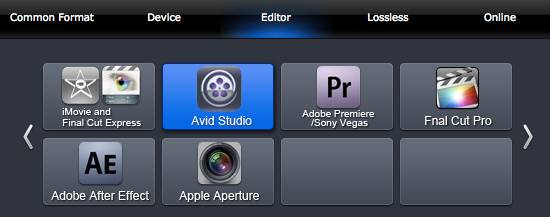
2. If you intend to work with Avid Media Composer, you need to choose “Avid Studio” as output format.
3. If you attempt to let Adobe Premiere Pro touch your AVI footage, you should select “Adobe Premiere/Sony Vegas” as target format.
Useful Tips
- Import/Edit/Transcode Sony NEX-5N/NEX-7/A57/A65/A77 1080 50/60P AVCHD to iMovie on Mac
- Transcode TiVo Shows to AIC for Editing in iMovie and FCE
- Import Canon Rebel T4i (EOS 650D) MOV to iMovie for Editing – H.264 MOV to AIC Conversion
- Best Way to Import Nikon H.264 MOV to iMovie for Editing and Playing
- How to Convert QuickTime File to iMovie?
- Convert Sony AVCHD MTS/M2TS to AIC MOV for iMovie


 Home
Home Free Trial Media Magician for Mac


