
 Home
HomeThe DJI Phantom 4 is the smartest flying camera that DJI has ever created. Able to fly intelligently with a tap, automatically create seamless tracking shots, fly intelligently over or around obstacles and much more. Flying has never been this easy or as much fun.
Have shoot the 4K videos with the DJI Phantom 4, and then you wanna upload the Phantom 4 4K video to YouTube, Facebook and Vimeo for sharing with your friends. However, something let you down, the uploading process take much times and the video quality did not achieve the desired results even if you enable Phantom 4 recordings are in MOV wrapper encoded with MPEG-4 AVC/H.264 codec.
Folks say that YouTube, Facebook and Vimeo always re-compress the uploaded video, so upload the best, highest resolution you can.
Absolutely! If you have captured videos in 4K with DJI Phantom 4, upload it in 4K - this will mean your users can see the maximum quality level available TO THEM. It is better for your users deciding which resolution should be chosen. In general, always upload the highest quality you can.
However, if you have tried, you will find uploading DJI Phantom 4 4K video to YouTube/Facebook/Vimeo is not as simple as you think, failure becomes commonplace. So what is best resolution for uploading to YouTube, Facebook and Vimeo?
For a standard accounts, uploaded file size up to 2 GB and file length up to 15 minutes. For partner accounts, uploaded file size up to 128 GB(it will takes much more duration depends on your video specs), and recommended compressing your video in a video editor before uploading it to YouTube.
In this case, is there a simple way to edit the DJI Phantom 4 clips and smoothly uploaded to YouTube, Facebook and Vimeo?
Without a doubt, measure always more than difficult, here we provide you the comprehensive solution. With Pavtube Video Converter, you can not only trim, crop or merge the video into a single one file to get a complete video for sharing with other people, but also you can specify the file size, modify the video bitrate, frame rate, audio channel, etc for your original Phantom 4 4K videos for easier uploading to YouTube/Vimeo/Facebook.
Upload and stream a complete 4K video from DJI Phantom 4 to YouTube,Vimeo or Facebook.
Step 1. Download the Pavtube Video Converter Program.
Pavtube Video Converter is an easy-to use, functional video converter and video editor, the trail-before-purchase is supported, just feel free to try it, it is 100% clean and safe.


Step 2. Add Phantom 4 4k video into the Program.
When you start up Pavtube Video Converter, the main interface pops up, click "Add Video" button to load DJI Phantom 4 clips to the program. You can also directly drag the video files into the program directly.

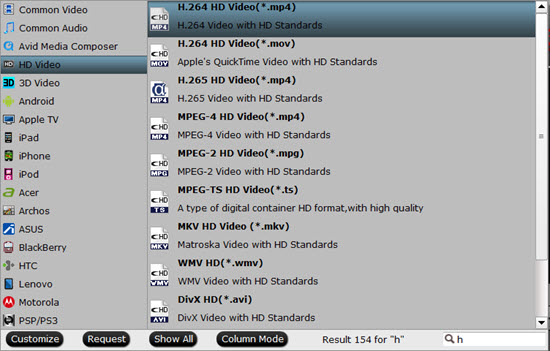
Step3. Set output format.
Click "Format" bar, from its drop-down options, choose YouTube best compatible uploading format from "Common Video" > "H.264 High Profile Video(*.mp4)" or "H.264 HD Video(*.mp4)" under "HD Video" main category. It maintain the original MPEG-4 AVC / H.264 codec.
Note: Open "Profile Settings" window, click "Size(pix)" to select "original" as the final resolution for output video if you would like to upload a 4K video to YouTube/Facebook/Vimeo. Upload the highest quality not always necessarily true. Shoot at the highest resolution you can support. Edit and deliver in the resolution most people will watch in (i.e. 1080p). When you give YouTube, Facebook and Vimeo a 1080p file that closely matches their target output format and bitrate, they will do significantly less damage to it. In "Profile Settings" window, you can also click "Size(pix)" to select "1920*1080" as the final resolution for output video to get a smaller video size and more smoothly when upload to YouTube, Facebook and Vimeo.
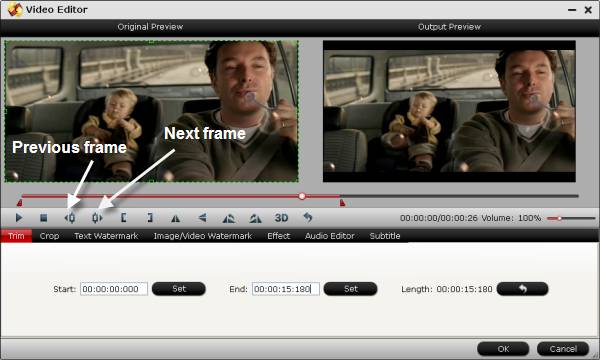
Step 4. Modiy the DJI Phantom 4 clips.
On the “Video Editor” Window, you can play and preview the original video and output effects. Also you can flip video, trim, add 3D effect, reset, and adjust volume.
![]()
Play/Pause: Click to start playing the current video or pause the playing.
Play/Pause: Click to start playing the current video or pause the playing.
Stop: Click to quit playback.
Previous Frame: Click and go back to the previous frame.
Next Frame: Click and go to the next frame.
Left square bracket: Click to set the start time for trimming.
Right square bracket: Click to set the end time for trimming.
Flip Horizontal: Click to flip the image horizontally.
Flip Vertical: Click to flip the image vertically.
Flip 90°towards left: Click to flip the image 90°towards left.
Flip 90°towards right: Click to flip the image 90°towards right.
Special Effect: Add special effect to source files.
Reset: Click to restore default value.
Volume slider: Drag to adjust volume.
In “Video Editor” there are seven edit tabs: Trim, Crop, Text Watermark, Image/Video Watermark, Effect, Audio Editor and Subtitle.

Trim: The "Trim" feature allows users to decide where to start and where to end when converting the selected clip, so that unwanted segments will be cut out after conversion.
Crop: The "Crop" facility enables users to get rid of the black edges and unwanted area of the image.

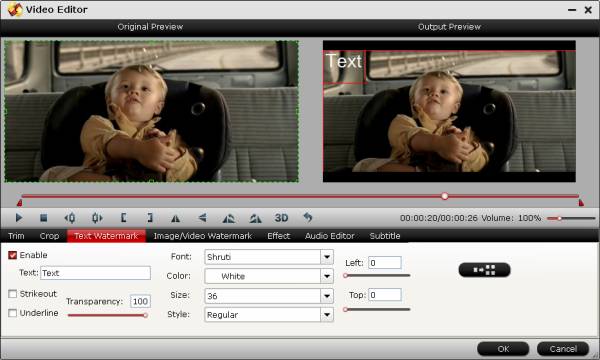
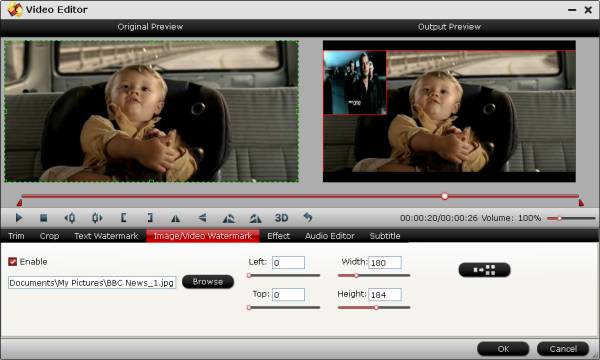
Text Watermark: Check Enable, you can add text watermark to selected video clip. You can either set parameters or drag the text on preview screen to set its location.
Image/Video Watermark: Check Enable, you can add images or videos as watermark onto selected video file. The location can also be set by dragging on the preview screen.
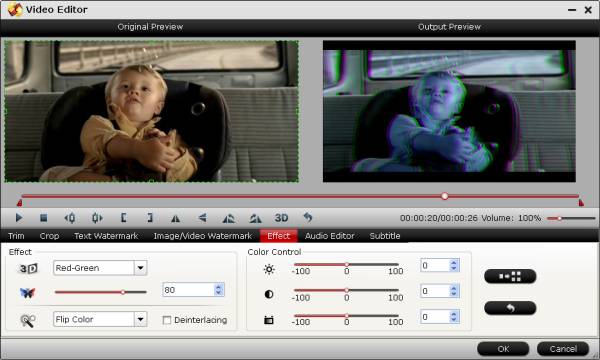
Effect: Under Effect tab, you can add 3D effect and other special effects like Simple Gauss Blur, Flip Color, Invert, Aged Film to your source video. In Color Control section, you can correct color by adjusting brightness, contrast, and saturation. You can also tick off “Deinterlacing” to keep good image quality.
You can either replace/remove original audio, or set audio fade in/out effects.

Subtitle: In this tab, you can add *.srt or *.ass/*.ssa subtitle-files to the video as hard subtitles.

Step 5. Start DJI Phantom 4 conversion.
Clicking the Convert button on main interface, you can go to Conversion window to start conversion.
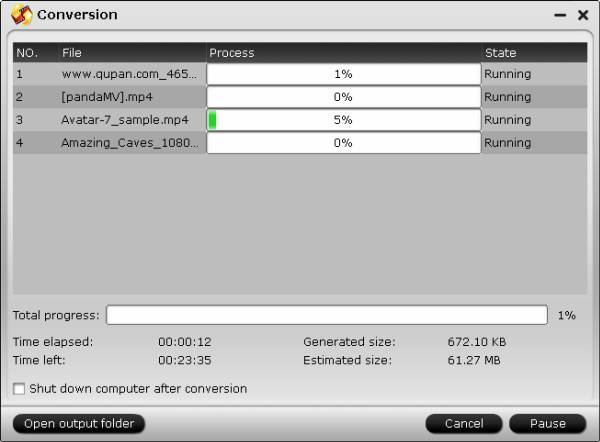
You can find conversion information on the window, such as Time elapsed, Time left, Generated size, and Estimated size.
Ticking off Shut down computer after conversion option, you can leave the program running and do other things instead of waiting around for the conversion.
After the conversion, you can click “Open” output folder to pop up output directory with the converted files. Then you can log in your YouTube/Vimeo/Facebook account and upload the converted complete video to them in a smoothly way.
Note: If you are using a trial version, there will be Pavtube logo watermark in the middle of output files. To get rid of the logo watermark and get better performance, please click Help > Register > Order to buy full version.
Further Reading:
Posting to YouTube and Vimeo from Final Cut Pro
Cut/trim/split long videos from camcorder/camera to YouTube
Upload iPhone 6 plus recordings to Youtube, Vimeo or Burn into DVD on Mac
 Free Trial Video Converter


