
 Home
HomeThis is a world of Internet. It’s common to see people always want to upload their video project onto YouTube and Vimeo, the two most popular websites for sharing videos. In this article we will explore everything you need to know about posting Final Cut Pro Projects to YouTube and Vimeo with optimized settings. It includes the following 2 sections:
Part 1: Posting to YouTube from Final Cut Pro
Part 2: Exporting Quicktime video for Vimeo out of Final Cut Pro
Part 1: Posting to YouTube from Final Cut Pro
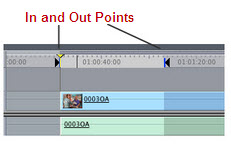
1. Mark In and Out points at the start and end of the media you want to export. You can see the In and Out points placed above the timeline. The portion that falls between these points will be exported.
2. Render the area between the in and out points by using the shortcut Command+R.
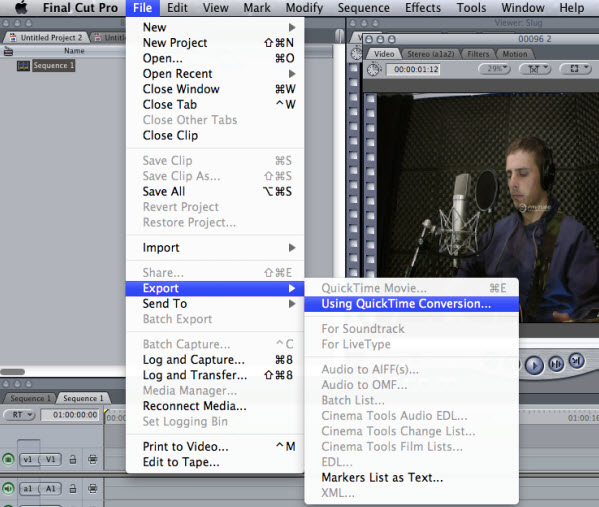
3.Move to the Menu Bar and choose “File” > “Export” > “Using QuickTime Conversion…”
4. Choose a file name for your exported video and a destination where it will be sent to. In the Save dialogue box, set the Format to” QuickTime Movie” and Use to “Default Settings” (these are the standard default settings in Final Cut Pro).
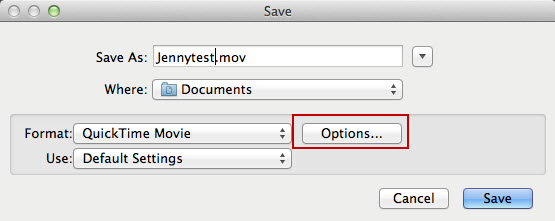
5. Click “Options”, and then the “Movie Settings” dialogue box pops up.
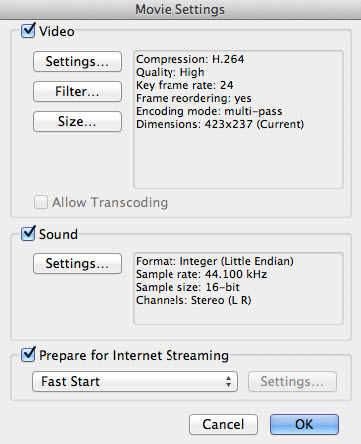
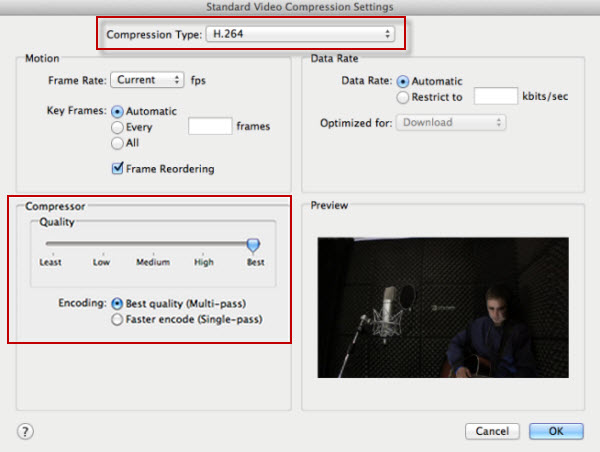
To keep the exported video as close to the original settings as possible, you need to set the Video Settings as follows:
- Set Compression Type to H.264: the H.264 codec is very YouTube friendly, and delivers a high quality looking image with a relatively small file size.
- Set the “Frame Rate” to “Current”
- Set the “Compressor Quality” to “Best”
- Set the “Encoding” to “Best Quality”
- Set the “Data Rate” to “Automatic”
6. Click “OK” and then click on the “Size” button. Set the “Dimensions” to “Current”. Check the “De-interlace Source Video” box then click “OK”.
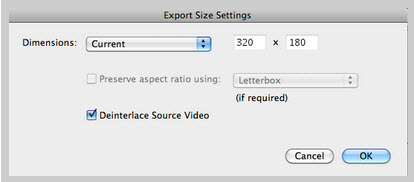
Note: YouTube prefers either 1280 x 720 or 1920 x 1080 for HD video and 640 x 480 for SD video. However, setting to “Current” will insure the video will be exported at its highest available resolution.
7. Click “OK” and when you return to the Save dialogue box press “OK” again to export.
8. After QuickTime compression finished, go to the destination folder to get the exported files for YouTube uploading.
Part 2: Exporting QuickTime video for Vimeo out of Final Cut Pro
The goal here is to create the best quality videos to share on Vimeo. When you navigated to the Menu Bar and choose “File” > “Export’ > “Using QuickTime Conversion…”, do the follows:
1. In the Save dialogue box, fill in a file name for your output video and a destination where it will be saved, choose “QuickTime Movie” and “Default Settings”. Click “Options”.
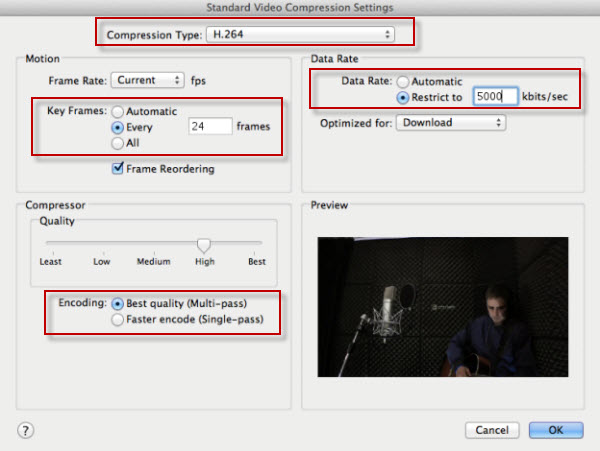
2. In the “Movie Settings” dialogue box, you need to set Video Settings, Video Size as well as Sound Settings. Choose Video Settings, the “Standard Video Compression Settings” dialogue box appears, set video settings as follows:
- Set the “Compression Type” to “H.264”
- Set the “Key Frames” to “Every 24 frames”
- Set the “Encoding” to “Best Quality”
- Set the “Date Rate” to “Restrict to 5000 kbits/sec” (Note: If your video is standard definition, set your data rate to 2000kbps)
When finished, click “OK”.
3. Choose Video Size, the “Export Size Settings” dialogue box pops up, set the “Dimensions to “1280 x 720 HD”. Click “OK”.
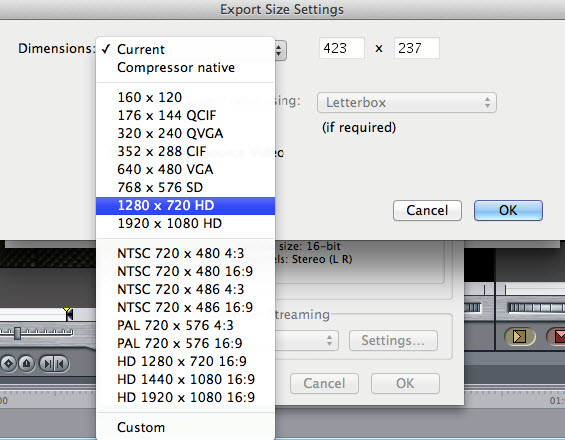
Note: If your video is standard definition, set your display resolution to either 640x480 (4:3) or 640x360 (16:9).
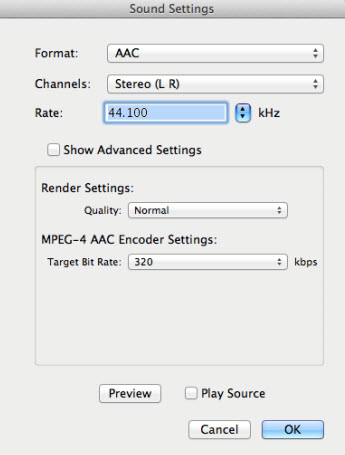
4. In Sound Settings dialogue box, set the “Format” to “AAC”, and set the “Rate” to 44.100 kHz. Click “OK”.
5. When you go back to the Save dialogue box, press “OK” again to export.
6. When the compression process completed, you can get files ready for publishing onto Vimeo with best quality.
Anyway, FCP is a professional NLE application, so it’s not surprised to see the compression speed is relatively slow. To highly accelerate the conversion speed, you can consider using Pavtube HD Video Converter for Mac instead of Using QuickTime Conversion in FCP. Simply “Export” your FCP project to “QuickTime Movie…”, add the exported files into Pavtube software, and compress using the codec and settings we mentioned above, Pavtube HD Video Converter for Mac will make full use of your CPU cores to complete conversion at super fast speed.
 Free Trial HD Video Converter for Mac

Useful Tips
- Play MOV Files on Windows 10
- Best Way to Fix iMovie Won't Import MOV Files Issues
- Transcode Canon 5D Mark III MOV to iMovie AIC for Editing
- Import/Convert Canon EOS-M Camera H.264 MOV to iMovie AIC Codec on Mountain Lion
- Import and edit Nikon D3200 MOV video in Adobe Premiere
- Convert Canon 60D MOV to 1080p AVI/WMV for Editing and Playback


