
 Home
HomeBigger than bigger, now more users like to recording by their iPhones, with the bigger iPhone 6 plus , the visual has been expanded to a large scale ever. But did you ever encountered that when you check your videos, you suddenly found that you just shot your videos in a wrong angle! You can't rotate it to the right angle, which means this video becomes useless. What's worse, when you successfully upload iPhone videos online, you found the picture is jerky while pulling the progress bar. Or buring iPhone videos into DVD to keep it may be a hard job to do because the confused format of the original videos.
All those problems can be solved once for all with this Video Converter for Mac. You can load your iPhone 6 plus videos into this app without any problem, do some simple edits on them before conversion. And if your files are not in the correct angle, with the "Edit", you can adjust it to the right angle. You can downsize the resolution and Bit rate to make the upload progress more quickly while the playback will be much smoother.


How to Transcode iPhone 6 Plus Videos to Upload them on YouTube or Vimeo?
Step 1. Download this iPhone Converter on your Mac
Click the free download button to download and install this converter on your Mac. After the quick installation, just click "File">"Add Video/Audio" button to load your files on the top of the main UI. You can still click this two icons to load your files.
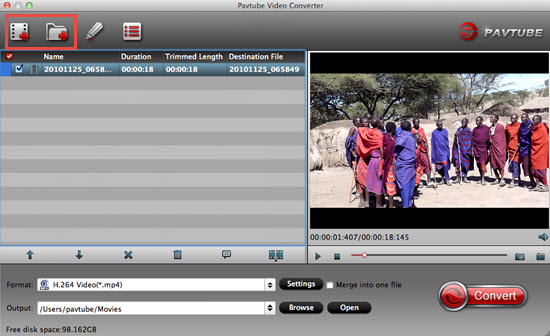
For the format supported by this Video Converter for Mac, you can go to this Specification page to learn more.
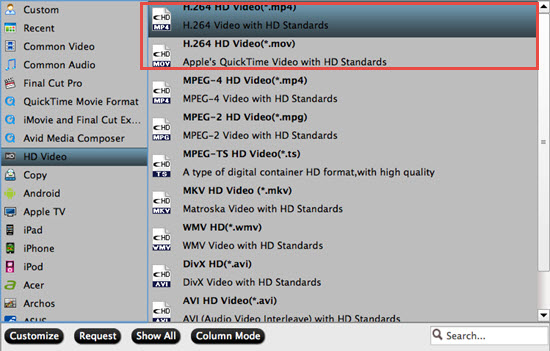
Step 2. Choose "H.264 HD Video (*.mp4)" as your output format
Before choosing the format, you can check about the supported formats of YouTube and Vimeo first then decide which output format to choose.
As we can see from those two sites, both the H.264 codec contained with MP4 can be supported by them both. So we go to the format bar then click this "Format">"H.264 HD Video (*.mp4)" as the output format.
Tips:
If you want to load your files into other NLEs, like FCP , Adobe Premiere Pro, iMovie or Avid MC, here are their presets for you to choose.
Step 3. Go to the adjust your parameters to speed up the uploading progress
By clicking "Settings" to this UI , you can adjust your Bit rate, Frame rate or Audio codec according to your needs. If you want to reduce the files size , you can dosnsize the Bit rate to 12000 kbp or 10000 kbp.

Step 4. Start to convert your iPhone videos into H.264 foramt
After settings the file location, back to the main UI ,then click this "Convert" button to start your conversion. Then when the conversion finish, click the "Open" on the main interface to find your converted files.
Useful tips:
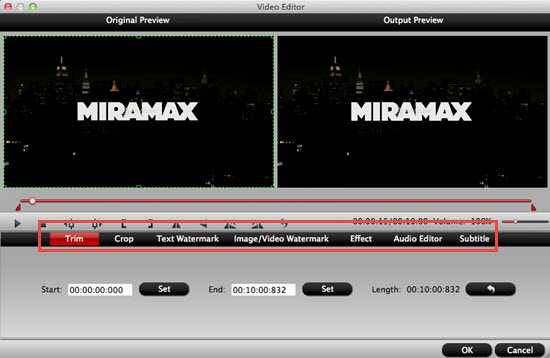
If you shot your videos in a wrong angle without notice, you can go to the "Edit" UI to choose to rotate your angle.
If you want to burn your HD iPhone videos into DVD, you can use this Pavtube DVD Creator for Mac to do the burning job.
For detailed burning workflow , just go to this guide.
 Free Trial Video Converter for Mac


