
 Home
HomeAs Windows fan, Windows Movie Maker is a perfect video editor which best supported video format is WMV. However, most user feedback that they can't import and edit WMV in Windows Movie Maker. When most users are trying to import WMV to Windows Movie Maker, appears the same failure phenomenon or get the similar error message: "Do you want to remove "filename.wmv" from the project? The file might be corrupted or in a format that Movie Maker doesn't recognize. This movie can't be saved or published until filename.wmv is removed from the project. Error 0x87160139."

As known to all, edit WMV in Windows Movie Maker is the best partner, why can't do that smoothly? From the Windows support answer, this issue can be caused by corrupted codecs or outdated video driveruser, user also can do the following action to import WMV to Windows Movie Maker:
Common Solution for Editing WMV in Windows Movie Maker
Step 1. Ensure that you have the latest version for Windows Movie Maker. You can download the latest version.
Step 2. Ensure that you have the proper codecs to play your videos and audio files. Audio and Video require codecs to play the file and it's important to have the right codecs installed or updated in your PC.
NOTE: If you can't find the codec you need you may convert the video to a supported format (eg. wmv) and then add it to your Movie Maker project.
Step 3. Ensure that your video card drivers are up to date. Movie Maker makes extensive use of the video card GPU (graphics processing unit). The display driver affects the reliability, performance, and compatibility of the video card with various software.
TIP: How to determine the version and video card driver date?
a. Run the DirectX Diagnostic Tool (dxdiag).
b. Type dxdiag in the Start screen, then press Enter key on the keyboard.
c. Click on the Display tab and you will see the driver details including the driver version.
d. If your video card driver seems outdated please go to the video card driver manufacturer and see if a newer version is available.
Best Solution for Editing WMV in Windows Movie Maker
Most user try to removed WMV and restarted Windows Movie Maker, or run the newest version of WMM, or try to repaired the program, however nothing happens. In addition, above steps are too complicated and fussy to a computer beginner, all the steps are like the hacker kingdom. Is there a easy and effective way to solve the issue forever? A perfect a Windows Movie Maker Converter is your WMV video savior which can help you to convert WMV to MP4 which is the best reliable Windows Movie Maker supported format.
Pavtube Video Converter you are worthy having one, user can master this software effortlessly. This Windows Movie Maker Converter can transfer WMV to any Windows Movie Maker supported video formats, like: MOV, M2TS, AVI, MP4, etc, Best choice is MP4 which can be supported by most media player and editor. Best of all, even the WMV is a little damage, this software can repair the file.
What a poty, Windows Movie Maker can't support Windows 10 any more, are you struggled to find the Windows Movie Maker alternative on Windows 10? You are lucky to be here, this perfect software can be the Windows Movie Maker alternative too which not only can support Windows 10, also can support Mac operating system, including the latest macOS Sierra.
Except the powerful operating system compatibility, video editing features won't let you down, user can cut the video , remove the video black bard, add the subtitles in video, replace the audio from video, etc. Here, you are the real host of video. Want to know more about the excellent Windows Movie Maker Video Converter? this article may be helpful for you.


How to Use the WMV to Windows Movie Maker Converter?
Step 1. Load WMV to Windows Movie Maker Converter
Install and launch WMV to Windows Movie Maker Converter on your computer, click "File" > "Add Video/Audio" to load WMV to Windows Movie Maker Converter. You can click the "Folder" button to batch load multiple WMV files into the program.

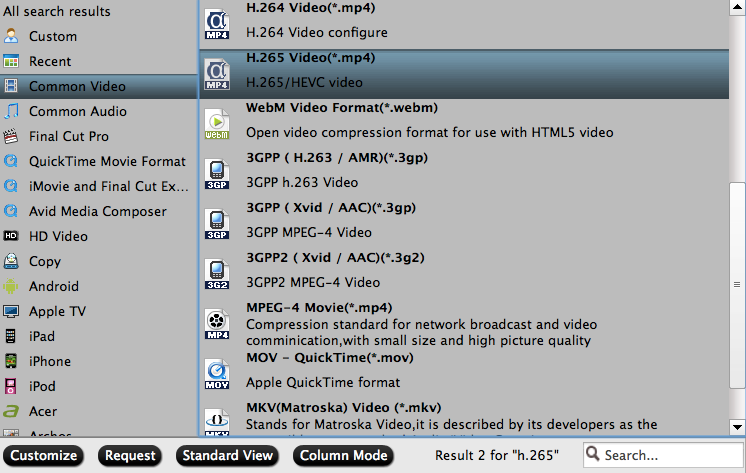
Step 2. Choose WMV to Windows Movie Maker supported format
Do you still worry about editing WMV to Windows Movie Maker? Click "Format" bar, from its drop-down list, select WMV to Windows Movie Maker supported format, from Windows Movie Maker official websites, MP4 is the best format for Windows Movie Make, you can also choose other video formats which is supported by Windows Movie Maker according to your own needs, like: MPEG-1, AVI, etc.
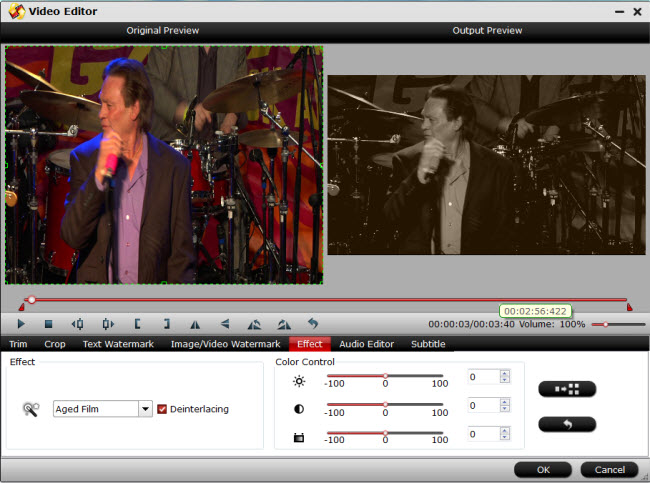
Step 3. Edit WMV to Windows Movie Maker Supported Codec
Before the exciting conversion, user can edit the video at the editing menu, click the "Edit" icon on the tool bar to open the "Video Editor" window, here you are the video master, any video effect is up to you, every editing button is waiting for you to create the magic power.
Step 4. Begin WMV to Windows Movie Maker Supported Format Process
After all the format and codec settings are done, go back to main interface, hit right-bottom "Convert" button to start WMV to Windows Movie Maker supported format process Just wait for a cup of coffee time, you can get a brand new video file.
How to Import Converted WMV to Windows Movie Maker From PC
Step 1. In the Task pane on the left side of the screen, click "Capture Video", at the drop-down list, choose the "Import video" section.

Step 2. Windows Movie Maker will navigate to the folder that contains all the components of your movie. Click the converted WMV video to Windows Movie Maker.
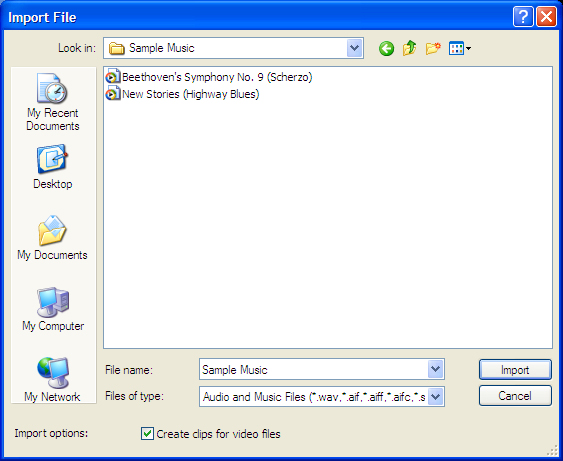
Step 3. After you choose the video, on the navigate right window, click the "Import" to start to import converted WMV to Windows Movie Maker.
You may be interested in these:
H.265 to Windows Movie Maker | MXF to Windows Movie Maker | H.264 to Windows Movie Maker
 Free Trial Video Converter

Useful Tips
- How to Flip or Rotate Videos using Handbrake?
- Play Tivo Recordings with Windows Media Player
- How to Use VLC to Convert AVI to MP4 on PC/Mac?
- MOV Compressor: How to Compress MOV to a Smaller Size on Windows/Mac?
- Stream 4K Video to Chromecast Ultra via Plex
- Get Chromebook Pro/Plus to Play MKV Files without Any Problem


