
 Home
HomeIf you try to get .MTS files taken by an AVCHD camera into FCP X, there are a couple of extra steps required. Here are some tips and tricks to make it smoother to get AVCHD .MTS clips off of a memory card or hard drive, without the need to connect the camera to your Mac.
Whenworking with AVCHD footage in FCP Xon Mountain Lion 10.8, the key to importing .MTS footage is to use the"Import From Camera..." dialog and NOT the "Import" dialog. This is true when using either a memory card or importing the .MTS files from your hard drive.
Before importing camera media into a NLE app, some people prefer to copy footage files onto a hard drive, usually an external drive. Whenworking with AVCHD .MTS footage and FCP X,it's important to put the entire file structure of your AVCHD to your hard drive. FCP X sees this folder structure as that of a camera, or rather a camera archive. If you just grab some loose .MTS clips and put them in another folder, you will have trouble whenimporting them to FCP Xfor later work.

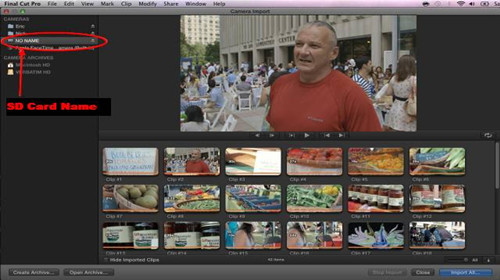
If you are importing from a memory card, you will see the card's name show up in the list of "Cameras" when you click"Import From Camera..."In this example, the card appears as "NO NAME", because it doesn't have a name.
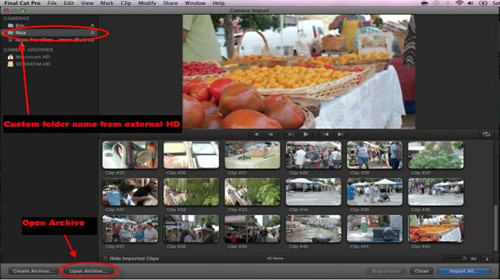
If you drop the card contents onto a hard drive before you bring it into FCP X, you will need to choose"Open Archive..."at the bottom of the Camera Import window. This gives you access to your available hard drives or other archives that you've created.
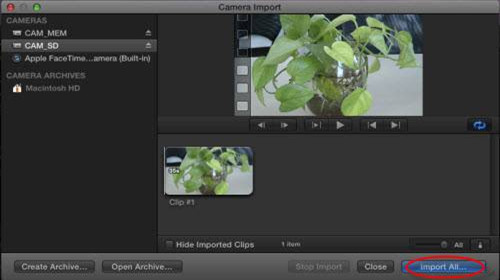
Once you have selected your memory card or camera archives folder location, you can then choose to import all of the files by just hitting the"Import All..."dialog.
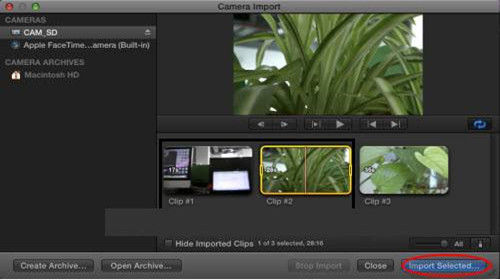
If you only want to import some of the .MTS files, you can select your clips and even selected portions of the clips and choose"Import Selected..."
align="left">We don't know why FCP X doesn't support importing .MTS files through the "Import" dialogue. This is not a big problem, but it can be a little confusing if you don't know that importing .MTS files means selecting "Import From Camera..." regardless of the file location.


How to make AVCHD Files to FCP X on Mac Mountain Lion/Yosemite?
However, .MTS files aren't equal when working in Final Cut Pro X on Mountain Lion 10.8. Some .MTS files produced by Sony AVCHD cameras cannot be read correctly even you use the above mentioned methods to import. In that case, you are suggested to use Pavtube MTS to FCP X Converter for Mountain Lionto transcode Sony AVCHD .MTS to Apple ProRes 422 before getting them into FCP X. This is also available when you only have some separate .MTS clips and need to edit them with Final Cut Pro X. Main steps are listed below you can take a reference.
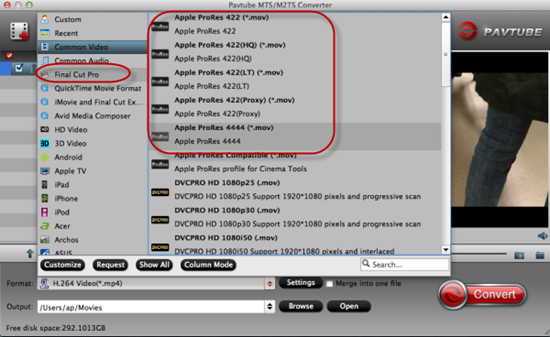
Step into the main interface and click the 'Add files', we can easily load our original AVCHD MTS files in. Since we have known the best video formats for FCP X, here we should come to the output list and choose the 'Final Cut Pro'>'Apple ProRes Codec 422 (*.mov)'as the best one. Of course then you can go back to the main interface to hit the 'Convert' button to get the conversion job started!
Tips:
For more additional functions in this program? Why not go to the 'Settings' buttons to adjust your video and audio parameters? Or step into the 'Edit' interface to edit more details for your output videos? After transferring files into FCP X, it's time to enjoy yourselves!
More reading:
How to convert MTS/M2TS AVCHD to AIC MOV for iMovie?
Sony AVCHD MTS converter for Premiere-Import Sony AVCHD to Premiere
How to encode/compress 1080i AVCHD on Windows or Mac
 Free Trial MTS/M2TS Converter for Mac

Useful Tips
- Import footages/videos/projects into Final Cut Pro X without rendering
- Convert Panasonic MXF Footages to FCP as ProRes for Editing
- Workflow for Importing HX-WA20 MP4 to FCP (X) on Mac
- Edit MediaPortal TS Files in FCP X/Avid/iMovie and Burn to DVD on Mac
- Convert Panasonic TM900 MTS Videos to ProRes 422 for Editing on FCP
- MKV to FCP---Convert MKV to Apple ProRes 422 MOV for Final Cut Pro


