
 Home
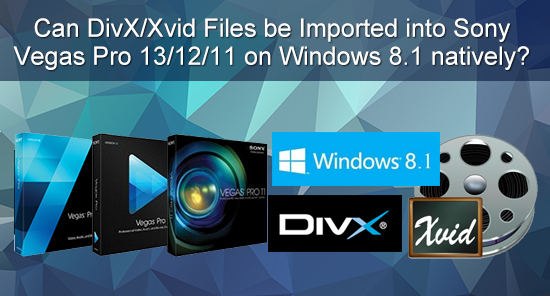
HomeYou may wonder why your "AVI","MP4" or other common formats can't be loaded into Sony Vegas, which this editing software has claimed that they can support those format natively? You may say that DivX/Xvid can also be imported into Sony Vegas, but sometimes the video has no audio or just the DivX/Xvid can't be read in Sony Vegas? Actually, MPEG is much more compatible with Sony Vegas which will create a HD converted files but the compression rate is larger than the DivX. So how to put those Divx/Xvid files into Sony Vegas while maintain the most quality of the videos?
Pavtube DivX/Xvid Video Converter can handle those "Container" format no matter the codec is DivX/Xvid or other codec like H.265/HEVC, XAVC ,all can be decoded by this converter, then transcode them into a proper format MPEG-2 (*.mpg). Also not only just this Sony Vegas Pro can be supported, but also other portable devices or NLEs like Adobe Premiere Pro can handle without any problem. Compatible with Windows 8.1 will assist you deal with your videos much easier.


How to Edit DivX/Xvid videos into Sony Vegas Pro smoothly on Windows 8.1?
Step 1. Download , install and run this DivX/Xvid Video Converter on your PC
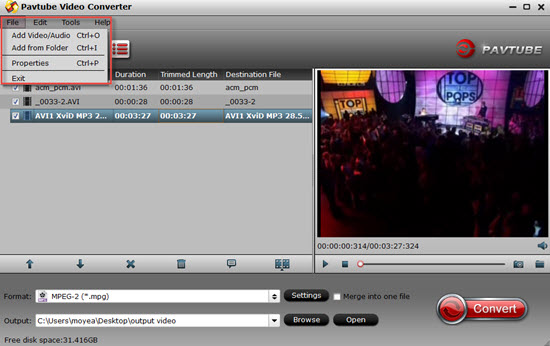
After the installation, click "File">"Add Video/Audio" to load your raw files, but still "Load from Folder" can save your bunch of time. If your videos not from your camera, which don't have some structure, those "Orphan" files can be load into this app by dragging them into the main UI.
Step 2. Choose MPEG-2 (*.mpg) as your target output format
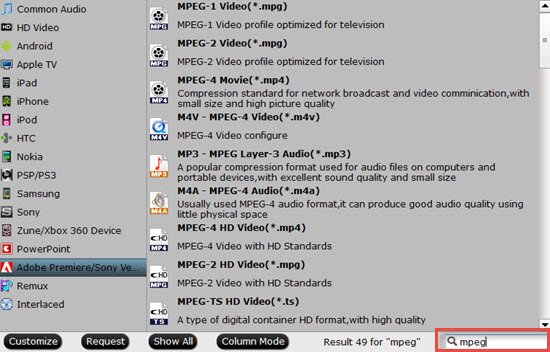
Then after the loading, you can click this format bar and go to the format profile to choose the default preset as "Adobe Premiere/Sony Ve...">"MPEG-2 (*.mpg)", which Pavtube tailor for the Sony Vegas Pro.

Tips:
Or if you want to custom your own format, you can choose other format. Just click "MPEG" in the search box, you can choose the format you like.
Step 3: Personalize your parameters of MPEG-2 (*.mpg) videos for Sony Vegas Pro
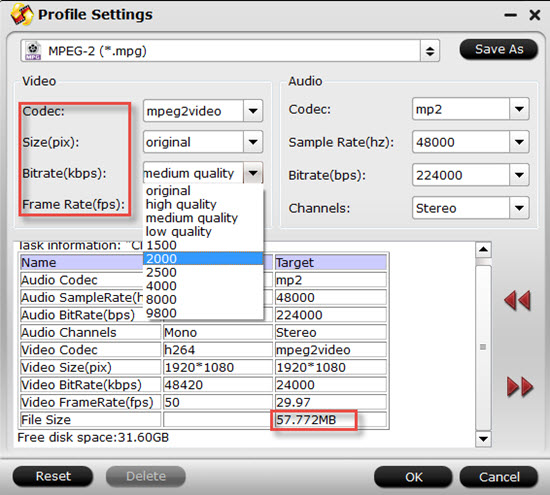
After choosing the proper format, you can click this "Settings", then go to this UI do change your Bit rate or Frame or Audio channels.
Tips:
Some videos came from camera may shoot under "Interlaced" mode, how to change the "Interlaced" to "Progressive" so that the quality of the videos will be much higher?
Just click the "Edit" or "Pencil" icon , then it will bring you to a Edit UI , you can click "Effect" to switch the mode between "Interlaced" and "Progressive".

Step 4: Start to convert your videos encoded by DivX/Xvid to MPEG-2 (*.mpg) to open them in Sony Vegas Pro correctly
After the conversion, you can click this "Open output folder" and find your converted files.
If you don't know what exact codec in your "Container" format, then you can try this MediaInfo to know the inner codec of your videos.
For newbie about this Sony Vegas , how to transfer your media files into Sony Vegas can be learned here. More relevant converting topics about Sony Vegas can be found here.
For Mac users, Pavtube Video Converter for Mac can run on Yosemite system flawlessly. More Mac version editing software and iDevices can become available by using this Mac version.
 Free Trial Video Converter


