
 Home
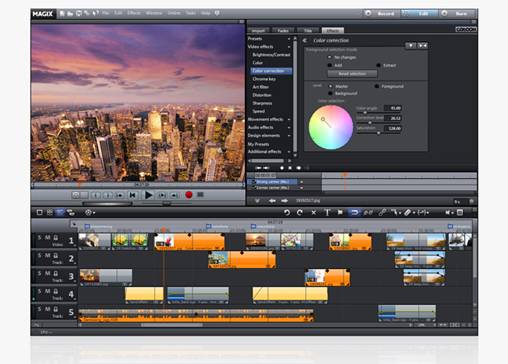
HomeMagix Movie Edit Pro 14 is quite popular among DV cam lovers and film amateurs due to its flourish video effects and powerful editing and burning features. Yet it does not work with all the footages created by HD camcorders, even if you have activated MPEG-4/H.264 codec. In case that an error message pops up and allege it is an invalid AVCHD format when you try to import MTS recordings to Magix Movie Edit Pro 14 from Sony Hanycam, Panasonic Lumix DMC, or JVC Everio GZ camcorders, a MTS Converter is right what you need. With Pavtube MTS Converter you can easily convert the AVCHD MTS to into editable formats for MEP14, like AVI and WMV. The easy-to-use but powerful MTS to MEP Converter not only converts MTS to MEP, but also help you trim the MTS to desired duration, remove the interlacing lines, add your favorite music as audio track, compress MTS to SD formats, convert MTS directly to iPad, iPod, Apple TV, PS3, etc. A step-by-step guide is displayed below for your reference:
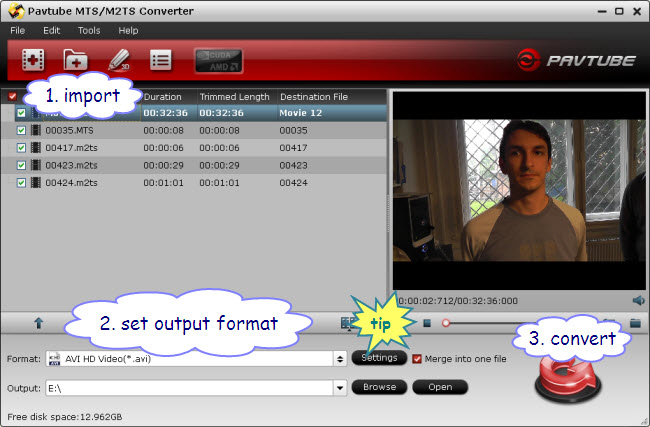
Step One. Load AVCHD Videos to the MTS to Magix Movie Edit Pro Converter.
Transfer the footages you’d like to edit from camcorder or memory card to PC. Install and launch MTS to MEP Video Converter, click “Add” to load the HD video clips, or directly drag and drop the MTS files to MTS to MEP Converter. By default, the files are selected. You could view the files in preview window by double-clicking the file. When previewing, you are allowed to thumbnail video frames too. To join the MTS files, simply check the box of “Merge into one file”.
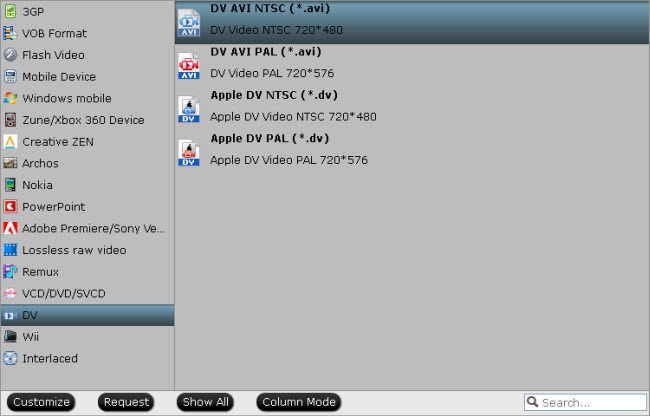
Step Two. Set Magix Movie Edit Pro compliant video format.
Click on “Format”, and select output format from the drop-down list. AVI and WMV format are naturally support by Magix Movie Edit Pro 14, other alternative formats are MPG, MP4 and MOV. In order to compress the AVCHD MTS to SD video for editing, you could follow “DV” -> “DV AVI NTSC (*.avi) or “Common Video”-> “AVI MSMPEG4-V3” (*.avi). I prefer the former, as the MEP 14 accepts video of 720*480 as default video size. For the users who are unwilling to degrade the HD video quality, a recommended configuration could be HD Video-> AVI HD Video (*.avi), and customize the video and audio parameters as you like.
Step Three. Converting MTS to MEP editable formats.
Finally, click on “Convert” button to start converting HD MTS footage to MEP 14 supported formats. You could set auto shutdown in progress window or leave it there and come back later. After conversion the videos can be easily loaded to Magix Movie Edit Pro 14 and above version for editing. To locate the converted files, click the “Open” button next to output path. Enjoy video editing and DVD authoring thereafter!
Tip: Customize your own profile.
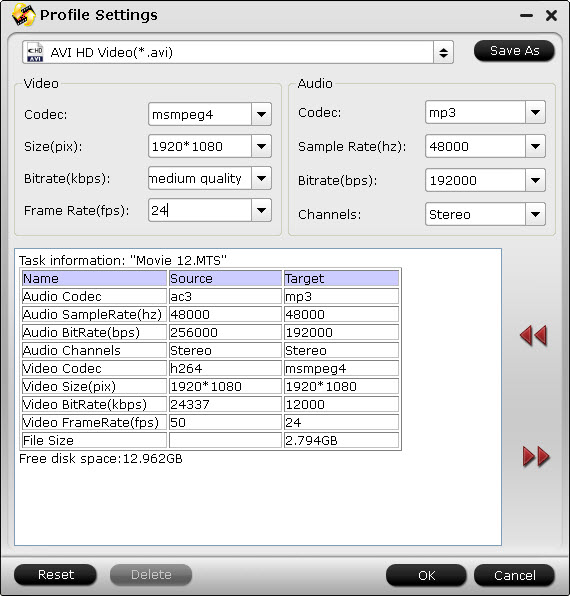
To create an optimized format for Magix Movie Edit, you can click “Settings” and customize advanced audio and video parameters and save you
settings. In Step 2 I select AVI HD Video and now I want to further adjust the video to meet my needs:
Video Codec: msmpeg4
Size: 1920*1080
Bitrate: high quality
Frame rate: 24fps
Audio Codec: mp3
Sampling rate: 48000hz
Bitrate: 192000
Channels: Stero
To get 5.1 surround sounds, you can select WMV HD as output format. After everything’s setting down, I click “Save As” and name it as “MEP AVI HD”, so that I can use the settings when run the MTS Converter next time by clicking the Format bar and following “Custom”-> “MEP AVI HD”.
If you are interested in this MTS to Magix Movie Edit Pro Converter, you may download its free trial or buy it online via the link. The trial version has no time limits, you can use it to test the MTS to MEP conversion anytime you like, but note that there is a watermark on converted video.
 Free Trial MTS/M2TS Converter

Useful Tips
- Import footages/videos/projects into Final Cut Pro X without rendering
- Convert 1080p MTS Videos to Windows Movie Maker
- Import and edit MTS/M2TS files with Windows Movie Maker
- Import/Edit/Transcode Sony NEX-5N/NEX-7/A57/A65/A77 1080 50/60P AVCHD to iMovie on Mac
- Transcode TiVo Shows to AIC for Editing in iMovie and FCE
- Convert Panasonic MXF Footages to FCP as ProRes for Editing


