
 Home
HomeMost HD (High-definition) digital camcorders produce MTS extension files, especially for Sony Handy cams. MTS/M2TS files are AVCHD videos with perfect video quality, but not so widely accepted by editing software and media players as common video formats like MPEG, WMV and AVI. Besides, the MTS files must be burned to HD DVD or blu-ray disc to obtain the original HD quality (usually 1920*1080). Even if you find some trick to burn the MTS files onto standard DVD, it will turns out with degraded image and slow motion. In a word, you can not enjoy the HD effect unless the MTS files are burned onto HD DVD or blu-ray disc. Taking the cost of HD DVD and blu-ray disc into consideration, it is acceptable to burn MTS footages to DVD with a little quality degradation but fluent motion. How to optimize Sony Handycam footages for burning onto standard DVD? The following guide might give you some hint.
Pavtube MTS/M2TS Converter can be a good choice to solve this problem once for all. You can load your MTS files into this app then convert the format which this DVD burner supported without quality loss. Also simple edit functions like trim, crop , merge into one files, video clip , adjust aspect ratio,etc will meet your basic needs to create your very own movies.


How to Load MTS files into Ulead DVD MovieFactory 6 to Burn DVD?
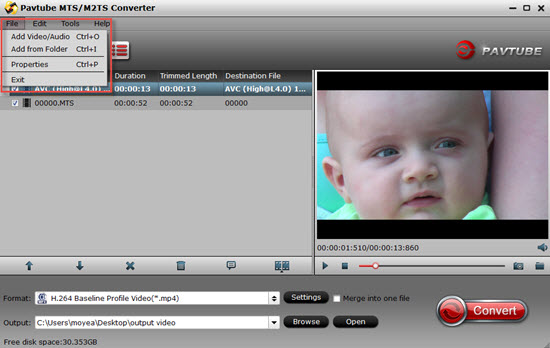
Step 1. Launch Pavtube AVCHD MTS to DVD Converter and load MTS/M2TS files into it.
You can click "Add Video" button or "Add from folder" icon to import .MTS/.M2TS files to the program.
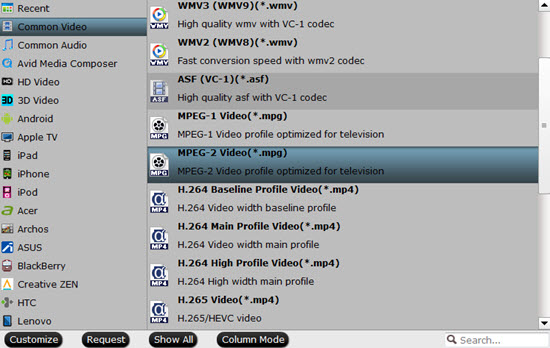
Step 2: Click the drop-down menu of "Format" to select output format
With multiple output formats, Pavtube Sony AVCHD Converter is able to output proper formats for numerous video editing software and portable devices. To burn a DVD, I select “Common Video">"MPEG-2 Video (*.mpg)" as output format for DVD MovieFactory 6. Alternative formats are AVI, WMV and MOV. By the way, if you wanna combine multiple MTS files to be as a single file, you can tick off the checkbox "Merge into one file".
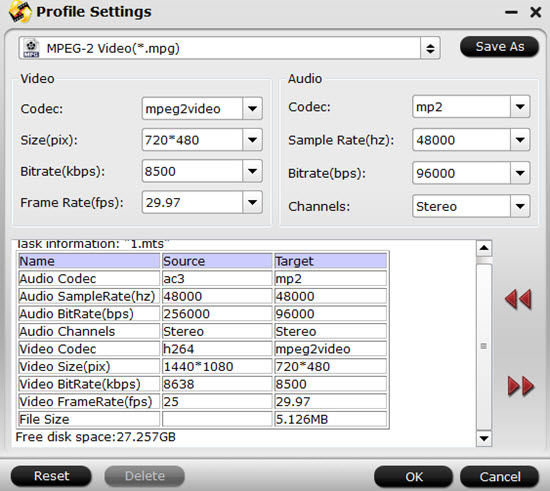
Step 3: Click "Settings" button to adjust audio and video parameters
To make good control of the output file size and quality, you can adjust all the items in the following interface, including codec, aspect ratio, bit rate, frame rate, sample rate, and audio channels. For standard DVD, recommended settings are:
Video
Codec: mpeg2video
Size (pix): 720*480 (NTSC) or 720*576 (PAL)
Bitrate (kbps): 8500
Frame rate (fps): 29.97
Audio
Codec: mp2
Sampling rate (hz): 48000
Bitrate (bps): 96000bps
Channels: Stereo
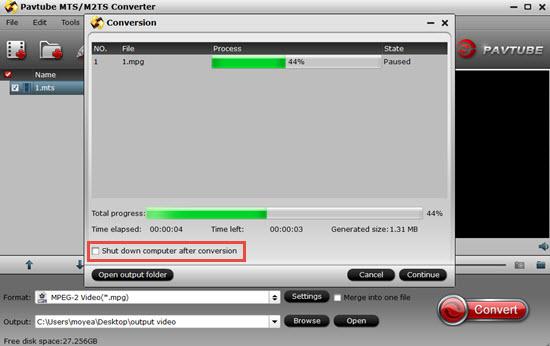
Step 4: Click "Convert" button to start MTS to DVD conversion
The following window will show you clearly about the conversion information, which will help you manage your time and storage space in a proper way. If you do not want to wait around for the whole conversion process through, you can choose "Shut down computer after conversion" to leave it alone. After conversion completed you can click on "Open" button in the main interface to get the generated files for DVD burning.
Detailed guide about burning DVD with Ulead DVD MovieFactory
Additional Information:
Pavtube DVD Creator program makes DVD creation much easier than ever before. It lets you burn any kind of video sources to playable DVDs within a few clicks. The acceptable source files are ranging from common videos (MKV, AVI, MP4, WMV, MOV, etc.) to camera shootings (MXF, MTS, M2TS, H.264 MOV, TOD, and MOD), TiVo recordings to photos. For more information, see DVD Creator Quick Start Guide to start burning your own DVDs.
If you interested in both MTS/M2TS Converter can DVD creator , then you are luck to see the bundle sale for more cheap price with this combination.
 Free Trial MTS/M2TS Converter

Useful Tips
- Import footages/videos/projects into Final Cut Pro X without rendering
- Convert 1080p MTS Videos to Windows Movie Maker
- Import and edit MTS/M2TS files with Windows Movie Maker
- Import/Edit/Transcode Sony NEX-5N/NEX-7/A57/A65/A77 1080 50/60P AVCHD to iMovie on Mac
- Transcode TiVo Shows to AIC for Editing in iMovie and FCE
- Convert Panasonic MXF Footages to FCP as ProRes for Editing


