
 Home
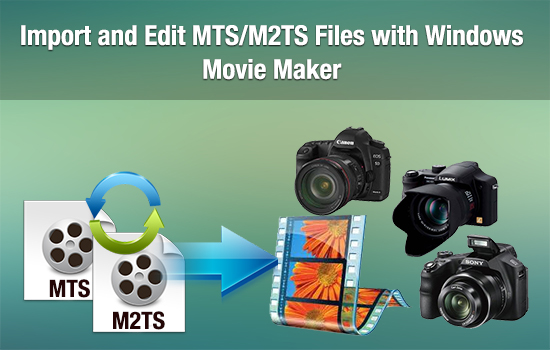
HomeAs we all know, Windows Movie Maker is the free video editing software installed on a PC using Microsoft Windows OS. However, probably because of the copyright issues, Windows Movie Maker only provides supports for a relative small range of formats. Unfortunately, the most popular AVCHD MTS/M2TS footages captured by a Panasonic, Canon or Sony camera/camcorder are out of the range. In order to import MTS/M2TS files to Windows Movie Maker, this article will show you how to use MTS/M2TS to WMV Converter to convert AVCHD to Windows Movie Maker for editing.
For your reference-Windows Movie Maker supported formats:
.WMV, .ASF, .MPG (MPEG-1), .AVI (DV-AVI), .WMA, .WAV, and .MP3
Additionally, the Windows Vista Home Premium and Ultimate editions of Movie Maker support importing MPEG-2 Program streams and DVR-MS formats. (To learn supported formats by Windows Movie Maker)
It is obviously that AVCHD MTS and M2TS files are out of the above mentioned formats range. If you try to capture these videos to Windows Movie Maker, there will be an error message pop up "The file can’t be imported into Windows Movie Maker". That means to edit MTS/M2TS files with Windows Movie Maker, you have to do format conversion to obey the format restrictions of WMM.


How to trasncode MTS/M2TS Files to WMV in order to load into Windows Movie Maker?
Step 1: Free download MTS/M2TS to WMV Converter, install and run it.
Once run it, you can click "Add Video" button or "Add from folder" button to load your MTS and M2TS AVCHD files.
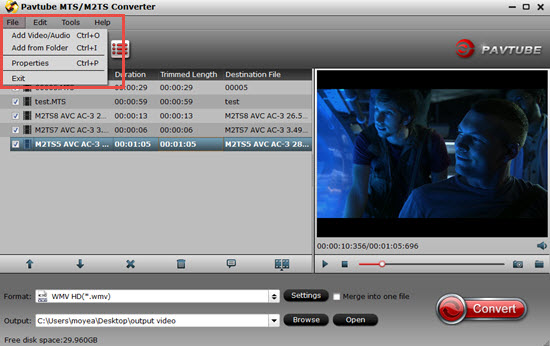
Step 2: Select output format for WMV and set destination folder
Click the pull down menu of "Format", then you will be able to select a Windows Movie Maker supported format from the output format profile, choose "HD Video">"WMV HD (*.wmv)" as your output format.

Meanwhile, click the "Browse" icon at the end of "Output" to specify where to save the output files for your WMV, if not, this program will export them to the default save path automatically.
Tips:
If you want to combine multiple MTS and M2TS files into a single file, you can tick off the checkbox "Merge into one file" to realize this goal.
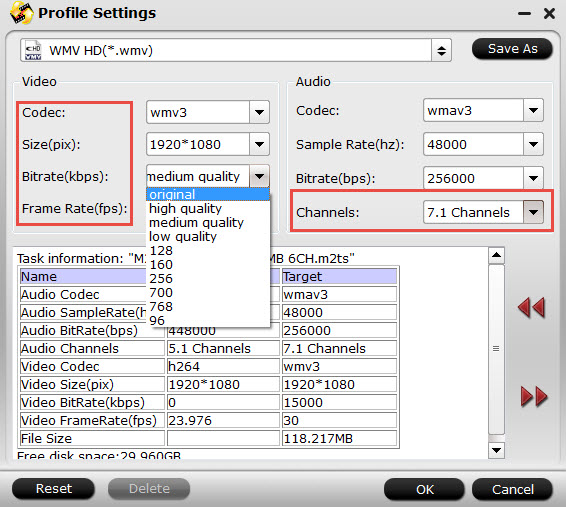
Step 3: Adjust video and audio settings to optimize output file quality
Click "Settings" button, then you will be able to adjust audio and video parameters on the popup window to customize the output file quality, these adjustable parameters include codec name, aspect ratio, bit rate, frame rate, sample rate, and audio channel.
Tips:
In the "Audio">"Channels" drop-down menu, you can select 7.1 audio channels to keep the original audio tracks.
Step 4: Click "Convert" button to convert AVCHD to Windows Movie Maker
Once the conversion is finished by MTS/M2TS to WMM Converter, you can click "Open" button to get the output files effortlessly, and now you are ready to import and edit MTS/M2TS files with Windows Movie Maker. Just import the converted files to WMV for editing via its "Import video" option.
Two free ways to transfer your MTS/M2TS files into Windows Movie Maker:
1. Update your Windows Movie Maker to Windows Live Movie Maker. The Windows Live Movie Maker can support MTS/M2TS files without any rewrapping.
Download Windows Live Movie Maker from official website
2. Free MTS/M2TS Converter for Mac (only Mac version available).
This version is the free version of the full version. The differences between those two versions are that there are no "Final Cut Pro", "iMovie""Final Cut Express" options in the free version. Other options are totally the same with the retail version, and of course, no watermark in the converted files.
Additional tips:
Update version of MTS/M2TS can support H.265/HEVC decode/encode, MXF in XAVC, H.264 high profile.
If you want to learn more about editing, playing, DVD burning of the AVCHD (MTS/M2TS), go to this theme page.
 Free Trial MTS/M2TS Converter

Useful Tips
- Import footages/videos/projects into Final Cut Pro X without rendering
- Convert 1080p MTS Videos to Windows Movie Maker
- Import and edit MTS/M2TS files with Windows Movie Maker
- Import/Edit/Transcode Sony NEX-5N/NEX-7/A57/A65/A77 1080 50/60P AVCHD to iMovie on Mac
- Transcode TiVo Shows to AIC for Editing in iMovie and FCE
- Convert Panasonic MXF Footages to FCP as ProRes for Editing


