
 Home
HomeThis guide is written for those guys who have trouble in editing MTS footage with Adobe After Effects CS4. Although Adobe announced that AVCHD is supported natively in AE CS 4, and mostly the software allows you to import MTS to AE CS 4 and edit them, the MTS videos may hop back and forth when you play them. Why should this happen?
Let me explain it. Firstly you get to learn a bit about the MTS format. *.mts is a filename extension used for AVCHD, a high-definition recording format designed by Sony and Panasonic that uses H.264 (conforming to H.264 while adding additional application-specific features and constraints) codec. H.264 encoded MTS video is highly compressed, good for transporting, but poor for editing. By the way, in order to play MTS videos on PC smoothly, your processor must be very powerful. In a word, if you want to make a short film from MTS footage with Adobe After Effects CS4 and prefer fluent playback, an MTS to Adobe After Effect Converter definitely helps. Converting temporally compressed footage to a spatially compressed format is always recommended for performance reasons. (After Effect CS4 support formats)
Here I recommend you a powerful and useful AVCHD Converter- the Pavtube MTS/ M2TS Converter. The program converts MTS footage to editable formats (*.avi, *.mpg, *.f4v, *.mov, *.mp4, *.wmv, etc) and obtain HD quality (1920*1080, 1440*1080, 1280*720). Converted file can be easily imported to AE CS 4 for editing.


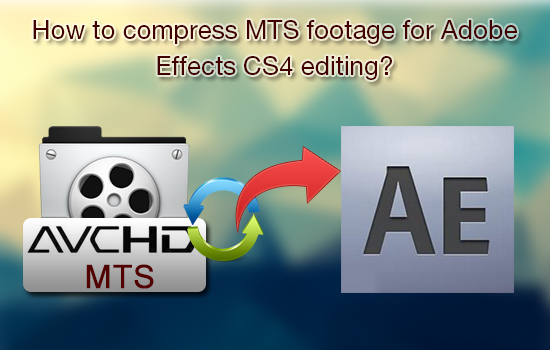
How to compress MTS footage for Adobe Effects CS4 editing?
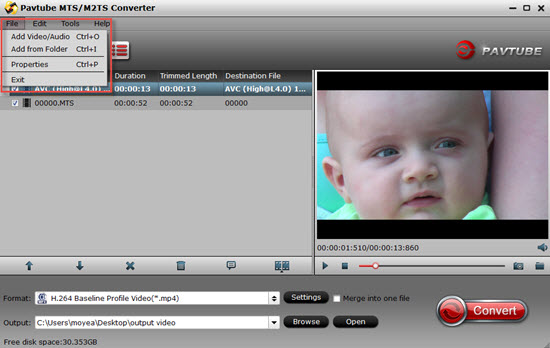
Step 1. Load MTS files to Pavtube MTS to Adobe After Effects Converter.
Pavtube MTS to Adobe After Effects converter can help you convert and compress MTS videos to After Effects. You may either click "File">"Add Video/Audio" button to import MTS files, or directly drag and drop the files into this program.
Tips:
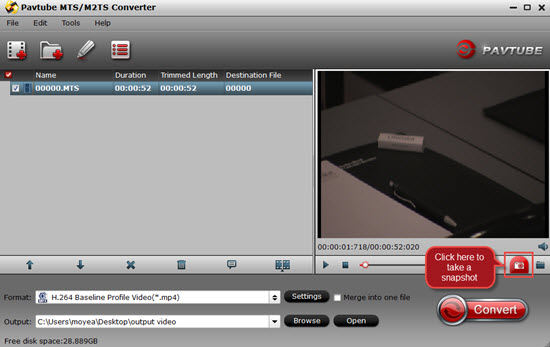
You are allowed to take snapshots when previewing the movie. Double-click on a file to preview when you would like to preview it.
Step 2: Click the drop-down menu of "Format" to select output format
Pavtube MTS to Adobe After Effects Converter is able to output proper formats for video editing software and devices. To import MTS to Adobe After Effects, I follow "Adobe Premiere/ Sony Ve...">" MPEG-2 (*.mpg)" as output format. Alternative formats are WMV, AVI, MOV, DV, etc.

Tips:
If you'd like to combine multiple MTS files to be a single file, you can tick the checkbox "Merge into one file".
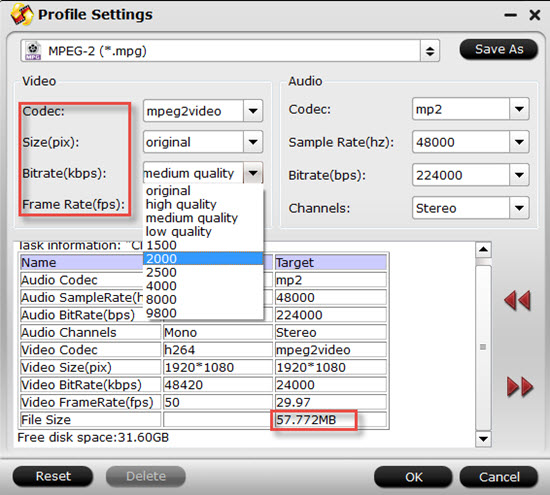
Step 3: Click "Settings" button to adjust audio and video parameters
To make good control of the output file size and quality, you can adjust all the items in the following interface, including codec, bit rate, frame rate, sample rate, and audio channels. To bear least quality loss, you may view the video information in the "Task information" tablet (or select the MTS file and click "Property" button to check file info) and set A/ V parameters according to the source MTS file. Note this could lead to huge file size. A way to cut file size down is to set smaller value in Video bit rate box.
Tips:
If you want to enjoy your videos on your portable devices, PC or 4K TV , then you can go for "HD Video">"H.265 HD Video (*.mp4)". This will allow you to enjoy sharp quality of your original videos while only with half size compared with original ones. (Free H.265 Media Player [libde265/VideoLan])
If DVD video quality is good for you, a recommended setting is
Video
Codec: mpeg2video
Size (pix): 720*480 (NTSC) or 720*576 (PAL)
Bitrate (kbps): 8500
Frame rate (fps): 29.97
Audio
Codec: mp2
Sampling rate (hz): 48000
Bitrate (bps): 96000bps
Channels: Stereo
As the source MTS files are AVCHD MTS videos and usually with AC3 5.1 audio, you can retain the 5.1 audio by adjusting the audio codec to ac3 and bit rate to 224000bps (or above), then select 5.1 Channels in drop-down list of Channels box as it shows below.

Step 4: Click "Convert" button to start compressing MTS to AE CS4
The following window will show you clearly about the conversion information, which will help you to manage your time and storage space in a proper way. After the conversion completed you can click on "Open" button in the main interface to get the generated files and load the compressed video to Adobe After Effects CS 4. If you do not want to wait for the whole conversion process through, you can choose "Shut down computer after conversion" before compressing MTS to After Effects CS4 and leave it alone.
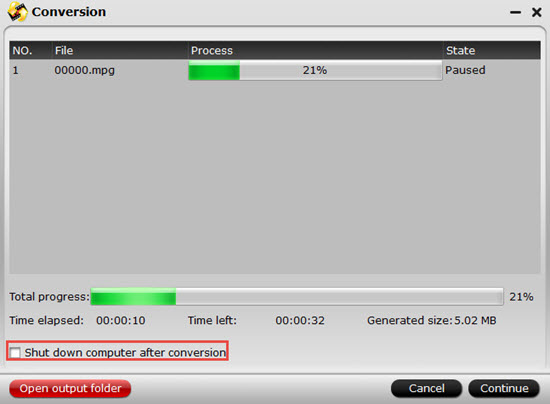
After the conversion, you can click "Open output folder" to check your converted files. And then load your files into Adobe After Effects CS4 without any problem.
Additional tips:
1.If you want to play your AVCHD(MTS) files on some devices like Samsung Tab, Windows surface, Xbox 360, you can still get to those done by this MTS/M2TS Converter.
2.How to render and export files by Adobe After Effects to learn more about After Effects.
3.For Mac users, Free MTS/M2TS Converter for Mac or Pavtube MTS/M2TS Converter for Mac can be both a good choice. Mac version can run on Yosemite system without any lagging off. The free version can convert videos without watermark on it, but no "FCP","FEC"and "iMovie" those options.
 Free Trial MTS/M2TS Converter

Useful Tips
- Import footages/videos/projects into Final Cut Pro X without rendering
- Convert 1080p MTS Videos to Windows Movie Maker
- Import and edit MTS/M2TS files with Windows Movie Maker
- Import/Edit/Transcode Sony NEX-5N/NEX-7/A57/A65/A77 1080 50/60P AVCHD to iMovie on Mac
- Transcode TiVo Shows to AIC for Editing in iMovie and FCE
- Convert Panasonic MXF Footages to FCP as ProRes for Editing


