
 Home
HomeWhen building a media-center Mac, everyone has his optimal components and different set of requirements. Now that the new Mac Mini sports the NVIDIA GeForce 9400M as its integrated graphics chip, it is finally a true contender for the home media center space. After building up a Mac mini HTPC, most folks would download music, pictures, games, music and most important of all, their movie collections to the Mac Mini HTPC immediately. If you’re HD movie lover and wish to add Blu-ray movies to the newly built Mac HTPC, Pavtube Blu-ray Ripper for Mac and PLEX are good combination. Pavtube Blu-ray Ripper for Mac copies protected Blu-ray movie to your Mac HTPC and PLEX plays high-definition 1080p M2TS files from Blu-ray structure. In that way you can play Blu-ray movie on Mac HTPC without quality loss. The following guide tells how to copy/rip Blu-ray and DVD movies to Mac Mini HTPC with Pavtube Blu-ray Ripper for Mac.
Required hardware: Mac Mini with an external BD drive; source DVDs and Blu-ray Discs.
Required software: Pavtube Blu-ray Ripper for Mac
(The software is able to back up Blu-ray movies and commercial DVDs for Mac HTPC Media Center without quality loss or compress the BD and DVD movies to MOV, MP4, MKV, M4V, etc. in perfect sync.
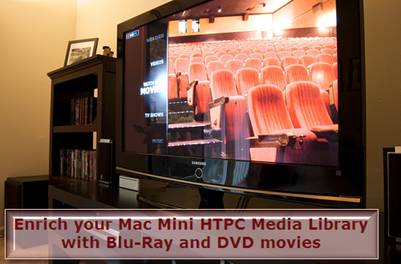
Enrich your Mac Mini HTPC Media Library: rip DVD and Blu-ray movies to PLEX:
Step 1. Load source movie files to the Blu-ray/DVD to Mac HTPC Converter software.
Insert source Blu-ray disc to BD drive, or DVD to optical drive. Install and run the Pavtube Blu-ray DVD Ripper for Mac on your Mac. When the below interface pops up, click "Blu-ray disc" icon to import Blu-ray or DVD movie. If you already have a Blu-ray folder or ISO file on your HDD, you can either click "Blu-ray Folder" icon or "IFO/ISO" to load your source files.
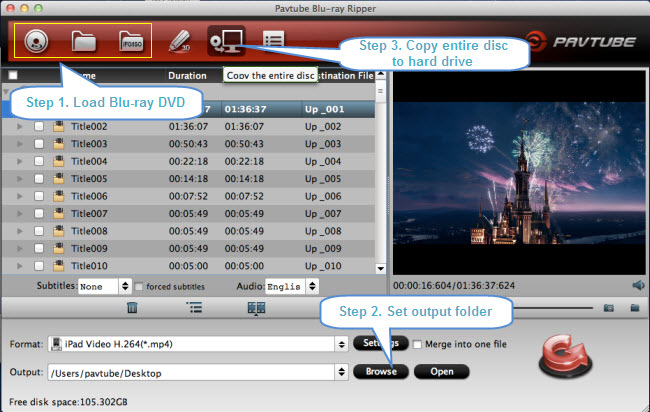
Step 2. Specify an output folder to save BD or DVD movie.
Click “Browse” button and specify an output location. Make sure there is enough space for a whole BD movie (usually 25GB-50GB) when backing up Blu-ray disc to Mac HDD.
Step 3. Back up Blu-ray/DVD for PLEX playback on Mac Mini HTPC.
Click on “Copy the entire disc” button to back up Blu-ray/DVD movie to Mac. A 90 min. Blu-ray takes about 40 min to copy to Mac hard drive. After the copying process completes, you can get the final output files by clicking “Open” button with ease.
The ripped Blu-ray directory contains two folders, “BDMV” and “CERTIFICATE”. The PLEX is able to play the M2TS files from Blu-ray directory. If you’d like to use other media player like VLC to play the M2TS streams, just follow “Disc Name”>> “BDMV”>> “STREAMS” to find uncompressed M2TS clips.
Tips and Tricks:
1. Jerky playback? Try the latest version of PLEX media center, as it has getting the GPU acceleration for playing Blu-ray files (as long as NVIDIA GeForce is integrated). If this doesn’t work, try shrinking the Blu-ray M2TS to 1080p DivX AVI/ MKV/MOV/MP4 with Pavtube Blu-Ray Ripper for Mac. The quality degradation is unconspicuous but with the file size down, the HD videos will be played back smoothly.
2. Wanna copy the M2TS/ VOB streams only without menus and ads? Make some changes in Step 3. Click on the “Format” bar and choose “Copy”>> “Directly Copy” mode, and then click “Convert” button to start conversion.
 Free Trial Blu-ray Ripper for Mac

Useful Tips
- How to Play MXF with VLC?
- Use XBMC for Blu-ray Playback on Mac
- Play ripped Blu-ray MKV files in MPlayer with audio and subtitles track
- How to play Blu-ray movies in VLC on Mac with selected audios/subs?
- Get Windows Media Center playing MKV movie ripped from Blu-ray Disc
- Enable Windows Media Player play MKV videos


