How to add audio track to MKV on Mac?

As far as we know, more and more people have the needs of adding audio track to MKV on Mac. But what’s the available way to do so? In this article, we show you how to add audio to mkv file by using Pavtube HD video converter for Mac. If you are looking for such a solution, just feel free to see the guide below. This tool enables you to create audio track to mkv on mac with your specified audio track as well as adding more special effects to your source file.
How-To:
How to add audio track to MKV on Mac?
Step 1: Run Pavtube HD video converter for Mac
Once run it, you can click “Add” button to load files that you wanna convert to MKV, including FLV, M4V, AVI, M2TS, etc. and the MKV file itself.
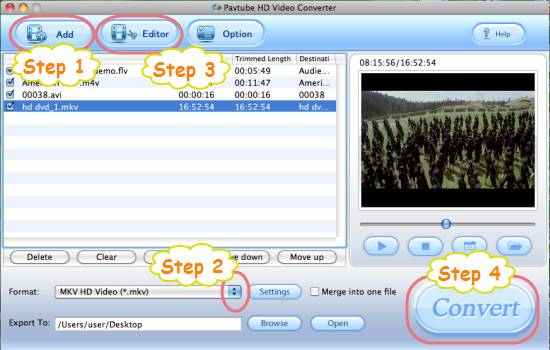
Step 2: Select MKV as output format
To edit audio track to mkv on mac, you need select MKV as output format. Click on the dropdown menu of “Format”, and then follow “HD Video”> “MKV HD Video (*.mkv)”. If you wanna get SD MKV files, you can choose the MKV format under “Common Video” option.

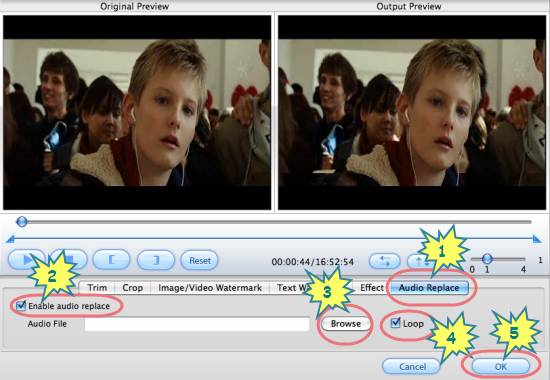
Step 3: Make audio track to MKV on Mac
Check the file you want to convert, and then click “Editor” button, after that, you will be led to the following interface. By then please do as below.
Select “Audio Replace” tag, and tick off “Enable audio replace”, and then click “Browse” button to select the audio track that you wanna add to MKV files. If you wanna loop the audio track, you can tick off “Loop”, if not, just let it be. The last but not least, do remember clicking “OK” button to confirm your settings.
Step 4: Convert
When the above mentioned steps are finished, you can click “Convert” button to add audio track to MKV on Mac. Once the conversion is done, you are able to click “Open” button to get the MKV files with your specified audio track. Hope this helps.
 |
 |
 |
