-
How to convert HD videos (in the format of M2TS, TS, TP, etc.) on Mac?
As people have higher and higher requirements about the quality of their watching videos, more and more HD videos are emerging. Nevertheless, at the same time, these videos bring people many format troubles. Have you ever met setbacks while converting your on-hand HD-DVDs, or Blu-ray DVDs to other formats like MP4 for playback on your iPod, iPhone? Or converting to MOV to do further editing with iMovie? Or converting to 3GP for playback on your cell phones? Or converting to WMV for playback on your Zune player? If so, you need to go on with this article, because it discusses what HD videos are, and how to convert HD videos (in the format of M2TS, TS, TP, etc.) on Mac?
First of all, what are HD videos?
From Wikipedia:
High-definition video or HD video refers to any video system of higher resolution than standard-definition (SD) video, and most commonly involves display resolutions of 1280×720 pixels (720p) or 1920×1080 pixels (1080i/1080p). Usually these HD videos are recorded in the format of M2TS, TS, TP, etc.
If you want to have deep understanding about this item, you can go to the following website to do further reading:
http://en.wikipedia.org/wiki/High-definition_video
How to convert HD videos (in the format of M2TS, TS, TP, etc.) on Mac?
Next, we will talk about how to convert HD videos (in the format of M2TS, TS, TP, etc.) on Mac with Pavtube HD Video Converter for Mac.
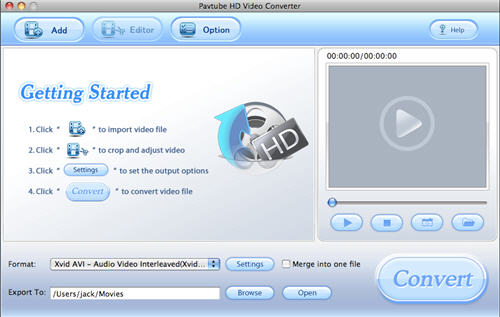
1. Download, install and then launch this program.
As soon as you have run this converter, the following interface will emerge.
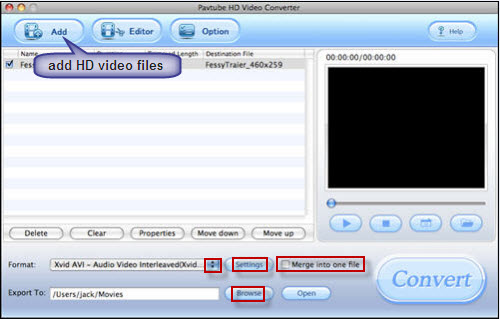
2. Add files, set output format and destination folder.
Click button “Add” to input HD video files, after that, you can select format according to your demands by clicking the drop-down list of “Format”. For instance, to play on iPhone, you can select MP4; to edit with iMovie, you can select MP4 or MOV; to play on Zune, you can select WMV, etc. Moreover, if you want to join multiple files together to be a single file, you can check “Merge into one file”. At the same time, you are allowed to specify where to load the output files by clicking “Browse”.
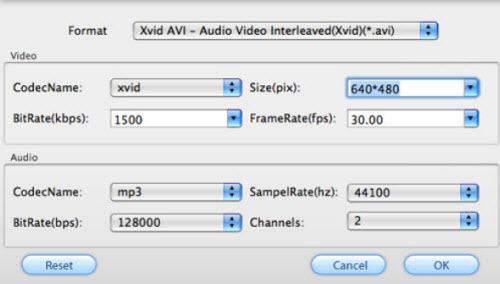
Want to adjust some audio or video parameters to optimize the generated videos? Slightly click button “Settings”, parameters like bit rate, screen size, frame rate, etc. can all be reset based on your requirements.
4. Convert
Once you have finished the above settings, you can start converting by pressing “Convert”. This program can completely finish the converting process at speed with extremely good quality.
Additional Tips:
- There is no need to worry about audio-video out of sync problem.
2. Capture the specified video clips to do converting is permitted; “Trim” function can help you realize it. Furthermore, the function of “Crop” can help you adjust the screen size or cut off the black edges of the original HD videos.
3. Text, images, GIF animations, and videos are all allowed to add as watermarks.
4. Audio replacement is available; you can take place of the original audio by your specified audio.Free Trial
HD Converter for MacBuy Now
HD Converter for Mac
- 1G Hz or above PowerPC G4/G5 or Intel processor.
- Mac OS X (including Mac OS X 10.4 Tiger ,v10.5 Leopard and v10.6 Snow Leopard ) on iMac, MacBook, Mac Pro, etc.
- 512 MB physical RAM (memory) or more.
- 1024*768 or higher resolution display.

DVD Ripper Quick Learn
Products List
- DVD Ripper Mac
- Blu-Ray Ripper
- DVD to iPod Converter Mac
- DVD to iPhone Converter Mac
- DVD to Apple TV Converter Mac
- DVD to Blackberry Converter Mac
- DVD to MP4 Converter Mac
- DVD to 3GP Converter Mac
- DVD to PSP Converter Mac
- DVD to Gphone Converter Mac
- DVD to Mobile Phone Converter Mac
- DVD to AVI Converter Mac
- DVD Audio Ripper Mac


Why choose Pavtube?
- Fully functional
- Free technical support
- Five-Star awards
- Free updates
- Excellent service