
 Home
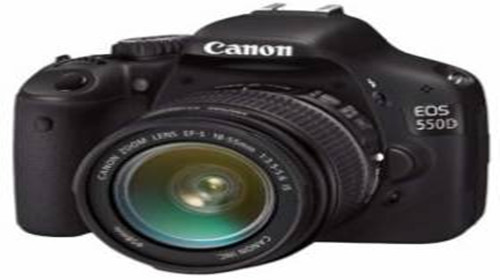
HomeCanon EOS 550D /T2i, the latest DSLR to offer HD video recording by Canon, is perfect for capturing clips or sequences which a consumer camcorder would otherwise find difficult or impossible.
The T2i allows you to film at either 1920*1080, 1280*720 or 640*480 pixels with 30fps, 25fps, and 24fps. Video is an absolute highlight of the EOS 550D / T2i and it's wonderful to have this degree of control in a camera. All of these are great, till you find it is a problem importing the H.264 MOV footages to Final Cut Pro for editing. Even the raw video could be successfully loaded to FCP but the film will look quite jumpy.
H.264 is a delivery codec rather than editing codec, and you need transcode the video to a format more friendly for FCP, for instance, Apple Intermediate Codec or Apple ProRes 422 codec. The following passage guides you how to convert Canon T2i footages to Apple ProRes 422 encoded MOV file for FCP.
Working as a DSLR Camera to FCP Converter, Pavtube software helps you import CanonT3i MOV to FCP, encode Canon 5D Mark III MOV for FCP X, edit Canon G12 MOV with FCP, convert Canon EOS 550D video to FCP, as well as transcode Nikon D3200 MOV to ProRes for FCP X. With this Pavtube HD Video Converter for Mac on your Mac, you can totally make


How to convert Canon 550D T2i video to FCP for editing?
Step 1. Run Pavtube Canon Video Converter for Mac.
Click "Add" button, browse to the footages and load them to the converter.
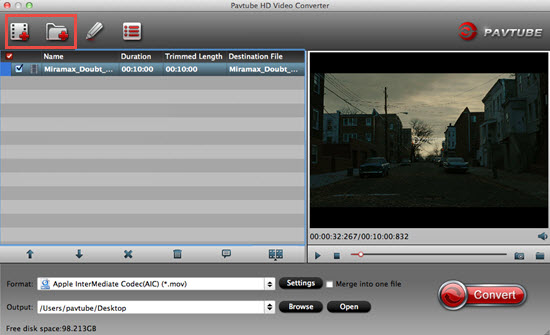
Step 2. Select the items to be converted
Click on "Format" bar to set a FCP friendly format in Final Cut Pro template. There are Apple ProRes family, DVCPRO and HDV codecs for your choice.
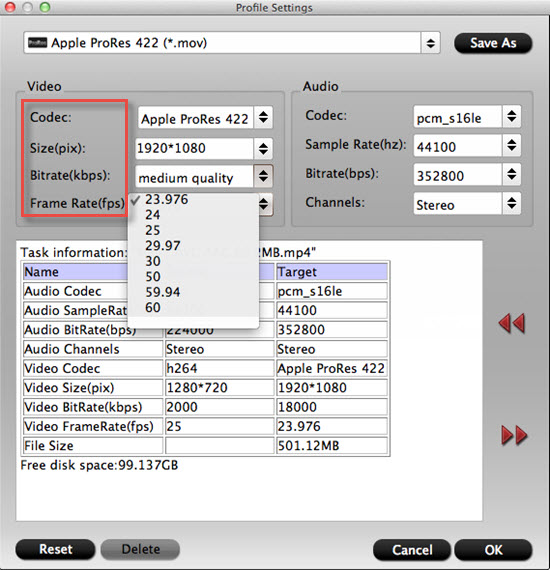
Basically, "Apple ProRes 422 (*.mov)" is the best format for converting 550D footage to FCP. If you prefer smaller file size, choose "Apple ProRes 422 (LT) (*.mov)" instead.

Tips:
If you don't know which ProRes to choose, then you can refer to this "Differences among Apple ProRes codec"article.
Step 3. Click the "Settings" button and set proper video/audio parameters.
My advice is to set the video size, bitrate and fame rate to be exactly as the footages so that you will suffer least quality degradation. For example, when the video is shot at 1920*1080, 5mbps, 30fps, you could set Size as 1920*1080, Bitrate as original, Frame rate as 30. If you would like to use default settings, simply skip this step.
Step 4. Click the "Browse" button next to the Output File Name field and select a location on your HDD for the output video file.
If you happen to forget setting the file loctaion, don't worry, just click "Open output folder" to check your converted files.
Step 5. Click the "Convert" button to start conversion.
After conversion you can click the "Open" button to locate converted video files for importing to FCP without rendering.
Small Tips:
1. Preview the video - select it in file list and click "Preview" button.
2. Thumbnail - click "Snapshoot" button when previewing the video. Click "Option" to set the image format of screenshots.
3. Deinterlace - click "Edit", switch to "Effect" tab, find "Deinterlacing" box, and check it.
4. Combine files together - check the files to be merged in file list and check "Merge into one" box beside "Settings" button.
To make the editing faster, you can convert the MPEG files to Apple Prores 422, since it is less compressed. Note that trascoding will definitely degrade the video quality, this is inevitable. The quality loss is up to your settings when converting the footages.
5. If you are new to FCP, here you can know how to transfer files into FCP.
 Free Trial HD Video Converter for Mac

Useful Tips
- Best Workflow of Canon 5D Mark IV 4K MOV with FCP X
- Canon MXF to Sony Vegas Converter-Edit MXF in Sony Vegas
- Convert Canon XF305 MXF Footage to VOB Format for Playing on TV
- How to import Canon MXF Video to Cyberlink PowerDirector for Editing?
- Convert Canon 60D MOV to 1080p AVI/WMV for Editing and Playback
- How to Convert Canon EOS 550D T2i Video to FCP Friendly Format?


