How to create a custom format for shrinking Blu-ray movie using Pavtube ByteCopy?
The flexible Pavtube ByteCopy software not only allows for lossless Blu-ray and DVD ripping, but also lets you create a custom format based on your own requirements. This guide focuses on how to create a custom format for shrinking Blu-ray movie.
Pavtube ByteCopy mainly allows you to set output video/audio quality by entire disc and individual Title. When the default formats do not meet your need, you can use custom output option to create a custom format. Here’re steps to create new output option.
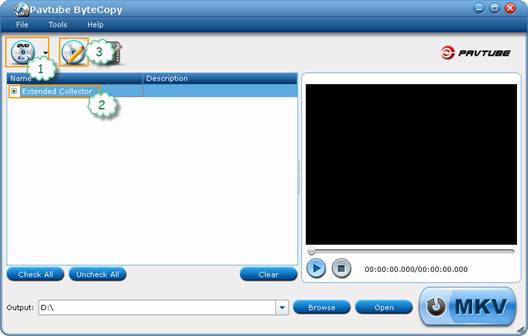
1. Load a Blu-ray Disc or DVD to Pavtube ByteCopy. Place the disc into drive, run Pavtube ByteCopy, and click “Load Disc” button ![]() to import movie.
to import movie.
2. Select the whole disc (root directory).
3. Click “Edit Disc” button![]() to enter “Edit Disc” window.
to enter “Edit Disc” window.
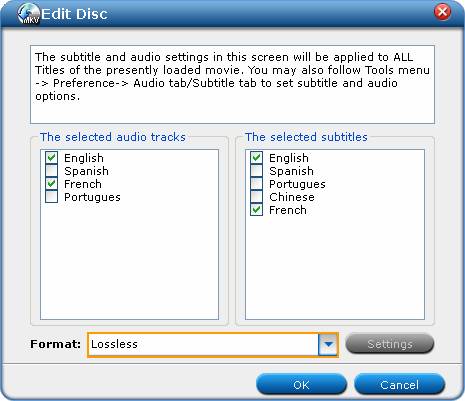
4. Find the “Format” bar, and select “Custom” from dropdown list of “Format” bar.
5. Click “Settings” button to set and save new output format in “Setting Disc Streams” window.

6. Check the “Encode” box below “All Video Stream” and “All Audio Stream”, and set customized video codec, size, bitrate, frame rate, audio codec, sample rate, bitrate, channels and subtitle codec. For instance, to create a format for converting Blu-ray movie to 720p video with DVD quality and Dolby Digital 5.1 sound, you can use the settings shows below.
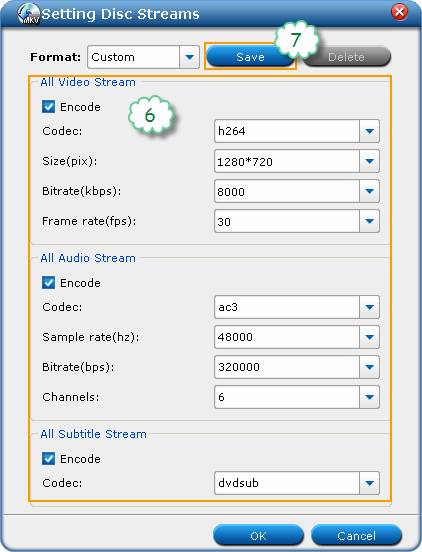
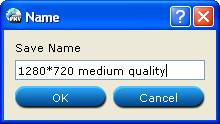
7. When everything’s set, click “Save” button, give a name to the newly created format, and click “OK”.
8. Click “OK” on “Setting Disc Streams” window and back to “Edit Disc” window. You’ll find that the new format is added to dropdown-list of “Format” bar.

The next time you rip Blu-ray or DVD movie, just follow the steps above and select custom format in drop-down list of “Format” bar in the 3rd step to use the custom format for Blu-ray/DVD ripping.
Some helpful tips:
1. By default the video size is “original”. When you make changes to video size, please also check the “Encode” box below “All Subtitle Stream”. Although the original subtitle looks fine for 1920*1080 video, it might go beyond the screen when the video is resized to 1280*720, so make sure the subtitle is converted as well.
2. Do not set 6 channels for audio when MP3 or MP2 codec is selected. Do not set 1 channel when DTS is set as audio codec.
3. A lossless Blu-ray movie can take up space ranges from 20GB to 50GB. If you want to cut down file size, try setting smaller value in video “Bitrate” instead of using “original”.
18000kpbs- excellent HD video quality close to Blu-ray standard
12000kbps- great HD video quality for watching on HDTV
5000-8000kbps- DVD video quality
2000kbps- video for portable media players (e.g. Galaxy Tab, Archos 101)
512kbps- video for regular mobile phones
4. In order to play a video clip properly on your device, make sure the video is encoded with proper codec (ByteCopy offers H.264, Xvid, MPEG-2 only) and packed in proper container format (MKV only for ByteCopy) with proper bitrate, frame rate, resolution, audio channels.
 |
 |
 |
