
 Home
HomeWordPress is a powerful website backstage server, with its mature products and bunch of free small plugins, you can make your website more vivid. This program is very easy to install and use, even you don't know anything about how to write a programs, you can still master this one to set up a great-looking, powerful website.
Medialement.js is another story to tell. Now most the latest website support HTML5 natively, but still some not or you don't have update them yet. This Medialement.js is just come out as a life saver to help bloggers or website developers insert their videos. But first, you have to make your videos more suitable for uploading , WebM is a good choice, for it is specially for HTML5 codec. But the common used format among us is like MP4/WMV/MP3/MKV/AVI,etc which may not be very well accepted by this Medialement.js, how to solve that?
As for this circumstance Pavtube Video Converter may be the one you are looking for. No matter what videos you get at your hand, just import into this app then choose WebM as your output format, the rest will be took care of by it.


How to make MKV/MOV/MP4/AVI/VOB/MTS/MXF into WebM for Medialement.js?
Step 1. Download this WebM converter on your PC
You can click the button above to have a quick installation of the trail version. There will be no time using limit about this version but "Pavtube" watermark will on the middle of the screen.
After installation, click "File">"Add Video/Audio" to load your videos. Or if your videos are on your desktop , you can just drag-and-drop to load your files.

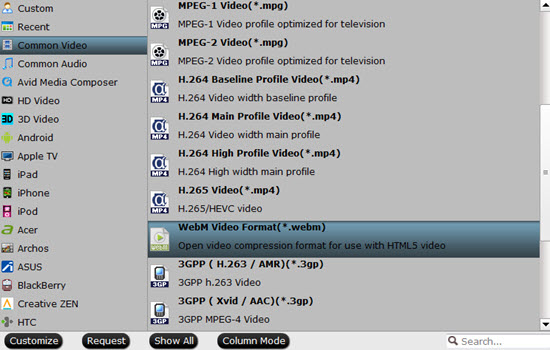
Step 2. Choose WebM as the output option for Medialement.js
Click the "Format" bar to choose "Common Video">"WebM Video Format (*.webm)". Even the MP4 is accepted by Medialement.js, WebM is the most suitable format for the HTML5 codec page. And even for the beginner, this converter provides this preset for you to save setting times.
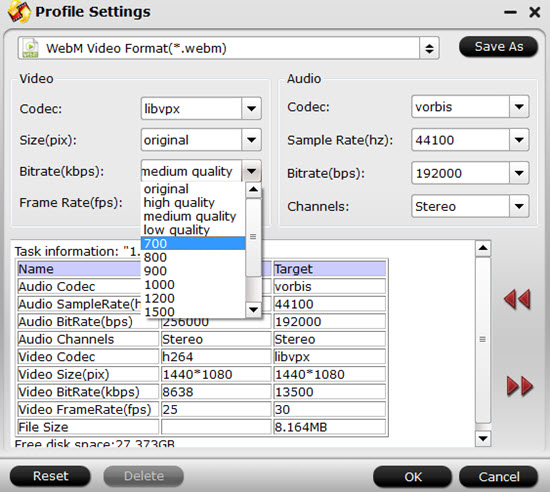
Step3. Adjust Bit rate, Frame rate if you want to
This step may not be very necessary for users who want to enjoy the original quality of the videos. But for speed up the loading progress, it will be very useful.
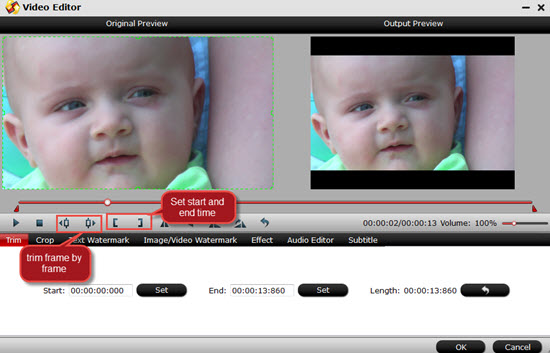
Step 4. Doing some simple edits (optional)
Before post your videos on your blog, how about make some further editing? Also , you may have some powerful NLEs like Adobe Premiere Pro, Sony Vegas to help you do the editing job. But for some armatures who want to save times and do quick conversion, this build-in editor will do the favor.
Trim and crop the part you don't need, add subtitles or watermark for fun, if you shot your videos in the wrong angle, you can rotate them under this function, adjust the aspect ratio to fit your screen better, etc.
Step 5. Start to convert MKV/AVI/MOV/MP4/MXF/MTS to WebM
After setting the file location, then back to the main UI to hit the "Convert" button. Soon , you will have the compatible videos for your Medialement.js.
Useful Tips:
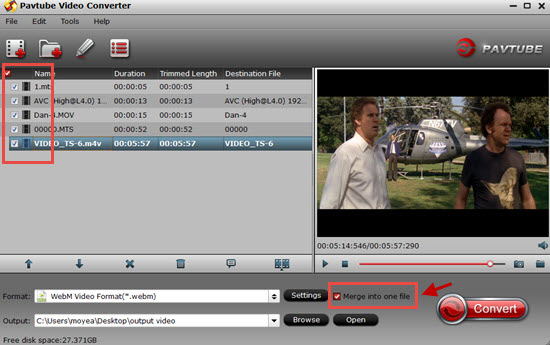
-merge into one file
If you have a plenty of videos that you want to combine them into one , then choose all files you want to join and check the "Merge into one file" before the conversion.
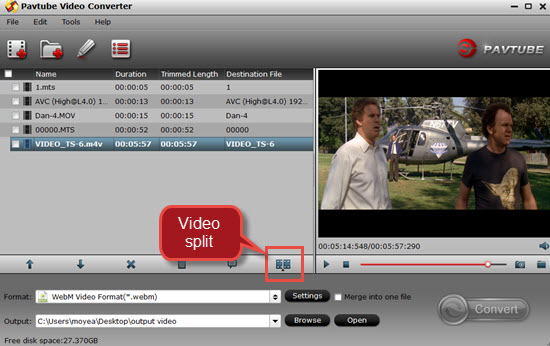
-video split
If you want to separate your videos by file account, time length or file size, then you can click this icon to do the job.
How to make Mediaelement.js work on your WordPress is for users who just set up their websites.
 Free Trial Video Converter


