
 Home
HomeThis article is written to help people who are using a Mac computer and want to add their recorded TiVo shows to Google Nexus 10 for playback. It guides you through how to transfer TiVo shows to a Mac computer, how to transcode TiVo recordings to Nexus 10 optimized file format and how to transfer the converted files to Google Nexus 10 for viewing on the go.
Software you will need:
TiVoDecode Manager
Pavtube Video Converter for Mac
Part 1: How to transfer TiVo recordings to a Mac computer?
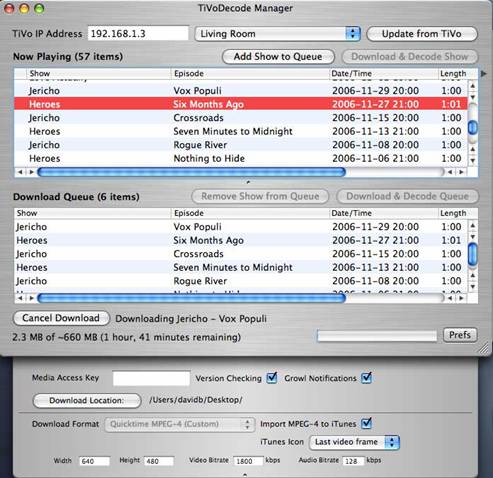
Although the TiVo Desktop software for the Mac (supplied by TiVo) does not allow users to transfer TiVo recordings to Mac, you can transfer TiVo to Mac with specific software as long as your TiVo box is connected to your home network. Once you’ve recorded your favorite shows on your TiVo box, freeware like the TiVoDecode Manager can accomplish this task for you. Run the TiVoDecode Manager, and enter your TiVo's IP address in the “TiVo IP Address” box. Next click the Prefs button in the lower-right corner. Fill in the Media Access Key. A list of shows on your TiVo will appear in the Now Playing list. Select the show and click “Add Show To Queue”. The selected show now appears in the Download Queue list. Click Download Location to select where you want to save it.
Part 2: Convert TiVo shows to Nexus 10 by using Pavtube Video Converter for Mac
(Also read how to transform TiVo to Nexus 10 on a Windows PC)
1. Add .TiVo files into the program
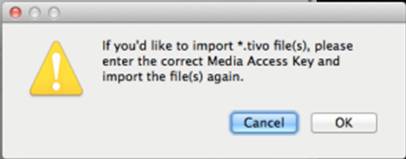
Launch Pavtube Video Converter Mac version as the TiVo to Nexus 10 Converter for Mac, once its main interface comes up, click “Add video” or “Add from folder” icon to load your TiVo files saved on your computer’s hard disk drive. If you are the first time running the program, a dialogue window will pop up, “If you’d like to import *.tivo file(s), please enter the correct Media Access Key and Import the file(s) again.” Click “OK” to confirm.
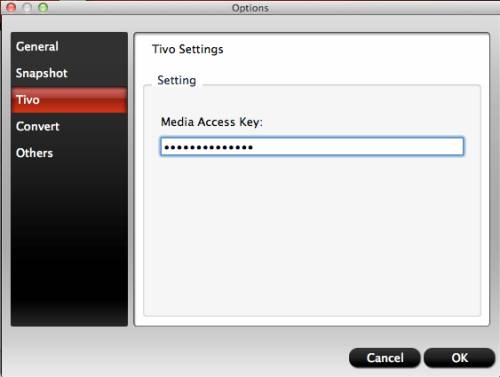
Then an “Options” dialogue box comes up, enter your Media Access key as it requires and click “OK” to confirm.
2. Select output format for Nexus 10
Go to “Format” menu and choose “Google Nexus 7 H.264 Video (*.mp4)” as output format from “Android” catalogue.
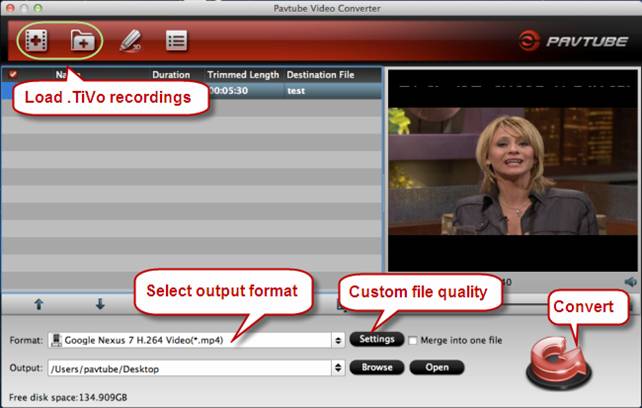
3. Custom output file quality for Nexus 10
You are allowed to click “Settings” button and enter “Profile Settings” panel to configure output file quality by adjusting video and audio parameters like video resolution, bit rate, frame rate, etc. The table below shows the recommended optimal video and audio settings for Google Nexus 10.
| Video | Audio |
|
Codec: h264 |
Codec: aac |
Learn to customize a suitable profile for your portable devices with Pavtube Mac software
4. Start transcoding TiVo shows to Nexus 10 viewable file format
Click “Convert” button to start encoding TiVo recordings to MP4 for Nexus 10. The program is able to finish conversion at super fast conversion speed with best image and sound quality without any video and audio out of sync issues. Once the format conversion task is done, you can click “Open” button to get the generated MP4 files with ease. Also read how to transfer video files to Nexus 10 for playback.
 Free Trial Video Converter for Mac

Useful Tips
- How can I Play Flash Video (FLV, F4V) on Kindle Fire HD?
- Connect Kindle Fire HD to Computer (Windows/Mac) for Files Transfer
- Enable Surface RT & Pro Tablet to Play MKV/AVI/MPG/TiVo/VOB Files Effortlessly
- How to Play VOB on Kindle Fire without any Hassle ?
- Enable Microsoft Surface RT/Pro Tablet to Play Flash FLV/F4V Videos
- Samsung Galaxy Tab AVI – put and play AVI on Galaxy Tab


