
 Home
HomeUnderstanding the AVCHD Camcorder Format
AVCHD is a high definition camcorder video format jointly developed by Panasonic and Sony for use in consumer camcorders. Currently, the AVCHD format has been used by a variety of camcorder manufacturers.
AVCHD records video in *.mts and *.m2ts extensions at a range of resolutions including 1080p, 1080i and 720p. Most AVCHD camcorders that advertise themselves as “Full HD” models will record HD video at a resolution of 1080i.
Why can't Premiere Pro and Final Cut Express 4 import my AVCHD files?
AVCHD is a form of video compression that allows the large data files created by HD video recording to be captured and saved on digital media such as hard disk drives and flash memory cards. As for editing, AVCHD is not the best suited format. That’s why sometimes people are unable to directly import AVCHD files into NLEs such as Adobe Premiere Pro and Final Cut Express 4 for post-production.
How to make AVCHD editable in Adobe Premiere Pro and Final Cut Express 4 on Mac?
Simply convert AVHCD MTS/M2TS clips to a format that is best suited for working with Adobe Premiere Pro and FCE 4. Pavtube MTS/M2TS Converter for Mac does the trick.
 MTS Converter for Mac Free Trial
Tips: The free trial version is provided for you to see if it would be able to convert your AVCHD footage to your required file type with desired image and sound quality - support 1080p/720p and 5.1 channel output. The trial version will create videos with PAVTUBE logo standing in the center of the output image. To bypass the watermark, you should purchase its retail version.

The steps to convert AVCHD to Adobe Premiere Pro and Final Cut Express 4:
1. Download, install and launch Pavtube MTS Converter for Mac as the best AVCHD Converter for Premiere and FCE 4. Once its main interface appears, you can import AVCHD media into the program from “Add video” or “Add from folder” icon.
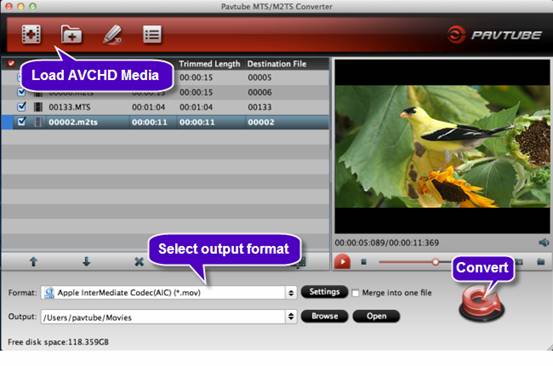
2. Move to “Format” menu and choose a proper format as target for using in Adobe Premiere Pro or Final Cut Express 4.
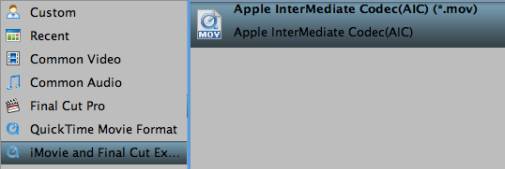
For generating files working with Adobe Premiere Pro, please select “Adobe Premiere/Sony Vegas” > “MOV (AVC) (*.mov)”.

For transcoding AVCHD to a format that is compatible with Final Cut Express 4, please follow “iMovie and Final Cut Express” > “Apple InterMediate Codec (AIC) (*.mov)”.
3. Press “Convert” tab to start encoding AVCHD MTS/M2TS files to Adobe Premiere Pro or FCE 4 preferred file format. As soon as the conversion process finished, you can click “Open” button to get the generated file that is ready for editing with Premiere Pro/Final Cut Express.
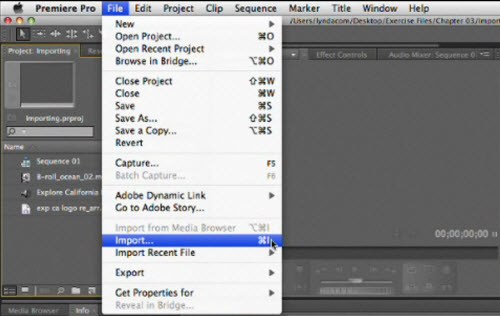
* Start up Premiere Pro, choose File > Import…, and navigate to the source folder to import files.
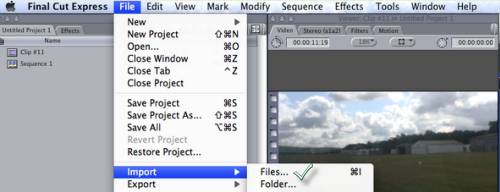
* Open up Final Cut Express, follow File > Import > Files… to browse and load the files you need to edit.
 Free Trial MTS/M2TS Converter for Mac

Useful Tips
- How to convert MXF to H.264 for Premiere Pro?
- MTS and Premiere Elements workflow - making 1080p/720p MP4 from AVCHD footage
- Adobe Premiere Pro Supported Formats – video and audio, camera, still-image (sequence), closed captioning and subtitle
- How to Import MP4/MOV/AVI to Photoshop CS6/CS5/CS4 for editing on Mac
- Adobe Premiere Pro workflow: How to import Media Files to Premiere Pro on Mac
- Why can't Premiere Pro and Final Cut Express 4 import my AVCHD files?


