
 Home
HomeThe WD TV HD Media Player has ability to play a wide variety of file formats. If the source file supports chapters, you can easily skip to play your wanted chapter at will by pressing “NEXT” button on the remote control. By using Pavtube ByteCopy software, you can easily rip Blu-ray to MKV container with chapter markers preserved, as well as retain multi-channel audios in the MKV file, including DTS audio.
As for DTS, it is a popular surround sound format for commercial DVDs and Blu-ray discs. When the WD TV encounters a video with DTS audio, it simply passes it through one of the digital audio connectors (TOSLINK or HDMI) rather than decoding it directly. So if you have a receiver that supports decoding DTS, you may consider copying Blu-ray movie to MKV format with lossless DTS audio.
You may also wanna know what audio codecs will Blu-ray support?
Linear PCM (LPCM) - up to 8 channels of uncompressed audio (mandatory)
Dolby Digital (DD) - format used for DVDs, 5.1-channel surround sound (mandatory)
Dolby Digital Plus (DD+) - extension of Dolby Digital, 7.1-channel surround sound (optional)
Dolby TrueHD - lossless encoding of up to 8 channels of audio (optional)
DTS Digital Surround - format used for DVDs, 5.1-channel surround sound (mandatory)
DTS-HD High Resolution Audio - extension of DTS, 7.1-channel surround sound (optional)
DTS-HD Master Audio - lossless encoding of up to 8 channels of audio (optional)
[Quick Guide]
How to keep Blu-ray chapters for WD TV and convert/backup Blu-ray with lossless DTS audio?
Requirements:
1. Pavtube ByteCopy
2. A purchased Blu-ray movie disc (insert it into your BD drive), or a BDMV folder or ISO file stored on your HDD
3. A PC with a Built-in BD drive or an external BD drive
Step 1: Open up Pavtube ByteCopy, and click “Load file(s)” icon to import Blu-ray movie files into the program directly from your BD drive, or load a BDMV folder or an ISO image file.
Note that only the main title of a Blu-ray is checked by default once loaded, if you want to check multiple titles to do conversion, just tick off the checkboxes before them.

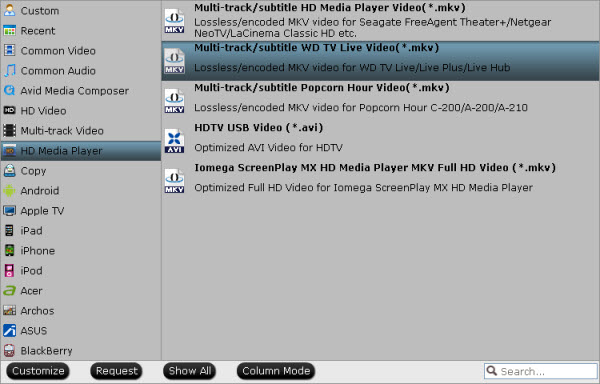
Step 2: Choose “Multi-track/subtitle WD TV Live Video (*.mkv)” as output format
Pavtube ByteCopy features a wide variety of output formats for users to choose from. To maintain Blu-ray chapters for WD TV, you should select “Multi-track/subtitle WD TV Live Video (*.mkv)” as output under “HD Media Player” column. This makes it possible to select wanted chapters to play within WD TV.
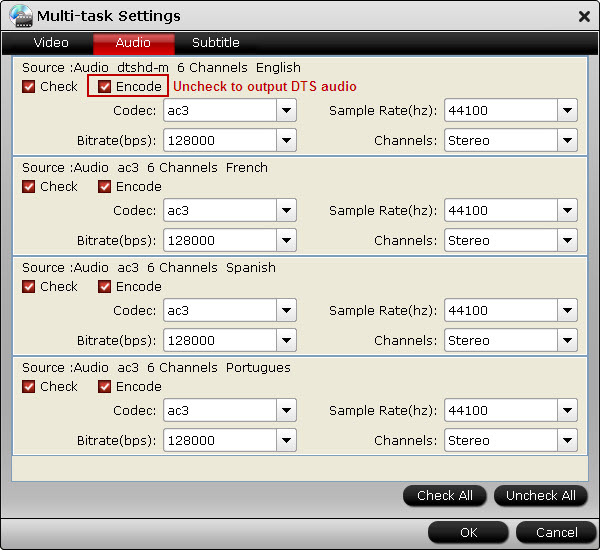
Step 3: Select desired audio tracks to be preserved in MKV
Click “Settings” button, the “Multi-task Settings” window pops up. Switch to “Audio” section, and uncheck the audio tracks that you don’t want to preserve.
Actually, the ByteCopy software checked all audio channels in a movie title by default, and will encode them into MKV container using ac3 codec. In order to output lossless DTS audio without changing anything, you need to uncheck "Encode" before starting conversion.
Tips:
1. The WD TV Live and the WD TV (2nd Gen.) only support up to 2-channel DTS audio. For anything more than 2-channels you might need to passthrough to a receiver that supports decoding DTS.
2. WD TV does not give well support for DTS-HD 7.1 audio, even you use an AVR in conjunction with your HD player, so we kindly suggest you convert/backup Blu-ray with lossless DTS audio only when the Blu-ray audio tracks are 5.1/6 channels.
3. In case that you don’t have a receiver to passthrough or decode DTS audio, you can choose to encode DTS to AC3.
Step 4: Start backing up Blu-ray movie to WD TV playable MKV with original chapter info and DTS audio preserved.
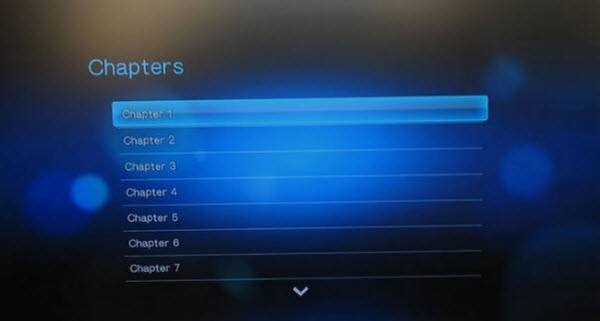
Simply click![]() to start, Pavtube ByteCopy will take care of the rest. When the conversion is finished, click “Open” button to get exported MKV file with ease. Just simply copy the output MKV file to your USB device, like a WD Elements, then connect the USB device containing your converted Blu-ray contents with your WD TV device, and choose the video for playback. The MKV video file created by Pavtube ByteCopy contains the chapter markers and multi-channel audios in a Blu-ray movie, so you can freely select any chapter to display or select DTS audio to play/passthrough during playback.
to start, Pavtube ByteCopy will take care of the rest. When the conversion is finished, click “Open” button to get exported MKV file with ease. Just simply copy the output MKV file to your USB device, like a WD Elements, then connect the USB device containing your converted Blu-ray contents with your WD TV device, and choose the video for playback. The MKV video file created by Pavtube ByteCopy contains the chapter markers and multi-channel audios in a Blu-ray movie, so you can freely select any chapter to display or select DTS audio to play/passthrough during playback.
Bonus features of Pavtube ByteCopy
a. Copy the entire disc
By using Copy the entire disc ![]() feature, you can preserve the Blu-ray/DVD’s original file structure without changing anything. When copy a Blu-ray, you will get a folder like this
feature, you can preserve the Blu-ray/DVD’s original file structure without changing anything. When copy a Blu-ray, you will get a folder like this

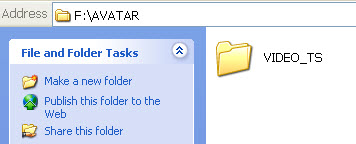
When copy a DVD disc, you will get a folder like this
b. Directly Copy
By choosing Copy > Directly Copy, you are ale to copy the selected movie file in its original format without quality loss. When directly copy a DVD video, you will get .vob as output, and when directly copy a Blu-ray title, you will get .m2ts as output.
 Free Trial ByteCopy

Useful Tips
- Play MKV AC3 5.1/DTS 5.1 audio with WD TV players- BD/DVD rip to MKV
- Enjoy Blu-ray movies on HDTV with WD TV Live Plus HD Media Player
- Rip Blu-ray to WD TV with chapter info and DTS audio preserved
- How to rip DVD to MKV to watch over WD TV?
- How can you appreciate Blu-ray Content material on Western Electronic WD TV Live?
- Rip blu-ray to 1080p DivX AVI video for WD TV HD Media Player


