
 Home
HomeThe great thing about digital cameras nowadays is their ability to act as video cameras as well. Sony Cyber-shot DSC-HX30V digital camera is such a little gadget. It captures video in AVCHD format at 1080p60 or 1080i60 quality at a few different bit rates - including a one that maximizes recording time, but grabs video at a resolution that is not fully HD (1,440 x 1,080). As long as you don't opt for 60p, you'll also be able to capture 13-megapixel stills while recording video.
Be ware that AVCHD is not the best format for editing, social media sharing or even burning onto DVDs. The two 1080p modes warn you that you need a Blu-ray burner to create a disc. So some users choose to shoot in 1080i mode. It is still very good. As for AVCHD editing, people might consider converting Sony HX30V MTS clips to a format that is well suited for using within FCP X, iMovie, FCE 4, Avid Media Composer and Adobe Premiere Pro. There are lots of software apps to do this job, like Pavtube MTS/M2TS Converter for Mac. It allows users to change the AVCHD footage from Sony HX30V camera to a variety of other media formats keeping 720p or 1080p HD-quality for different uses, including editing, sharing, playing and burning. If your source AVCHD files are interlaced (e.g. 1080i), by using its ‘deinterlacing’ facility, you are able to remove the interlaced lines from your video to deliver excellent image quality. More than handling MTS footage generated by a consumer-level digital camera, it is also able to deal with shootings produced by professional AVCHD camcorders.
![]()
Tips:
1. The free trial version is provided for you to see if it would be able to convert your AVCHD format video from a Sony HX30V digital camera.
2. The trial version will create videos with PAVTUBE logo standing in the center of the output image. To bypass the watermark, you should purchase its full version.
![]()
Import media files from Sony HX30V to FCP X, iMovie, FCE 4, Avid, and Premiere Pro
The guide below shows the details on how to transcode AVCHD files from a Sony HX30V camera for editing within Final Cut Pro X, iMovie, Final Cut Express 4, Avid Media Composer and Adobe Premiere Pro by using Pavtube MTS/M2TS Converter for Mac.
1. Launch Pavtube MTS/M2TS Converter as a Mac Sony HX30V camera video converter.
2. When its main interface comes up, click ‘Add video’/ ‘Add from folder’ to input AVCHD source files captured by your Sony HX30V camera. You can load directly from your camera or from a file folder that contains your source files that stored on your Mac computer.

3. Go to ‘Format’ menu and choose an output format depending on the editing application you are using.

Tips:
1). If you intend to edit Sony HX30V AVCHD footage with FCP X, you can choose “Apple ProRes 422” as output format under ‘Final Cut Pro’ column.
2). If you are going to work with iMovie or FCE 4, ‘Apple InterMediate Codec (AIC)(*.mov)’ is recommended.
3). If you are editing with Avid Media Composer, you’d better select ‘Avid DNxHD (*.mov)’ as target format from “Avid Media Composer’ option.
4). If you are using Adobe Premiere Pro to handle Sony HX30V MTS clips, you can opt ‘MOV (AVC) (*.mov)’ as output format under ‘Adobe Premiere/Sony Vegas’ catalogue.

4. Click ‘Convert’ button to start rewrapping Sony HX30V videos to your editing system preferred file format. As soon as the conversion finished, you can click ‘Open’ button to get the generated files. These files now are ready for editing in FCP X, iMovie, FCE 4, Avid, or Adobe Premiere.
Additional Info: If you would like to burn QuickTime MOV videos from Mac onto DVDs, you can try out the Free DVD Creator for Mac released by Pavtube Studio.
Here is a step-by-step guide:
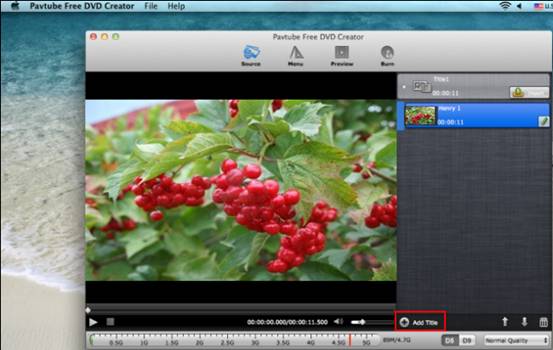
1. Load QuickTime MOV from your Mac into the Free DVD Creator for Mac
Run Pavtube Free DVD Creator for Mac, click “Import” tab to browse your hard drive and load the MOV files your want to burn into the program. To create another Title, click the "Add Title" button and add more QuickTime videos.
2. Create DVD menu
Free Pavtube DVD Creator for Mac enables you to custom a DVD menu to fully access your QuickTime movies on DVD disc. There are three built-in DVD menu templates under “Menu” tab for you to choose from. If you don’t want a menu, you can choose no menu. After selecting a menu template, you can change menu buttons, thumbnails, add text, background music and background images to custom a DVD menu.
3. Preview final effects
Switch to “Preview” tab to have a look at the final playback effect of your DVD. If anything needs to be changed, go back to the former steps to do modification.
4. Start burning MOV videos to DVD on a Mac
Once you are satisfied with the preview effect, go to “Burn” tab to set settings like video standard (PAL or NTSC), audio channels (5.1 channels, Mono, Stereo), output settings, disc label, and DVD drive (please insert a blank DVD disc into your selected DVD writer). Press “Burn” button and the Free Mac DVD authoring program will start creating DVD from MOV source files on you Macintosh automatically.
Pavtube DVD Creator for Mac also comes with a Retail version, which can do more than the free version:
* One-click to quick Burn DVD ISO file and DVD folder structure to a blank DVD
* Burning slide show DVDs from still image files
* Directly creating playable DVDs from AVCHD MTS/M2TS and MXF footage
* Offering more DVD menu templates for users to choose from
* Burning MediaPortal recorded TS files to DVD on Mac
 Free Trial MTS/M2TS Converter for Mac

Useful Tips
- How to Edit MTS in GoPro Studio
- Join/Merege Spanned AVCHD MTS/M2TS Video into Continuous Clip
- How to Convert AVCHD 3D to SBS 3D MP4 for Playing on 3D Tablet?
- Convert AVCHD/AVCHD Lite Footage to Apple ProRes 422 Encoded Files for Final Cut Pro
- Top 5 Best MTS/M2TS Converter for Mac - Play, Edit and Share MTS/M2TS Files on Mac
- AVCHD to MOV: How to Convert AVCHD to QuickTime MOV on Mac


