
 Home
HomeConsidering the issue of insufficient storage memory, you may want to copy TiVo recordings to hard drive for enjoying the shows more freely on PC, or burning favorite TiVo series to DVDs. The freeware TiVo Desktop lets you transfer shows from TiVo box to your PC. If you pay $15.99 to TiVo corp., they will help you upgrade the software to TiVo Desktop Plus, which is capable of converting TiVo shows to portable devices. But to be frankly, the software does not support these devices well. The TiVo company knows clearly about it, and they offer you another solution, the Roxio Creater 2010. This software costs you $69.99 (for TiVo users), and is more powerful. It helps you convert TiVo files to iPod, iPhone and PSP, and more important, burn TiVo shows to DVD. Sounds a nice choice? Well, that’s not we’re talking about. In this guide I’d like to introduce you a more economical way to copy TiVo to DVD, which costs you $35 only if you have the freeware TiVo Desktop for the PC (the DVD burner is excluded, of course).
Software you’ll need:
1. TiVo Desktop for the PC (freeware)
Note: As of June 5th, 2013 the free version of TiVo Desktop for PC is no longer available for download. The paid version that adds support for transferring videos to the TiVo and DVR recordings to mobile devices will still be available at a cost of $15.99, lowered from $24.99.
2. Pavtube Video Converter (shareware, $35.00)
3. Windows DVD Maker (freeware)
Part 1: Transfer TiVo recordings to PC with TiVo Desktop
If you recorded a show on your TiVo box, you can easily play it back on your PC or laptop. I believe it is an everyday thing for most TiVo users. And there are instructions by TiVo’s official site: Transferring TiVo shows to your PC
Transfer times vary, but may be as long as the show's duration to complete the transfer, so you have to be patient when the software is copying TiVo to PC.
Part 2: Convert TiVo to DVD Movie Maker compatible formats
The Pavtube Video Converter is much more than a TiVo to DVD Converter. It converts TiVo shows to iPod, iPhone iPad, Apple TV, PSP, Android tablets/phones, Xbox 360, PS3, etc. and media formats like *.avi, *.mpg, *.vob, *.mkv, *.wmv, *.dv, *.mov, *.mp3, *.m4a, *.wav, *.ogg, *.ac3, etc. and handles TV recordings of other formats like *.ts, *.tp, and *.trp files. When converting TiVo with Pavtube Video Converter, there are multiple choices. To retain original HD quality, you can "Directly Copy" TiVo shows to MPEG/MPEG-TS files; to save storage, you can shrink the TiVo recordings by choosing a common SD video format; to burn CD album, you can extract audios from TiVo files; to cut the commercials, you can "Trim" the ads out; to eliminate the black edges, you can "crop" the image and remain the part you like. Feel like giving it a shoot with the trial version of Pavtube Video Converter? Now let’s focus on the process of converting TiVo to DVD. By the way, the trial version gives videos with a "Pavtube" logo on the screen.
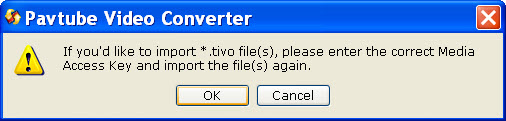
Step 1: Input Media Access Key
Launch Pavtube Video Converter, and load your TiVo recordings into it. You can click either “Add Video” or “Add from Folder” button to import .tivo files, or you may drag and drop the *.tivo files to the Getting Started Area directly. If you are the first time loading TiVo shows, a popup message will ask “If you’d like to import *.tivo files, please enter the correct Media Access Key and import the files again.” Click “OK”.
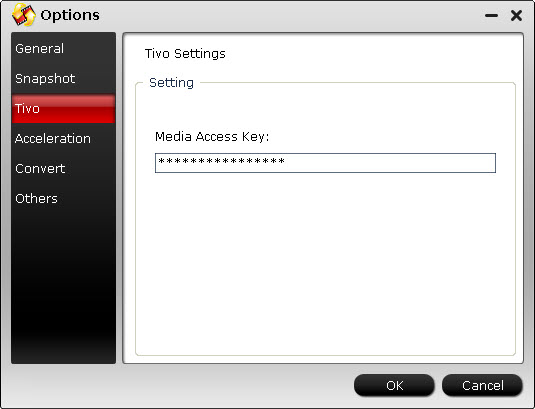
Fill in your Media Access Key as the program requires, and then click "OK".
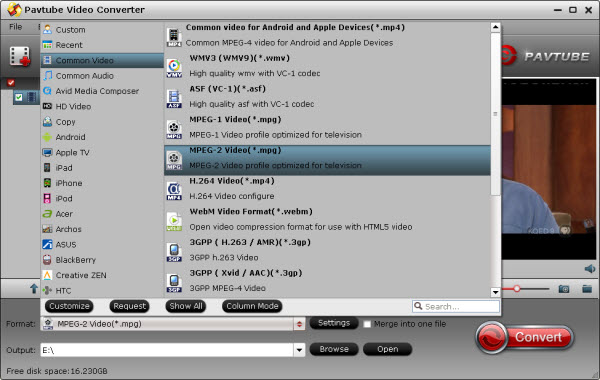
Step 2: Select an output format for burning TiVo shows to DVD in Windows DVD Maker
Click on the pull down menu of “Format” to select output format. If you do not want to loss any quality, please select Copy-> Directly Copy so that the TiVo Converter will decrypt the shows to *.mpg or *.ts files. Nowadays the shows are normally HD 1920*1080 videos, which is too good to burn on a standard DVD. My advice is, compressing the HD TiVo shows so as to fit DVD 5/ DVD 9.
As I will copy TiVo to DVD with Windows DVD Maker, let’s take a look at Windows DVD Maker supported file types:
Video files: *.asf, *.avi, *.dvr-ms, *.m1v, *.mp2v, *.mpe, *.mpeg, *.mpg, *.mpv2, *.wm, and *.wmv.
Audio files: *.aif, *.aifc, *.aiff, *.asf, *.au, *.mp2, *.mp3, *.mpa, *.snd, *.wav, and *.wma.
Picture files: *.bmp, *.dib, *.emf, *.gif, *.jfif, *.jpe, *.jpeg, *.jpg, *.png, *.tif, *.tiff, and *.wmf.
I used to select Common Video-> MPEG-2 Video (*.mpg) as target for burning a DVD.
Step 3: Click “Settings” button, the “Profile Settings” dialogue box will appear. Set Video and Audio settings as follows:
- Set video size to 720*480
- Set video bit rate to medium quality
- Set frame rate to 29.97 fps
- Set audio codec to ac3
- Set sample rate to 48000 hz
- Set audio bit rate to 160000 bps
- Set audio channels to Stereo (If you’d like to keep 5.1 surround sound, simply change the audio channels to “5.1 Channels”)
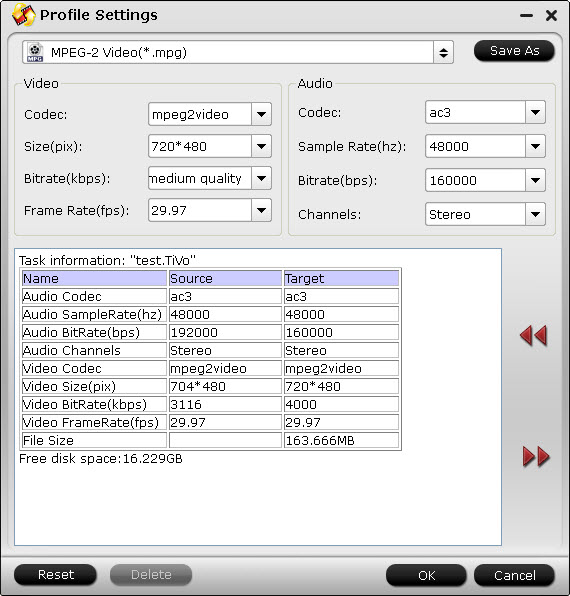
You may change the video “Size” to 960*540 if your source video is 16:9 and you don't want outstretched image. The TiVo to DVD Converter displays task information like the estimated file size. If you find the file size very huge, just set a smaller value in Video Bitrate box.
Step 4: Start converting TiVo for burning DVD.
Click “Convert” button and the TiVo converter will generate videos that are compatible with Windows DVD Maker. After conversion you can click the “Open” button next to output path to find converted recordings.
Additional tips - edit the TiVo recordings to keep proper length and size.
A. Cut unwanted black edges
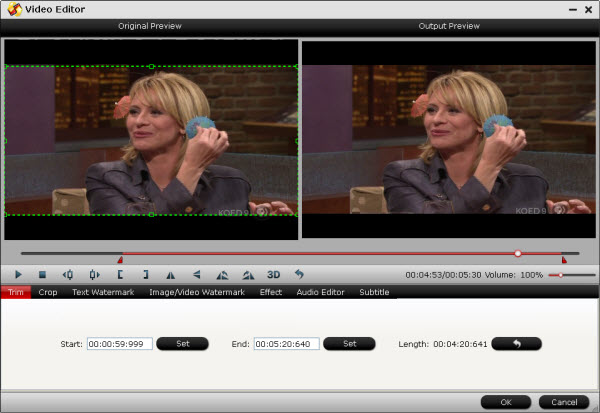
Check the tivo clip you want to edit, and click “Edit” icon  to pop up “Video Editor” panel. Switch to Crop tab to cut unwanted edges. You can crop the video by adjusting the green cropping rectangle or setting values (Left, Top, Width and Height) of crop area.

B. Trim out bothering commercial ads
Under “Trim” tab you are allowed to cut out unwanted part of selected clip. To trim the video, simply type in desired time value in “Start” and “End” box and click ‘Set’ button. Or you can click left square bracket and right square bracket to set start and end time when playing the video.
Part 3: Copying TiVo to DVD with Windows DVD Maker
After conversion you can burn the converted videos with Windows DVD Maker. Follow these steps:
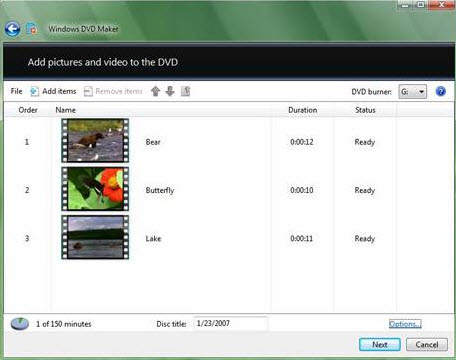
Step 1: Click the "Start" button and select "Windows DVD Maker" to run the program, then click the "Add items" button from the top menu and browse to the folder were the movies you want to burn are located. By default, they should be found in the "Videos" folder.
Step 2: Select the videos you want to burn and type the "Disc title". Also, you may select the order in which the movies will be saved on DVD. To do that, select a movie and press the "Up" or "Down" button to change its order.
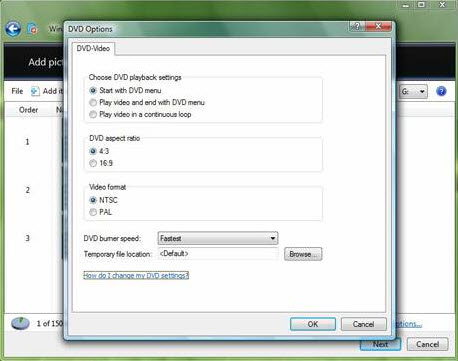
Step 3: If you want to, you can click the "Options" button and set things like the burning speed, the aspect ratio, the video format or you can choose if the DVD will have a menu or not. After you finished making the settings you want, click the "OK" button and then "Next".
Step 4: At this step you can create a custom DVD menu or you can select a predefined one. To select a predefined menu, scroll the "Menu Styles" list and select the one you like most. You can customize it by pressing the "Customize Menu" button and making the settings you want. Also, you can change the menu text by clicking the "Menu text" button and typing the text you want for each button.
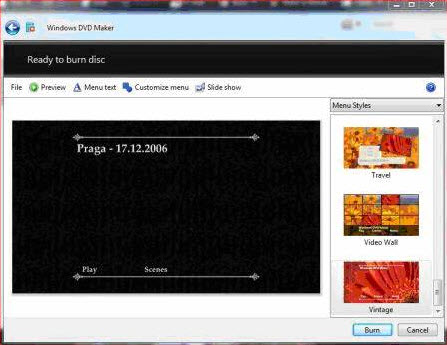
Step 5: When you have finished making all the customizations, click the "Burn" button.
First, Windows DVD Maker will encode the movie in the appropriate format and then it will burn it on DVD. Usually, the encoding process takes much more time than the burning so you have to be patient.
Now we have finished copying TiVo to DVD! Hope this guide helps.
Additional Information:
Pavtube DVD Creator program makes DVD creation much easier than ever before. It lets you burn any kind of video sources to playable DVDs within a few clicks. The acceptable source files are ranging from common videos (MKV, AVI, MP4, WMV, MOV, etc.) to camera shootings (MXF, MTS, M2TS, H.264 MOV, TOD, and MOD), TiVo recordings to photos. For more information, see DVD Creator Quick Start Guide and DVD Creator product page.
 Free Trial Video Converter

Useful Tips
- The complete Blu-ray/DVD Backup Solutions for Mac OS X
- How to convert TiVo Recordings for Burning DVD with Nero?
- AVCHD MTS to iDVD - Create a DVD from your MTS/M2TS Videos
- Burn TiVo shows to a DVD using Windows DVD Maker
- How to convert HD footages for authoring with iDVD?
- How to convert F4V files for burning DVD with Nero?


