XDCAM is a series of products for digital recording using random access solid-state memory media, introduced by Sony in 2003. Four different product lines – the XDCAM SD, XDCAM HD, XDCAM EX and XDCAM HD422 – differ in types of encoder used, frame size, container type and in recording media. No matter which one you use to record videos, you will find that it is hard to edit the Sony XDCAM in Davinci Resolve smoothly.
From the recent research, we have discovered that long gop formats do not work well in Davinci Resolve and the consensus is to transcode to something like ProRes or better DNxDH for stability and other unspecified "issues". So today, let's teach you how to convert XDCAM to ProRes or DNxHD for Davinci Resolve easily. First of all, you need to download a video converter that can handle XDCAM files.
Best XDCAM File Converter for Davinci Resolve
Pavtube Video Converter for Mac is a professional XDCAM Video Converter that is dedicated to convert all Sony XDCAM series camcorder recorded BPAV files to Davinci Resolve compatible ProRes, DNxHD, MPEG-4, etc. During the conversion process, video parameters including resolution, frame rate, bitrate, codec, etc can be configured to make the output video more compatible with Davinci Resolve. Furthermore, the feature to merge multiple XDCAM into a single one for Davinci Resolve convenient editing. You also can trim XDCAM file length, crop XDCAM video file border and remove the audio from XDCAM files with the built-in video editor.
For Windows users, you can turn to Pavtube Video Converter to convert XDCAM to Davinci Resolve accepted video format.
Steps to Convert XDCAM to Davinci Resolve More Supported video
Step 1. Load XDCAM files
Here you can directly drag & drop the XDCAM files to the converter, or click “Add Video” or “Add from folder” button on the top menu to browse and choose XDCAM files. Batch conversion is supported here so you can add multiple XDCAM to convert to Davinci Resolve.

Step 2: Specify output file format for Davinci Resolve
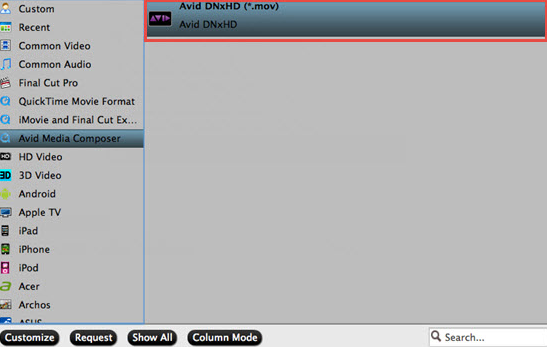
Click "Format" bar, from its drop-down list, select Davinci Resolve best supported editing codec such as "Avid DNxHD (*.mov)" from "Avid Media Composer" main category menu extended list. Click “Settings” button if you’d like to customize advanced audio and video parameters like Video Codec, aspect ratio, bit rate, frame rate, Audio codec, sample rate, audio channels.

Step 3: Edit video. (Optional)
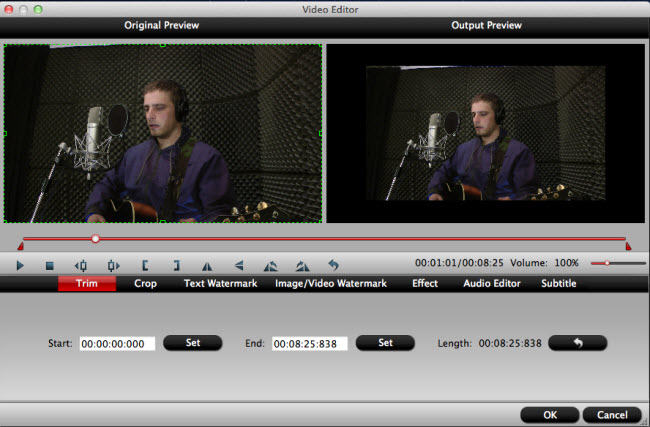
Before loading your video into Davinci Resolve for professional video editing, you can complete some basic video editing task with the program's built-in video editing function. Check an item to active the "Video Editor" function, then click the pencil like icon on the top tool bar to open the "Video Editor" window, you can trim video length, crop video black bars, add watermark, apply sepcial rendering effect, remove/replace audio in video, etc.

Step 3. Start XDCAM to Davinci Resolve conversion
After all the settings are done, simply click the Convert button to start transcoding XDCAM/HEVC files to DNxHD mov for Davinci Resolve on Mac.
When the conversion is done, click "Open Output Folder" button to pop out the folder with converted files, then you can add those files into DaVinci Resolve Media Pool without any issues.
Useful Tips
- How to Flip or Rotate Videos using Handbrake?
- Play Tivo Recordings with Windows Media Player
- How to Use VLC to Convert AVI to MP4 on PC/Mac?
- MOV Compressor: How to Compress MOV to a Smaller Size on Windows/Mac?
- Stream 4K Video to Chromecast Ultra via Plex
- Get Chromebook Pro/Plus to Play MKV Files without Any Problem


 Home
Home

 Free Trial Video Converter


