
 Home
HomeWindows Movie Maker is an excellent video editor, most user like to edit video in Windows Movie Maker, then share with friends or upload to some social app, like Facebook. Edit the video is an important thing, but the export video is also fatal, after the long time and toilsome video editing in Windows Movie Maker, then can't export video or the video output format can't be played on other media player well, so terrible. Here will tell you the right way to export Windows Movie Maker file to WMV, if you have some trouble in playing WMV video, this article will tell you the effective way.
How to Export Windows Movie Maker file to WMV?
As Windows Movie Maker beginner, following steps are useful.
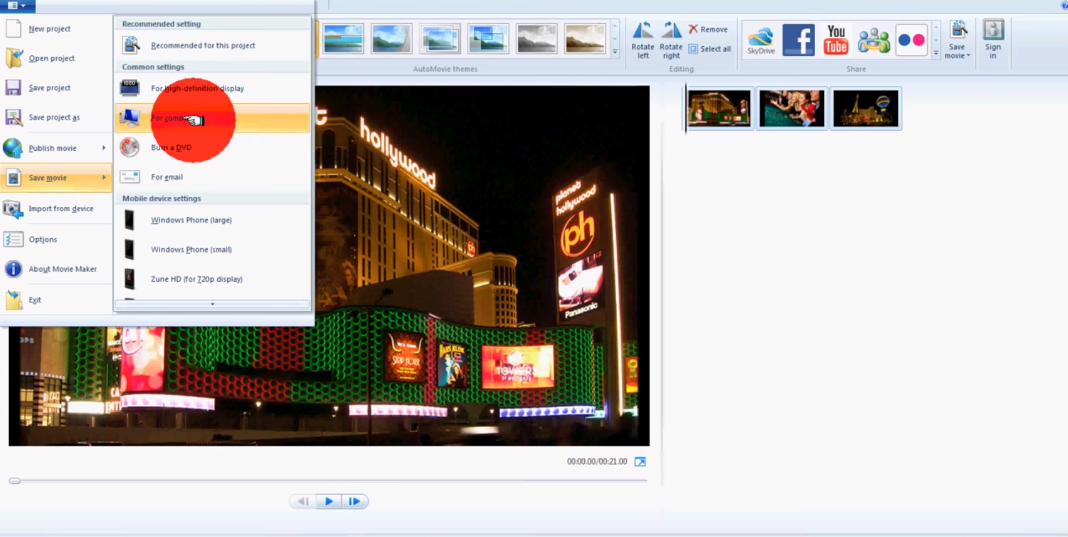
Step 1. After the video editing is done, choose "Save Movie", at the right window, choose "For computer", user can choose WMV format at the bottom list.
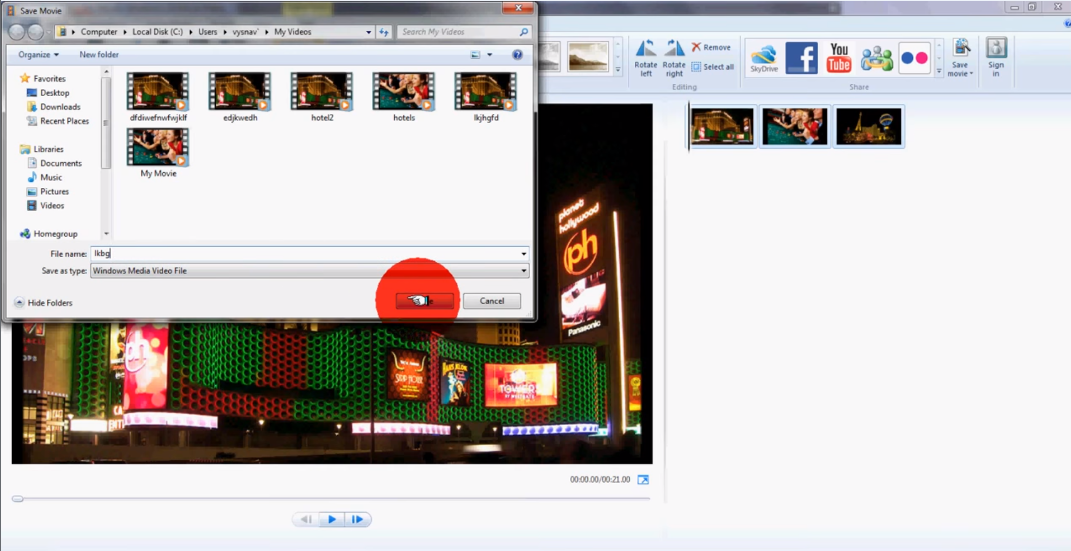
Step 2. Input the video name and choose the video save location on PC, then click "Save"
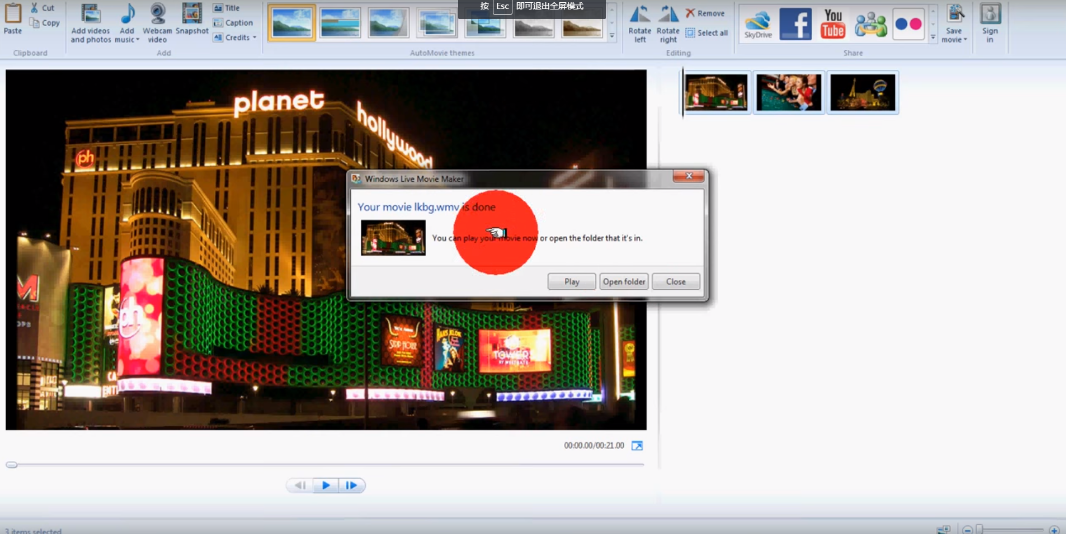
Step 3. Then start to export the video to your PC, after that, user can click "Open folder" to play the video or "Close" to shut down the window.
Best Way to Export Windows Movie Maker file to WMV
Above steps seem to be easy, but most user can't play and share the WMV video well, why? For example: Upload WMV video to Youtube, which is limit to the video codec, bit rate, frame, video length, etc. User have to change these video parameters to Youtube best supported video type, want to upload to Facebook? the reason is the same with Youtube. Another condition is that user export Windows Movie Maker file to WMV, which is used the special video and audio codec. WMV is a container, not all the media player can support to play WMV due to the codec compatibility.
Because of these various reasons, export Windows Movie Maker file to WMV from Windows Movie Maker directly is not a wisdom choice, user can use a third video converter which not only can convert Windows Movie Maker file to WMV, also allows user to adjust the WMV video for better playback, upload and share. Pavtube Video Converter for Windows which is a professional and stable Windows Movie Maker to WMV Converter, user also can download the Mac version for Mac operating system.
User can convert Windows Movie Maker to WMV smoothly, if user often use Windows Movie Maker, good news, user can import WMV folder to this software and do batch video conversion, which can save you much time and energy. This Windows Movie Maker to WMV Converter will provide you the perfect WMV file without any interruption, quality loss. Except the basic WMV file, user can choose 3D WMV, which can bring you amazing 3D experience on VR headset.
In addition, user can so the host of your WMV video, at the video setting menu, user can adjust the video and audio related parameters, like: Video and Audio codec, video size, video frame, video bit rate, etc. These factors are important when user is uploading video to some websites or play on other media player. This Windows Movie Maker to WMV Converter provides the perfect video editing feature, user can change the video length by cutting, add subtitles to video, replace or remove audio by yourself and so on. More functions are waiting for you to explore. This review may be useful for you.


Step by Step to Convert Windows Movie Maker Files to WMV
Step 1. Load Windows Movie Maker Files
Install and launch Windows Movie Maker to WMV Converter on your computer, click "File" > "Add Video/Audio" to load Windows Movie Maker files to the program. At the right window, user can watch the video.

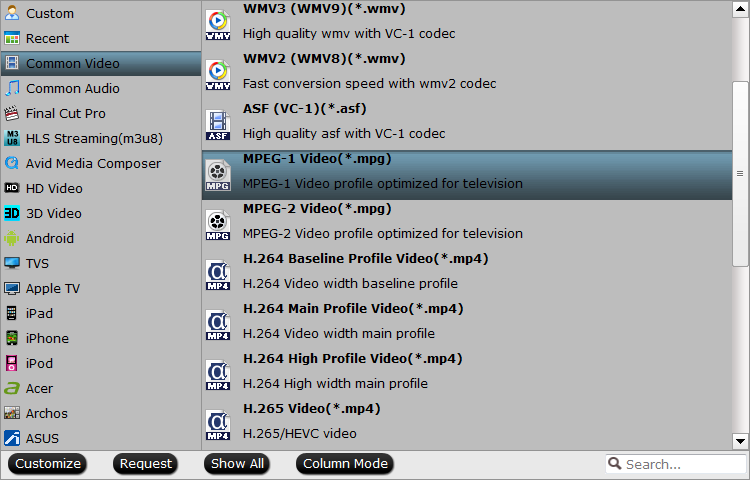
Step 2. Output Windows Movie Maker Files to WMV
2-1. User click the "Format" to choose the "Common Video", then choose the AVI video as the output video format
2-2. At the format list, user also can choose "HD Video", which can provide the high quality, including HD WMV, a good choice
2-3. As 3D fans, this choice you can't miss, just click "3D Video", then choose the 3D WMV you like, such as: WMV Top-Bottom 3D Video, WMV Anaglyph 3D Video, WMV Side-by-Side 3D Video.
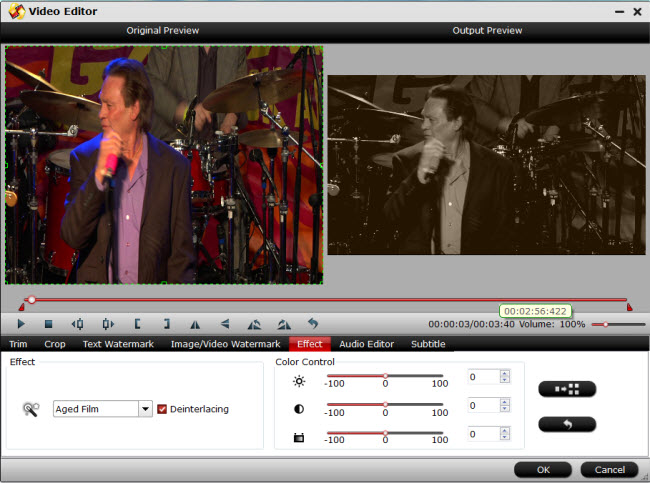
TIP: Before starting the magic conversion, user can edit the video to the desired effect, also can cut the Windows Movie Maker files into clips for better uploading to apps: Click the Trim, user can set the video start and end point, at the right, user can watch the video length.
Step 3. Begin Windows Movie Maker Files to WMV Conversion
Final step: Go back to main interface, hit right-bottom "Convert" button to start Windows Movie Maker Files to WMV process. Just wait for a while, you can get a brand new WMV video file. When you are waiting the conversion result, you can watch the video at the preview windows.
Finish the happy video conversion, you can upload WMV to Youtube, watch WMV on your phone, etc. This Windows Movie Maker Files to WMV Converter won't let you down. By the way, this software can help user to edit any video Windows Movie Maker without any trouble, such as: OBS to Windows Movie Maker, MXF to Windows Movie Maker and so on. Good luck to you.
 Free Trial Video Converter

Useful Tips
- How to Flip or Rotate Videos using Handbrake?
- Play Tivo Recordings with Windows Media Player
- How to Use VLC to Convert AVI to MP4 on PC/Mac?
- MOV Compressor: How to Compress MOV to a Smaller Size on Windows/Mac?
- Stream 4K Video to Chromecast Ultra via Plex
- Get Chromebook Pro/Plus to Play MKV Files without Any Problem


