The Vegas Pro 13 now has broad support for 4K/2K/HD/SD camcorder video with various different file formats and codec. However, for Panasonic GH4 users, you will encounter strange problems when dealing with the MP4 or MOV files from the camera with Sony Vegas Pro 12/13: the video parts of the clip do not comform to the audio part when the clips are moved to the timeline and Vegas somehow thinks a clip's video track is over four times longer than it's audio track.

Why GH4 video parts do not conform to audio parts
As a matter of fact, Vegas's issue with the GH4's footage is frame rate specific. Footage shot at certain frame rates works fine in Vegas, while clips shot at other frame rates is incompatible. Following is a breakdown of the GH4's different frame rates and whether Vegas can handle it or not:
|
Frequency |
Resolution |
Framerate |
Plays correctly |
|
NTSC |
1080P |
24 |
No |
|
NTSC |
1080P |
30 |
Yes |
|
NTSC |
1080P |
60 |
Yes |
|
NTSC |
4K (UHD) |
24 |
Yes |
|
NTSC |
4K (UHD) |
30 |
Yes |
|
Cinema |
1080P |
24 |
No |
|
Cinema |
4K (UHD) |
24 |
No |
|
Cinema |
4K(C4K) |
24 |
No |
|
PAL |
1080P |
25 |
Yes |
|
PAL |
1080P |
50 |
Yes |
|
PAL |
4K (UHD) |
25 |
Yes |
From above tablets, we can see that Sony Vegas Pro only have playback problems with 23.98 fps(NTSC) or 24.00fps (Cinema) on the recorded by the Panasonic GH4, however, it can work well with 25fps, 30 fps, 50 fps and 60 fps GH4 footage.
Fix GH4 24p clips editing issue with Sony Vegas Pro
Although Sony has made great effort to fix this issue long ago, however, there is any indication of then this bug will be fixed. Fortunately, there are still some workarounds that allow you to load Panasonic GH4 24p footage in Sont Vegas. The following article will list 3 solution for you.
1. Rewrap the video files
Rewrap the GH4's 24fps clips so that Vegas can open it properly. Rewrapping a clip takes the clip's original video and audio data andwraps it in a new file container. Though the video and audio data are exactly the same, the rewrapped files are fully compatible with Vegas, making this a permanent workaround to this bug. Rewrapping footage is fairly straightforward with the command-line tool, FFMBC. Open a command prompt and run the following command to rewrap a GH4 file:
ffmbc -i "" -vcodec copy -acodec copy -strict experimental ""
Note: Replace and with the original and rewrapped file names respectively.
You can also use batch processing software like Another GUI to rewrap multiple files at once. You can download a preset for rewrapping GH4 footage with Another GUI in the Vegas Compatibility Kit at the end of this post.
2. Trim it with a script
Vegas allows you to use scripts to automate certain processes, such as trimming excess video from GH4 clips on the timeline. Alexander Anikin has created a script that does exactly this to clips on the selected track in a Vegas project.
Original source:
https://suggestionofmotion.com/blog/sony-vegas-pro-panasonic-gh4-compatibility/
3. Adjust frame rate to 30fps
As Sony Vegas can work GH4 footage recorded at 30fps with issue, you can download this simple to use application called Pavtube Video Converter (review) to change GH4 footage with 24fps to 30fps in the program's profile settings windows.
Apart from that, you can also use the Mac version of this application to transcode GH4 4K/HD MP4/MOV files to compatible file formats for best editing codec for editing on macOS Sierra with iMovie, Avid Media Composer, FCP 7/X, Davinci Resolve, etc.
Wish to edit and ehhanced your GH4 video footage in just a few simple clips. You can easily achieve that with this program's built-in video editing options. You can flip video horizontally or vertically, rotate video clockwise or counterclockwise to get it displayed in the right angle, trim or cut video to remove unwanted parts or segments, crop video to cut off unwanted black borders or area, personalize video with video/image/transparent text watermark, split large video into small parts by file size, count or length, merge separate video clips into one, adjust picture effect like brightness, contrast, saturation or apply special rendering effects like Gray, Flip Color or Aged Flim, etc to your video or add external SRT/ASS/SSA subtitles to video.
Step by step to Change GH4 24fps Footage to 30fps Footage
Step 1. Import GH4 MOV/MP4 files with 24fps.
Run video converter and click "File" > "Add from Video/Audio" or "Add from Folder"to import GH4 24fps video clips.

Step 2: Choose output file formats.
You can choose to output the same file format recorded by Panasonic GH4 camcorder such as MP4, MOV or AVCHD.

Step 3: Adjust output video frame rate.
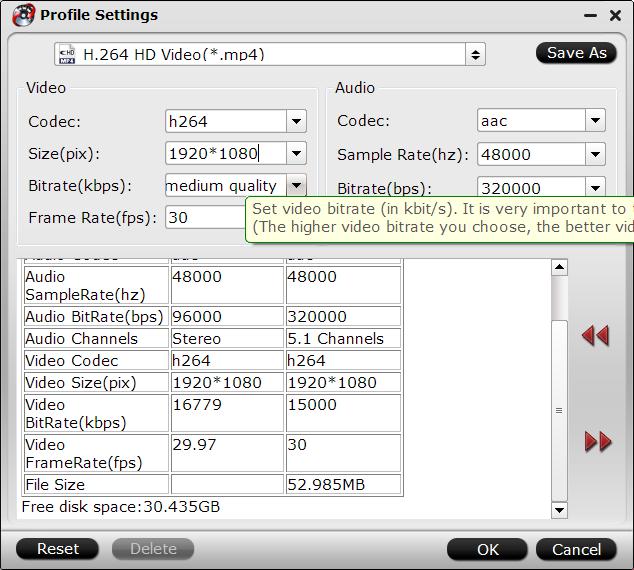
Click "Settings" on the main interface to open "Profile Settings" window, under video section, from the "Frame Rate" drop-down list, select 30fps to output.

Step 3: Edit video(optional).
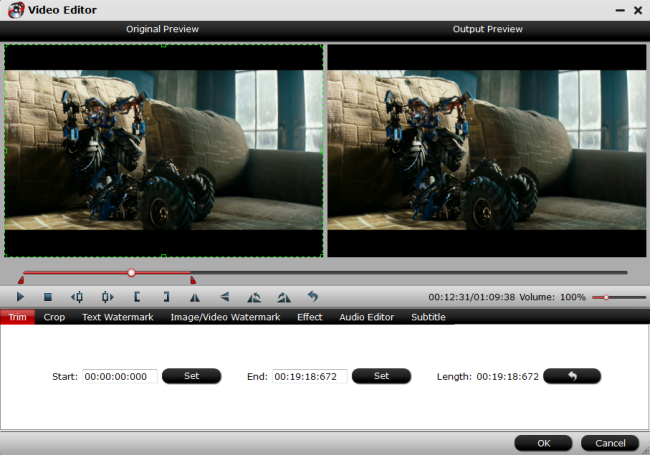
Check an item to active the "Video Editor" function, then click the pencil like icon on the top tool bar to open the "Video Editor" window, you can trim video length, crop video black bars, add watermark, apply sepcial rendering effect, remove/replace audio in video, etc.

Step 4: Start GH4 24fps frame rate changing process.
Hit right-bottom "Convert" button to start the conversion process to adjust GH4 24fps to GH4 30fps.
When the conversion is finished, you can click "Open Output Folder" button to get the output files effortlessly, and then you will have no problem to work Panasonic GH4 4K or UHD video with Sony Vegas Pro 12/13.
Useful Tips
- How to Flip or Rotate Videos using Handbrake?
- Play Tivo Recordings with Windows Media Player
- How to Use VLC to Convert AVI to MP4 on PC/Mac?
- MOV Compressor: How to Compress MOV to a Smaller Size on Windows/Mac?
- Stream 4K Video to Chromecast Ultra via Plex
- Get Chromebook Pro/Plus to Play MKV Files without Any Problem


 Home
Home
 Free Trial Video Converter


