
 Home
HomeAs freelance photographer, I often set up one or more cameras at an event and let them roll, sometimes for hours. This is done in anticipation that something interesting might occur in that camera’s field of view in the next couple of hours. Out of all those hours there might only be a few minutes I really want to keep. This results in enormous files with only a few seconds of really good footage. Ideally I wish to keep only the good bits and delete the rest but so far I’ve found no way to extract a short clip I want to keep and delete the rest without any loss of video quality. For years I’ve been using Sony Vegas Pro for video editing and it has a built-in trimmer just for the purpose of extracting bits from a larger clip BUT it cannot save the extracted bits losslessly. It always does a “conversion” and not a byte for byte lossless copy. And it always takes several times as long to render the clip as the clip itself, even on an i7.
Recently I’ve discovered a program (Pavtube Media Magician) that processes lossless trimming lighting fast. It loads AVCHD very quickly and converts very quickly, faster than anything I’ve ever seen and it does make some use of multiple core CPUs. It allows one to LOSSLESSY trim long video clips in MTS MT2S MOD and TOD formats. I don’t know of any current Video cameras still using MOD and TOD but MTS are what AVCHD and “AVCHD Lite” HD video cameras produce and that is becoming quite popular with Panasonic, Sony and Canon cameras. The benefit of lossless trimming for me is that I can free up much hard disk space and save just what I’d like to keep.
How to extract frames/conduct lossless trimming from AVCHD and AVCHD Lite HD videos
Stage 1: Add MTS/M2TS clips into Media Magician
There are two ways available for loading source media files:
1) Import from camera/camcorder
Connect your camera/camcorder with your PC and run Pavtube Media Magician. This frame accurate video editor program will detect your camera or camcorder automatically and ask “Camcorder is connected. Are you ready to launch wizard now?” Click “Yes” to confirm. In the mean time, you are allowed to backup MTS/M2TS footage directly from camera to local computer. Also, you can click the camera icon to load camcorder videos as well.
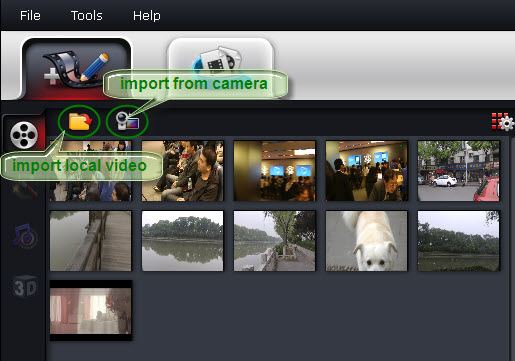
2) Import from local computer
If you have already stored MTS/M2TS clips on the hard disk drive of your PC, you can choose to “Import Media Files” or “Import Media Folder” to browse and load source files from the path that contains the source files.
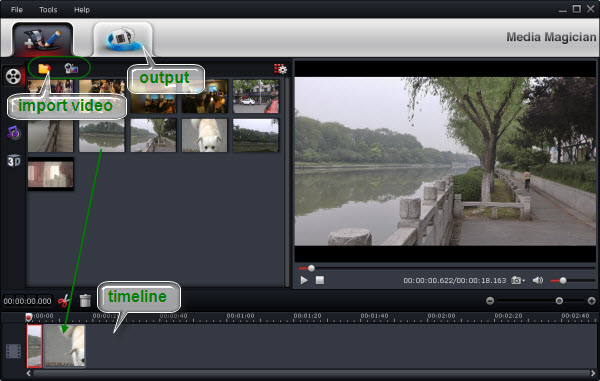
Stage 2: Drag and drop AVCHD MTS/M2TS files onto Timeline
After source MTS/M2TS clips are imported into the program, you can directly drag and drop the clips that you want to do frame accurate splitting onto timeline. To select multiple clips on list, you can press Command Key and click.
Stage 3: Split/Cut/Trim MTS video by frames accurately
On the preview window, you can use Frame Selection Controller to seek to the corresponding frame of the current image, or seek the previous frame/next frame for locating desired frames accurately.
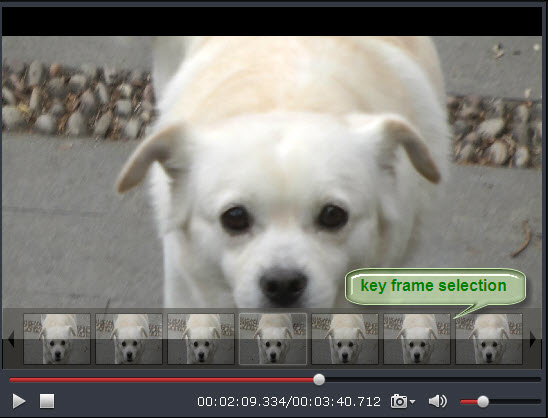
After the desired frame selected, please click “Cut” button on timeline to split/cut/divide the MTS clip at a very precise point. Then highlight the clips you want to delete from the timeline, and click the “Delete” button next to the “Cut” button to remove the unwanted parts.
Control buttons on Timeline
The control buttons on timeline help you locate frames accurately so that you can cut, trim, delete, and merge video clips in a much easier way.

1. Time Display Controller: Move your mouse cursor on timeline, the opposite time point will be displayed here. Once you entered a time point into the time display box and click enter, the Preview Window and Timeline will switch to the frame of this time point. This helps to locate to the accurate frame that you want.
2. Zoom in and Zoom out: Drag the bar on top-right of timeline to Zoom in or out for better view.
3. Preview: Highlight a clip on timeline and click Play button, you can preview. Double click on a clip can also begin preview.
4. Cut: Drag the pointer to the right place; Put your cursor to process bar under preview window and select the right frame; Click the Scissors button and you can cut the clip. And then you can rearrange order or delete.
5. Delete: Highlight the unwanted clip on timeline, and click Delete button. You can also delete it with right-click menu.
6. Trim: Put your cursor to the start or end point of a clip on timeline until it changes to trimmer. Drag the trimmer and you can trim off unwanted starting or ending.
7. Rearrange order: Drag and hold a clip to the right place until the place line shows. Drop the clip and it will be placed right there.
8. Merge and join: All files placed on timeline will be output as one file. So if you want to merge and join several clips, just drag them to timeline in right order.
Stage 4: Export MTS to MTS (M2TS to M2TS) without recompression
Choose “Output” in the main interface, and click “Plus” icon to add conversion task before selecting output format. Then switch to “Lossless” > “original” and click “Start” to begin exporting MTS to MTS without re-encoding.
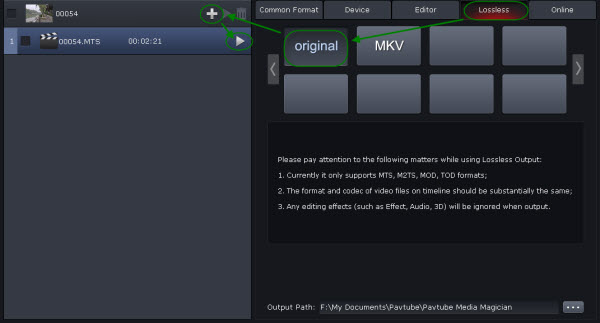
Please pay attention to the following matters while using Lossless Output:
1. Currently it only supports MTS, M2TS, MOD, TOD formats;
2. The format and codec of video files on timeline should be substantially the same;
3. Any editing effects (such as Effect, Audio, 3D) will be ignored when output.
 Free Trial Media Magician


