
 Home
HomeMore and more people love to create personal videos for sharing on YouTube. These people don't need professional video editing tool but for simple entry-level video editors. There are many video editing software packages available today which are easy to use and do some simple video prosessing tasks. Therefore, it can be an overwhelming task to choose the right video editing software for your needs.
How to choose the right video editing software for you who maybe a beginner? Which is the easy-to-use NLE application? What criteria should you follow when picking video editing tool for you? Choosing video editing software can be daunting. There are many types of video editing software, all at different prices and offering different features. So here, let's teach you how to choose the best video editor for beginner.
 3 Tips for Choosing the Right Video Editor
The Right Video Editing Tool Recommended
How to Edit Video with the Right Video Editor?
Part 1: 3 Tips for Choosing the Right Video Editor
Entry Level Video Editing Software
If you only want to edit some personal camcorder recordings or home videos for sharing on YouTube, a entry level video editing software should meet your needs. Features included in entry level video editing software include the ability to trim video clips from the beginning or end, string together multiple video clips, add very basic video effect. Entry level video editing software will, in the majority of cases, not allow you to trim video clips from the middle. Your title screen will also be very basic in nature, with white text on a black background. If you are using a basic digital camcorder, the software should have a camcordere wizard to make it easier to load camcorder footages.
Economic Price
That depends on your budget. How much money you plan to cost on a video editing tool will be the first and foremost on the list of factors to consider when purchasing a video editing package. If you're a beginner, I recommend you go for cheaper software. I know many people swear by the powerful editing suites like Adobe Premiere Pro, but for the average user, it is complete overkill. The cheaper packages save you money and will fulfill most of your video editing needs. You can always upgrade to better software when you're more experienced.
Video File Import And Export
The last factor you should consider is the ability to import and export various formats of video files. If you want to import DJI drone recordings, Canon footages and edit them, check the package to ensure you can import those video formats. Same thing for exporting video files - if you want your finished product to be a YouTube media files, ensure the package supports that feature.
The Right Video Editing Software Recommended
Pavtube Media Magician (Only $23) will be the best easy-to-use and feature rich editing tool for Windows XP/Vista/7/8/10. Such a great video editor for Windows helps you to edit all regular video formats to share with the worldwide.
Firstly, it can support various video formats to load such as
camcorder footages (AVCHD*(MTS, M2TS), AVCHD Lite*(MTS, M2TS), MXF, TOD, MOD, MOV, etc.)
other video formats (*.avi,*.divx, *.wmv, *.wma, *.asf, *.dvr-ms, *.wav, dts in wav, *.rm, *.rmvb, *.ra, *.mov, *.qt, *.mp4, *.3gp, *.3g2, *.dv, *.m4b, *.m4v, *.m4a, *.aac, *.flv, *.f4v from YouTube, Hulu, Fox, etc., *.dat, *.mpg, *.m2v, *.m2t, *.m2ts, *.ts, *.tp, *.evo, *.mkv, *.dv, *.flc, *.fli,*.gxf, *.pss, *.mvi, *.mtv, *.vdr, *.pmf, *.pva, *.k3g, *.vp6, *.nsv, *.nuv, *.dmskm).
Secondly, outputs the video you want in the formats of:
Common format: MPEG-2 (*.mpg), MPEG-4 (*.mp4), *.avi, *.wmv, *.mov, *.mkv, *.m2ts
Device: Andoid Tablets and smart phones, Windows Tablets and smart phones, iPad, iPhone, Apple TV, HD Player, PSP/PS3, HDV (*.mp4, *.m4v, *.wmv)
Editor: Avid Studio (*.mov), Adobe Premiere & Sony Vegas (*.wmv, *.mov, *.mpg), Adobe After Effect (*.mpg, *.mov), Cybelink PowerDirector (*.avi, *.wmv), Pinnacle Studio (*.mp4, *.mpg).
Lossless: Original format (*.mts, *.mov, *.m2ts, *.tod), MKV (*.mkv)
Online: YouTube (*.mp4, *.webm)
Thirdly, this video editing software has rich video editing function: trim, cut, combine in a few clicks, convert 2D to 3D, adjust brightness, contract, saturation, as well as add special effects like Aged Film, Simple Gauss Blur, edit video by frame, timeline editing without rendering, capture picture in certain frame, etc.
Fourthly, with Pavtube Media Magician, you can edit video, convert video to YouTube and then directly upload video to YouTube.
Fifthly, when loading camcorder videos to this video editing tool, you can get a camcorder wizard.
Sixthly, if import MTS/M2TS/MOD/TOD video with same codec, you can output lossless videos with original format or MKV. And on the timeline, you can accurately cut and trim unwanted commercials at any point and join them into one.
More features in Media Magician review.
How to Edit Video with the right Video Editing software?
Step 1: Load video files
A: Import Video from PC Hard Drive
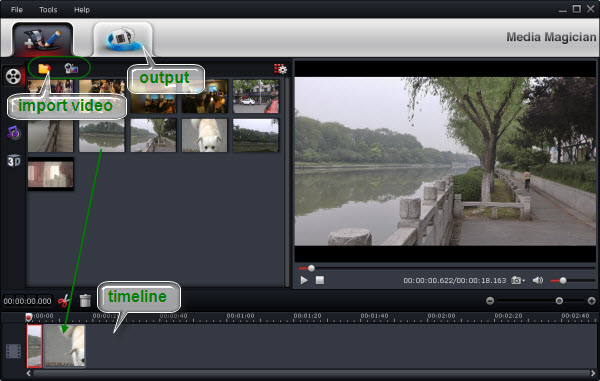
To import video files from hard drive to Media Magician, proceed as either way follows:
a. Drag and drop source files to source area directly
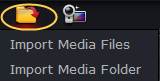
b. Click folder button to choose import media files, or import the whole folder.
Note: To load protected .tivo files, you have to set “Media Access Key” first. Find settings in ToolsàpreferencesàTivo
B: Import Source files from Camcorder
Before importing the video files from camcorder to the program, you should connect the camcorder to computer. If you have used the camcorder to record content on a SD memory card, please insert the card in the camcorder first. Start Pavtube Media Magician, then you will get a popup window asking for the connect confirmation. Just click “Yes” to continue.You will be taken to the follow window, all the files on the camera will be checked, and if you click Start it will import all the files into Media Magician library. You can uncheck the files you do not want to import. Preview it in player on your right hand side. While you check Backup Files to Local at the same time, Media Magician will help you capture/copy camera videos to your computer.
Step 2: Edit Video files
Drag and drop the video files to Timeline, then you can manage it into movie. This function makes splitting movies, merging video clips, trim video clips at just the right moment easy. Now enhanced with frame accurate seeking, you can split/cut movies at a very precise point. To learn the function of each icon.
Step 3: Choose format to output
Switch to Output window, you will find task area and profile area. Click + to add a task before choose a profile. Media Magician comes up with massive output formats (AVI, WMV, MKV, MPG, H.264, TS, MOV, MP4, etc). Here we take MP4 as a instance, just follow “Common Format” and choose “MPEG-4”. There is also a lossless output. But this output only adapt to MTS, M2TS, TOD, MOD formats. And any video effect will be ignored when output lossless.
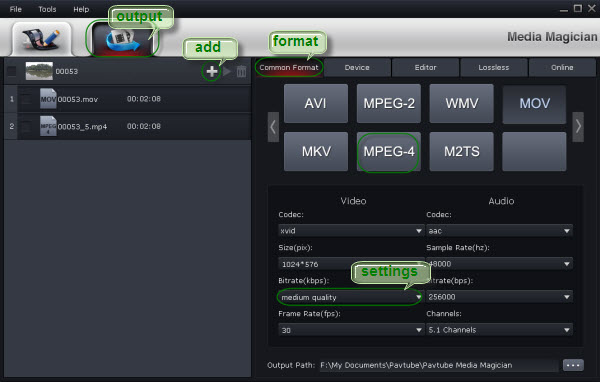
To limit the size of output file, you can set video bitrate down to desired value. Basically, the smaller bitrate you set, the smaller output file size it would be. But keep in mind there is noticeable quality degradation when you set any bitrate lower than 1500kbps.
Step 4: Start conversion
The software will specify a default folder to save converted videos. If you’d like to change the output location, please click ![]() to navigate to the folder you want to save videos to. After specifying all the settings, you can click
to navigate to the folder you want to save videos to. After specifying all the settings, you can click ![]() to start the conversion.
to start the conversion.

 Free Trial Media Magician


