
 Home
Home"My videos are profesional videos recorded from surgeries directly from the surgical microscope. It is a high definition digital recording which encoded by mpeg-4 not read by the iMovie so I need to convert it to Quiktime or DV"said from one of our users.
If you have similar situations just like this user's, then you may need to use those files for some presentations and lectures or sometime to upload time on Eyetube. But you can't use them before editing while the iMovie can't recognize those HD MPEG-4 Videos from surgical microscope. AIC .mov could be the best one, so do you know how to deal with that?
The best solution is to transfer those files into the format which iMovie can read successfully. Pavtube HD Video Converter for Mac can handle those HD videos no matter where they came from some Sony XDCAM camcorder or download from YouTube . And there are bunch of presets for you to choose. You can reduce the quality degradation to the least while import into NLEs smoothly. Even for newbie, it will work easily and nicely.


How to Transfer HD MPEG-4 Videos to load into iMovie Natively?
Step 1. Download , install and run HD Video Converter on Mac
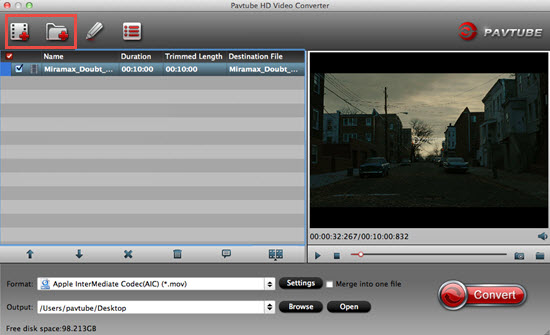
Install this HD MPEG-4 Converter on your Mac, then run it quickly. Click "File">"Add Video/Audio" to load your HD MPEG-4 videos into this app. Or you can click those two icons on the left-up corner to do this load job.
Step 2. Choose" iMovie and Final Cut Ex...">"Apple InterMediate Codec (AIC)(*.mov)" as your output format
You can go to the format list bar to choose the preset which will fit your iMovie best. Click "iMovie and Final Cut Ex...">" Apple InterMediate Codec (AIC)(*.mov)".

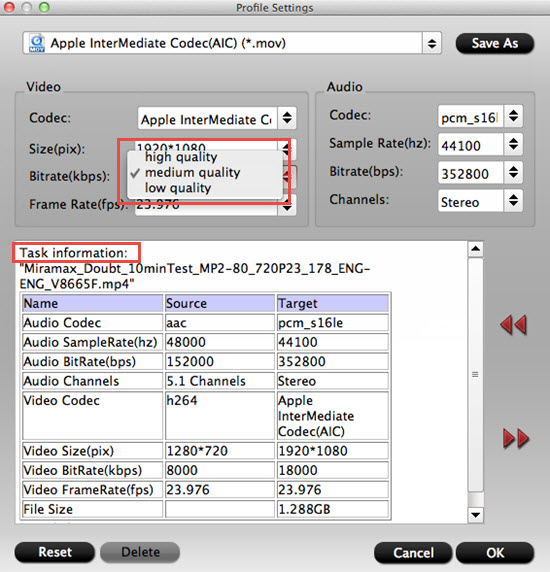
Step 3. Custom parameters to achieve a better quality
You can go to the "Settings" UI to adjust your parameters. If your videos didn't come from HD camera, or some HD recorder, you can increase the Bit rate to improve the quality of your videos. In this UI, the detailed information like the output file size, can be found in the below table.
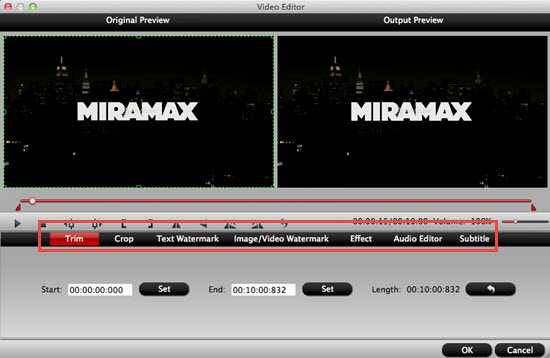
Step 4. Edit your videos to make it unique (optional)
If you just want to create some personal videos to enjoy or share online. Before the conversion, you can use the build-in editor to do some simple edits. Trim, crop can get rid of the part you don't need. Effect can make your videos more interesting, and under this option "Deinterlaced" can be chosen to make your videos much clear. Watermark and subtitles can be added if you want to protect your copyright.
Step 5. Start to convert HD MPEG-4 videos into
After all have been settled, just click this "Convert" in the main UI. After the conversion , you can click "Open output folder" if you forget to set the file location.
Tips :
Combine videos-you can choose the videos you want to combine, then click "merge into one file".

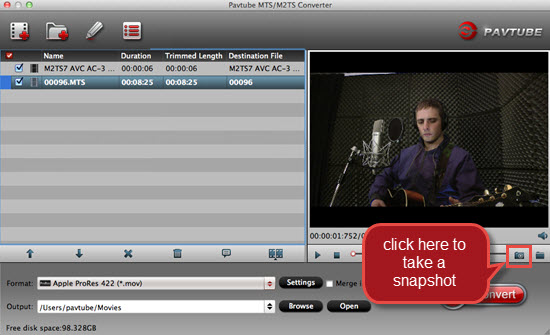
Snapshot- click this "camera" icon to take a snapshot of the scene, you can find the picture by clicking the "folder" icon next to the "camera"icon.
For newbie who just walk into the Mac world , how to transfer files into iMovie can be learnt here.
Pavtube HD Video Converter for win users can keep even improve the quality of your videos by the new codec H.265/HEVC.
 Free Trial HD Video Converter for Mac

Useful Tips
- Review of 5 Best HD Video Converter for Mac (macOS Sierra Included)
- Import DJI Mavic Pro 4K video to iMovie for Editing
- Import DivX to iMovie (iMovie 11 Included)
- How to Convert ASF to iMovie (iMovie 11 Included) on Mac?
- Superior iMovie Alternatives for Mac (MacOS Sierra)
- 2017 Top 5 Best HD Video Converters for Mac OS X El Capitan/Yosemite/Mavericks


