
 Home
Home"I felt blue today, I downloaded tons of YouTube videos and excited to import them to iMovie to do further editing but failed in the end."
Have you happened to be in same dilemma before? This happens because iMovie does not natively support FLV files, and it only supports formats like DV (standard definition), HDV (high definition), MPEG-2, and AVCHD from Camcorders, MPEG-4, and MOV files. In order to add YouTube FLV videos to iMovie smoothly, you should convert YouTube FLV to iMovie compatible formats like MOV, MP4 firstly. Then you can achieve your goal without trouble.
How to Convert YouTube FLV videos to iMovie on Mac?
1. Add YouTube videos.
Download YouTube FLV to iMovie Converter to your Mac computer, install and launch it. Click "Add Video" button to load YouTube Videos.
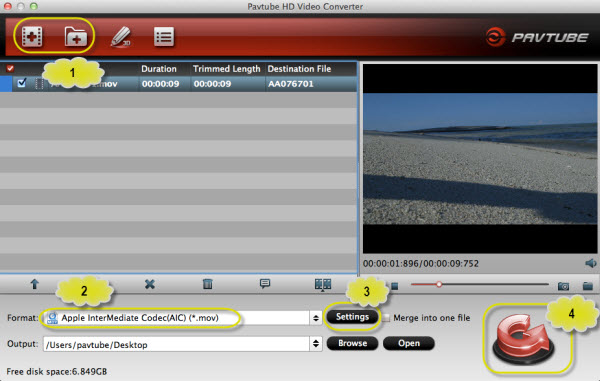
2. Select output format.
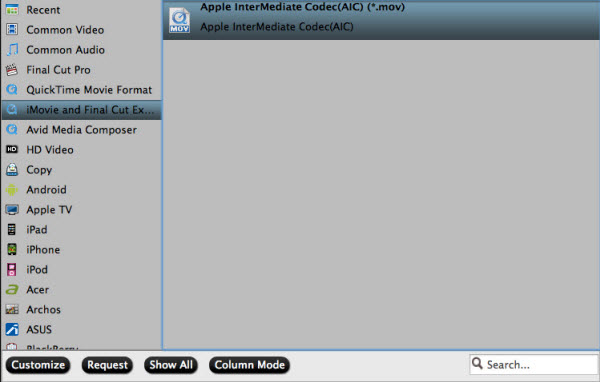
Pavtube HD Video Converter for Mac includes multiple video profile presets for different devices, such as Final Cut Pro, Avid Media Composer, FCE, and iMovie.
Click the "Format" drop-down list, you will get the perfect preset "Apple InterMediate Codec(AIC) (*MOV)" under "iMovie and Final Cut Express" for iMovie.
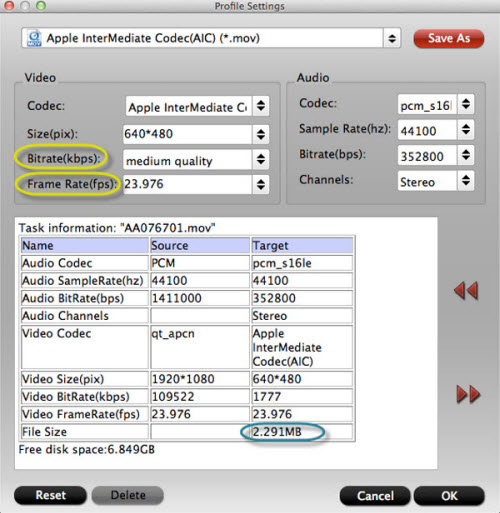
Tip: Do not satisfy the video quality from the profile preset? Don't worry, you are allowed to customize profile parameter, including frame rate, bitrate, video size, vide and audio codec.
3. Start conversion of YouTube FLV to AIC MOV for iMovie.
Click the big "Convert" icon to start conversion process. Once finished, you could locate the generated MOV files and import the converted Youtube FLV videos to iMovie.
 Free Trial HD Video Converter for Mac

Useful Tips
- Convert AVI/MKV/MP4/M4V/FLV to Apple ProRes codec for FCP editing
- How to convert MTS to FLV, F4V and SWF format for uploading to Internet?
- How to install Adobe Flash Player on Samsung Galaxy S4?
- How to Import YouTube FLV to iMovie 11/9/8 for editing on Mac
- How to convert MKV to MP4, MOV, and FLV on Mac?
- Convert MOD to FLV with MOD Converter


