
 Home
HomeMagix Movie Edit Pro 14 is quite popular among DV cam lovers and film amateurs due to its flourish video effects and powerful editing and burning features. Yet it does not work with all the footages created by HD camcorders, even if you have activated MPEG-4/H.264 codec. For instance, when you try to import the HD MOV footages (H.264 MOV, 1920*1280p) took with Canon EOS 7D or MTS (MPEG-4 MTS) shot with Sony HDR SR10 to MEP14, an error message will definitely pop up to tell you it is not a valid AVCHD format. Actually footages taken with AVCHD and some other HD camcorders cannot be transferred to Movie Edit Pro 14, as the app does not recognize them. What you need is to transcend the files (HD MOV, MTS, TOD etc) into something more editable for MEP14, like AVI and WMV. Here I would like to recommend an easy-to-use but powerful converting tool to you, Pavtube HD Video Converter. It focuses on HD Video conversion and will enable you to handle videos of any formats in MEP. A step-by-step guide is displayed below for your reference:
Step One. Getting started
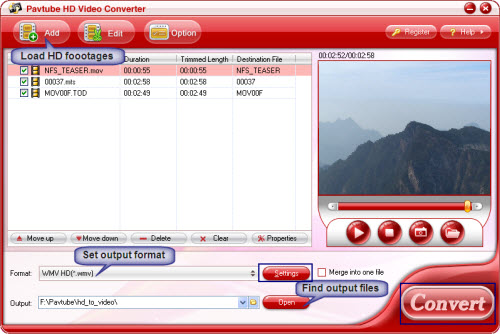
Transfer the footages you’d like to edit from camcorder or memory card to PC. Install and launch HD Video Converter, click “Add” to load the HD video clips, or directly drag the files into file list. By default, the files are selected. You could view the files in preview window, simply highlight the file and click play button.
Step Two. Adjusting audio and video settings
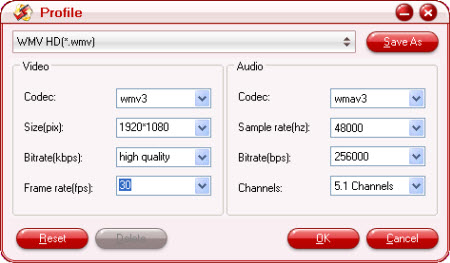
Click “Settings” and customize advanced audio and video parameters. Now that we are converting HD files(MTS, MOV, TOD) to edit in Magix Movie Edit Pro, it will be just ok to set output format as Common Video->AVI/ WMV, 720*480p, 25fps. For the users who are unwilling to degrade the HD video quality, a recommended configuration could be HD Video-> DivX HD (*.avi), 1920*1080p, 25mbps, 30fps or HD Video-> WMV HD (*.wmv), 1920*1080p, 25mbps, 30fps. You may set audio channels to 5.1 in order to get surround sound.
Step Three. Converting HD footages to editable formats
Finally, click on “Convert” button to start converting HD footages to editable files for MEP 14. You could set auto shutdown in progress window or leave it there and come back later.
After conversion the videos can be easily loaded to Magix Movie Editor Pro 14 and above version for editing. To locate the converted files, click the “Open” button next to output path. Enjoy editing and burning your own DVDs!
If you are interested in Pavtube HD Converter, you may download its free trial or buy it online via the below links.
 Free Trial HD Video Converter

Useful Tips
- Best Workflow of Canon 5D Mark IV 4K MOV with FCP X
- Canon MXF to Sony Vegas Converter-Edit MXF in Sony Vegas
- Convert Canon XF305 MXF Footage to VOB Format for Playing on TV
- How to import Canon MXF Video to Cyberlink PowerDirector for Editing?
- Convert Canon 60D MOV to 1080p AVI/WMV for Editing and Playback
- How to Convert Canon EOS 550D T2i Video to FCP Friendly Format?


