
 Home
HomeCanon is a popular camera brand that has been manufacturing cameras since 1984. This Japanese multinational company manufactures standard as well as high-end professional camera and camcorders. With it, you can shoot your outside sport videos or your birthday party. If you want your videos more attractive and professional, you also can import your Canon videos to Davinci Resolve for further editing and creating.
However, before you load Canon camera videos to Davinci Resolve, you should know whether the Canon videos are supported by Davinci Resolve or not. Normally, many Canon cameras record as an h.264 stream embedded in a MOV and MP4 file while some are AVCHD folders. When your Canon videos are MOV videos, you probably can directly import your Canon video to Davinci Resolve, otherwise, you need to convert your Canon MP4 and AVCHD folders to Davinci Resolve supported file format with a video converter.
Davinci Resolve supported file formats
DaVinci Resolve supports these following video codec and format
Video codec: QuickTime, Prores, DNxHD, MXF, DPX, CIN, EXR
Image format: TIFF, JPEG, MOV, TGA, BMP
Camera raw format: Blackmagic CinemaDNG RAW, ARRI Alexa RAW and Amira. RED One, EPIC , Scarlet and Dragon R3D files including +5K, monochrome and HDRx images, Cineform , Cineform 3D, Phantom Raw, GoPro, Canon, Canon C300, C500 and 1D, 5D, 7D, Sony F65/F55/F5 RAW, Sony XAVC variants
Best Canon Video to Davinci Resolve Converter
Pavtube Video Converter for Mac is a video converter that works with the most popular video formats on the market, offering remarkable conversion speed and easy to navigate interface. With it, you can easily convert Canon MOV, MP4 and AVCHD folder files to Davinci Resolve supported DNxHD and Apple ProRes 4444, Apple ProRes 422 (HQ), Apple ProRes 422, Apple ProRes 422 (LT), Apple ProRes 422 (Proxy) with excellent video and audio quality. Normally, each of these formats sports its very own pack of settings but you still can pick your own framerate, video and audio codec, resolution and output folder.
What's more, you can do some simple editing on this file. For example, you can trim the unwanted part of the Canon video or remove/replace the audio in the video file. You also can add some text/video/image watermark to the Canon recordings if you plan to upload the recordings to YouTube after edited in Davinci Resolve. For Windows users, Pavtube Video Converter is recommended to convert Canon to Davinci Resolve accepted video format.


Supported Canon Cameras:
Canon EOS 7D Mark II | Canon EOS 80D | Canon PowerShot ELPH 190 IS | Canon PowerShot G9 X Mark II | Canon SX530 HS 9779B001 | Canon SX530 HS 9779B001 | Canon PowerShot SX720 | Canon EOS 5D Mark IV | Canon EOS 5D Mark III | Canon EOS-1D X | Canon EOS 7D Mark II | Canon EOS 5DS | Canon Rebel T6s
Steps to Convert All Canon Video Files to Davinci Resolve
Step 1. Load Canon video files
Here you can directly drag & drop the Canon video files to the converter, or click “Add Video” or “Add from folder” button on the top menu to browse and choose Canon video files. Batch conversion is supported here. You also can import Sony XDCAM, Samsung H.265 video and other source video to convert to Davinci Resolve.

Step 2: Specify output file format for Davinci Resolve
Click "Format" bar, from its drop-down list, select Davinci Resolve best supported editing codec such as "Avid DNxHD (*.mov)" from "Avid Media Composer" main category menu extended list. Click “Settings” button if you’d like to customize advanced audio and video parameters like Video Codec, aspect ratio, bit rate, frame rate, Audio codec, sample rate, audio channels.

Step 3: Edit video. (Optional)
Before loading your video into Davinci Resolve for professional video editing, you can complete some basic video editing task with the program's built-in video editing function. Check an item to active the "Video Editor" function, then click the pencil like icon on the top tool bar to open the "Video Editor" window, you can trim video length, crop video black bars, add watermark, apply sepcial rendering effect, remove/replace audio in video, etc.

Step 3. Start Canon video to Davinci Resolve conversion
After all the settings are done, simply click the Convert button to start transcoding Canon video files to DNxHD mov for Davinci Resolve on Mac. When the conversion is done, click "Open Output Folder" button to pop out the folder with converted files, then you can add those files into DaVinci Resolve Media Pool without any issues.
Import Media Files to Davinci Resolve
1. In order to import media from your media storage to the media pool, you have to select the media that you want to upload and then just drag it to the media pool.
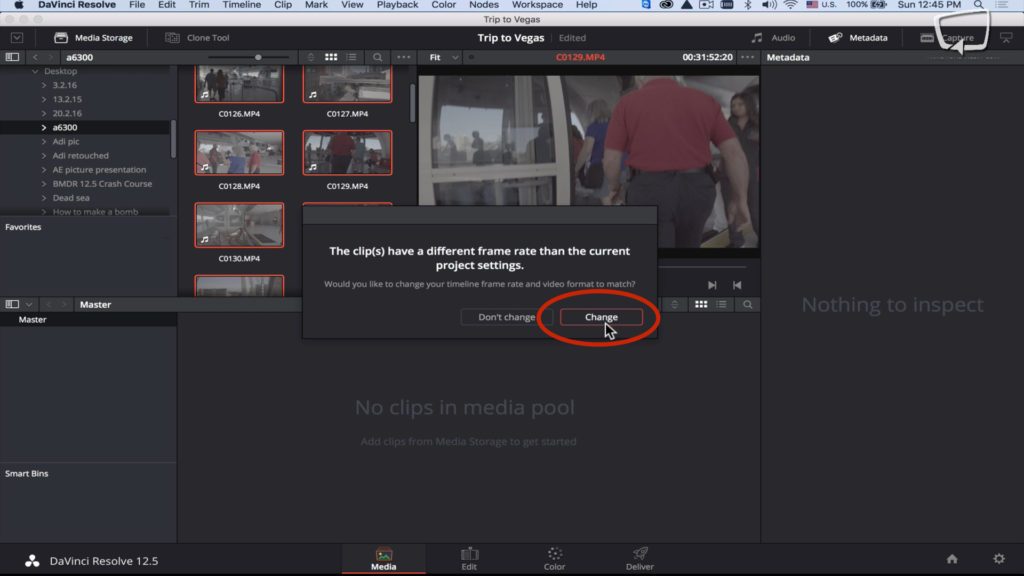
2. If you get a pop up message that asks you if you want to change the frame rate of the timeline to the frame rate of your media because they don’t match, you should click on “Change”.
3. By double clicking on a video in the media pool, and pressing the play button you can simply preview the shot.
4. In order to delete a video from the media pool just right click it and press “Remove Selected Clips”
 Free Trial Video Converter for Mac


