Be there with 2010 FIFA World Cup – Convert the football clips for editing
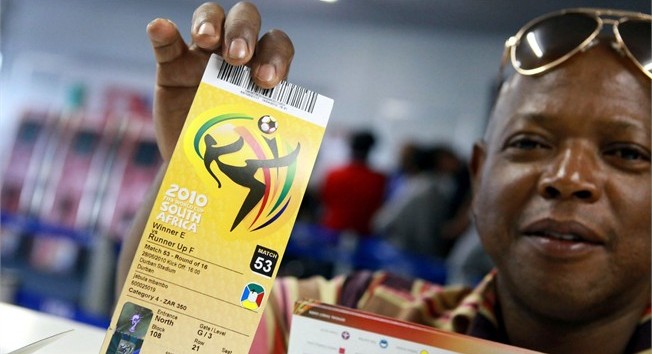
"I can’t believe I’m one of the guys who will watch the final and the opening game. I’m so happy now it’s not really possible to explain in words," said by a South African fan. Indeed, it would be more than great to experience this wonderful tournament in South Africa. Most football fans had spent hours, some overnight and had to endure the scorching morning conditions to queue for tickets. If you are lucky enough getting the chance to cheer for your favorite team at the scene, or being a witness of the final, you should not forget to bring the camera/ camcorder and record the most exciting match. And Pavtube HD Video Converter helps you to edit all the high quality footages and share your recordings easily, no matter they are shot in MTS, MOD, TOD or MOV format, HD or SD mode. In the following guide I would like to share with you the easy procedure of converting HD footages with Pavtube HD Video Converter.
Step One. Getting started
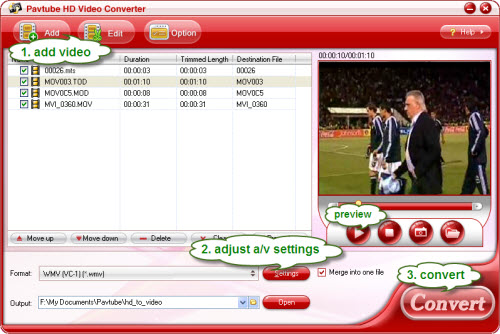
Transfer the footages you’d like to edit from camcorder or memory card to PC. Install and launch HD Video Converter, click "Add" to load the HD video clips, or directly drag and drop the files into file list. By default, the files are selected. You could view the files in preview window, simply highlight the file and click play button.
Step Two. Adjusting audio and video settings
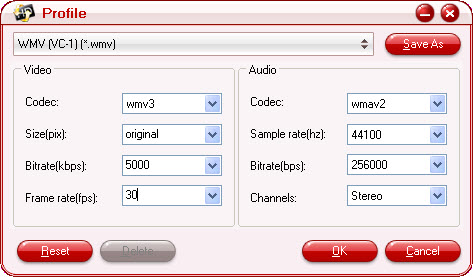
Click "Settings" and customize advanced audio and video parameters. Now that we are converting the football recordings (MTS, MOV, TOD) for edit, you may select a compatible video format with your editing software. Take Adobe Premiere as example, editable formats are WMV, MPG and MOV, so you can click on the format bar and find the row of Adobe Premiere/ Sony Vegas, then elect a desired formats. Here I select WMV (VC-1) as output format (see as below shows). The footage was recorded in Full HD 1920*1080 size, so I select ‘original’ to keep the 1920*1080 resolution, and set Bitrate to 5000kbps, Frame rate to 30fps to maintain best video quality.
There are also various other video and audio formats for different editing software such as Sony Vegas, Avid, Magix Movie Edit Pro, Pinnacle Studio, etc. Just make sure the format you select is compatible with the editing software you use.
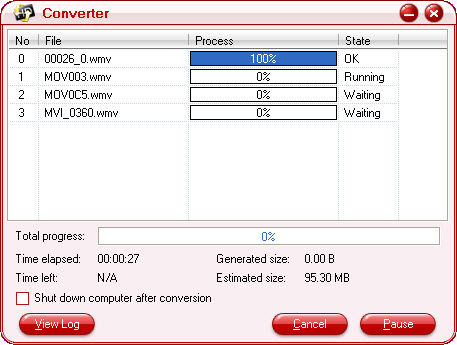
Step Three. Converting HD footages to editable formats
Finally, click on "Convert" button to start converting HD footages to editable files for Adobe Premiere. You could set auto shutdown in progress window or leave it there and come back later.
After conversion the videos can be easily loaded to Adobe Premiere for editing. To locate the converted files, click the "Open" button next to output path. The converter also allows you to convert the footages to flash videos (*.flv, *.f4v, *.swf) so that you can share the videos with more football fans on Youtbe and other video sharing sites.
