
 Home
HomePavtube Media Magician is not a substitute for full-featured video editing software if your goal is professional looking videos. However, if you’re just doing home movies of summer vacation for the family, and you want to take an hour’s footage and extract only five minutes’ worth for fun, this makes it very quick and easy to do that. On the other side, it can do a few limited special effects and brighten or darken clips, including 3D rendering. The software runs on Windows 7, Vista, or XP SP3; there's a Mac version for OS X 10.8, 10.7 and 10.6. I tested the Media Magician for Windows version, which includes the speedup of hardware acceleration (Nvidia CUDA and AMD APP computing).
Software Availability
Pavtube Media Magician for Windows | Pavtube Media Magician for Mac
Getting Started
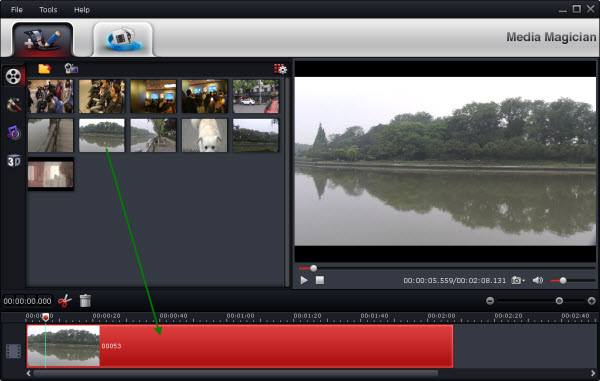
When you fire up Media Magician for the first time, you'll see its main window, which features media library, timeline and media player. Above these, there’re 2 tabs at the top left for you to switch between input and output settings.
The Media Magician uses a wizard interface to take you through the workflow of importing, organizing, editing, previewing, and finally outputting a film. It comes with a camera wizard that allows you to quickly transfer video from most cameras- including digital cameras (Canon Vixia, Panasonic Lumix), HDD based camcorders (Sony Handycam, Panasonic HD, JVC Everio, etc) and flash drive cameras – to Mac HDD. It is easy to filter and choose desired clips by film date or file type for downloading to your computer.
Easy Editing
Editing in Media Magician is quite intuitive. Any video from the media library can be dragged and dropped to the timeline where you cut video by frame-accurate, trash undesired frames, join multiple AVCHD clips together, set video effect including 3D Red-Blue/Red-Cyan effect, mute (or articulate) audio, rotate video, take snapshot, etc.
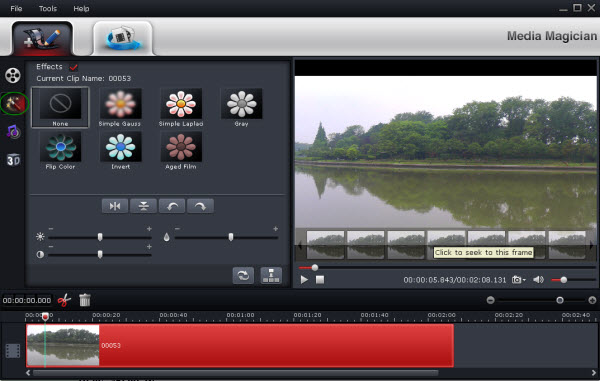
Set simple 2D special effects
To do simple 2D special effects, select a clip in timeline and click on the “Effect” button. You can choose from Simple Gauss, Simple Lapaci, Gray, Flip Color, Invert and Aged Film. To brighten or darken video, drag the cursor to set video brightness, contrast and saturation.
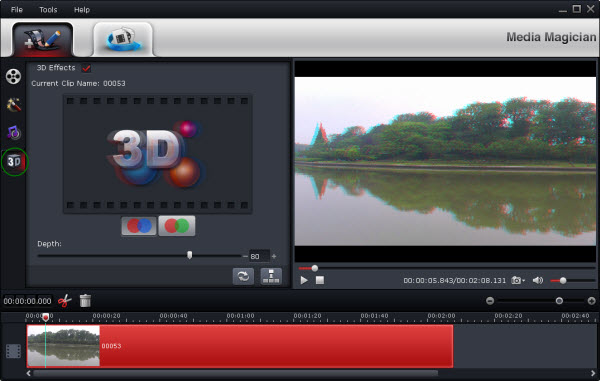
Set 3D Effects
Media Magician also provides 3D output effect. To set 3D effect, select a clip in timeline and click on the “3D” button. One click on the “3D Effects” box to enable red-cyan or red-green effect – and you can set depth manually.
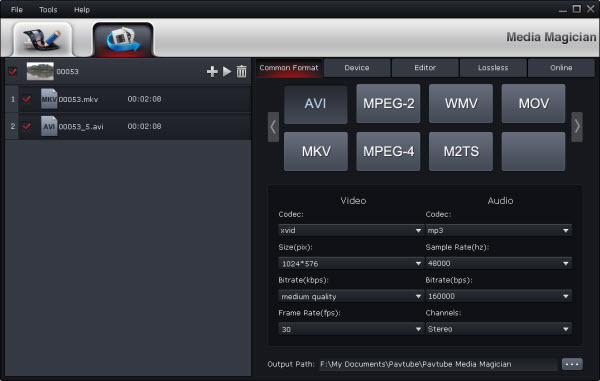
Versatile Output
What set Media Magician apart from other video editing software is its massive output formats. Lossless M2TS/MKV output is intended for seamless merge of multiple AVCHD clips; under Editor tab there are intermediate codecs for mainstream video editors so that professionals can further edit the footage natively in FCP, Avid, Adobe AE, etc; the Online tab offers a time-saving way for users to upload their work to YouTube; also there’s a Device tab under which you can find hundreds of presets for almost all the devices that play video, from tablets and smartphones to HD media players and video game console. This really makes sense for average users who has no idea what codecs are or what format to use- just find your device in the list and choose the preset.
Cons
It’s lacking many essential ingredients for serious video editing, including transitions, importing stills, title pages, and overlapping clips to “fade” from one to another which is very useful when editing out small parts of a longer clip. And it doesn’t have any image stabilization tools, not surprisingly. It does not display an audio ribbon and other comments indicate limited audio editing capabilities. For any serious editing you want to be able to add sound effects such as music or commentary.
 Free Trial Media Magician


