
 Home
HomeAccording to Apple, iPad gives up to 10 hours of surfing the web on Wi-Fi, watching video, or listening to music. By any means, it is a great portable video player. So why not transfer you TiVo recordings to iPad? No matter where you are, whenever it is, just take out the iPad and enjoy your favorite TV programs or football matches freely! Nice idea, isn’t it? In the following guide I would like to share with you how to get your TiVo recordings ready for iPad (iPad Wi-Fi +3G). In order to enjoy TiVo recordings on iPad, you got to transfer TiVo to your Mac and then convert the TiVo files to iPad compatible formats.
1. Transfer TiVo recordings to Mac (or MacBook)
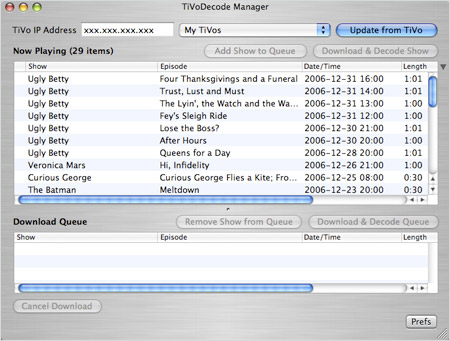
Once you’ve recorded your favorite shows on your TiVo box, you can transfer them to your Mac with certain software as long as your TiVo box is connected to your home network. Although the TiVo Desktop software for the Mac (supplied by TiVo) does not allow user to transfer TiVo recordings to Mac, there are other freeware can accomplish this task, like the TiVoDecode Manager. Run the app, enter your TiVo's IP address in the TiVo IP Address box. Next click the Prefs button in the lower-right corner. Fill in the Media Access Key. A list of shows on your TiVo will appear in the Now Playing list. Select the show and click Add Show To Queue. The selected show now appears in the Download Queue list. Click Download Location to select where you want to save it. The app allows you to convert TiVo shows to MPEG-4 video for iPod. Of course you can play these TiVo shows with QuickTime Player. To convert the recordings for iPad, you can use Pavtube Video Converter for Mac.
2. Convert TiVo recordings to to iPad compatible formats.
There are too many converting tools on market, yet few do convert TiVo files. A recommended one is Pavtube Video Converter for Mac, which converts TiVo files as well as HD footages, Flash videos, Matroska container format, tec.
Before converting TiVo files, let’s take a look at the iPad-supported video formats:
H.264 video up to 720p, 30 frames per second, Main Profile level 3.1 with AAC-LC audio up to 160 Kbps, 48kHz, stereo audio in .m4v, .mp4, and .mov file formats;
MPEG-4 video, up to 2.5 Mbps, 640 by 480 pixels, 30 frames per second, Simple Profile with AAC-LC audio up to 160 Kbps, 48kHz, stereo audio in .m4v, .mp4, and .mov file formats;
Motion JPEG (M-JPEG) up to 35 Mbps, 1280 by 720 pixels, 30 frames per second, audio in ulaw, MacM stereo audio in .avi file format.
Now please refer to the converting procedures below:
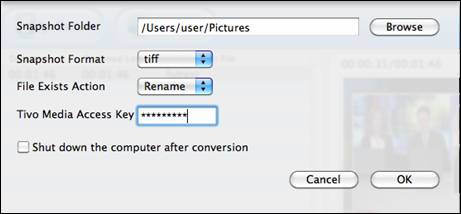
Step 1. Input Media Access Key.
Launch Pavtube Video Converter, Click on the "Option" button, switch to TiVo tab, and enter your Media Access Key. Click "OK" to confirm.
Step 2: Import TiVo files.
Now click "Add" to import all .tivo files to Pavtube Video Converter.
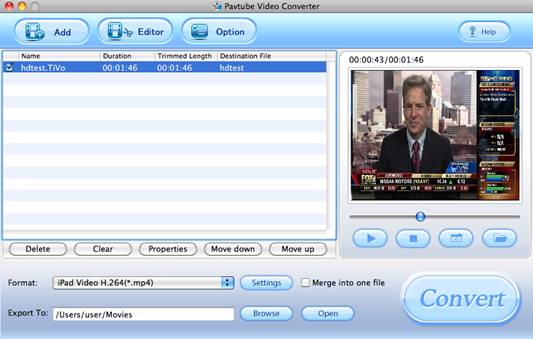
Step 2: Select an output format for iPad, iPad 3G, or iPad Wi-Fi+3G
Click on the pull down menu of "Format" and then tap "iPad", after that, you will see three options optimized for iPad showing as below, including "iPad HD Video (*.mp4)", "iPad Video H.264 (*.MP4)", "iPad Video MPEG-4 (*.mp4)". You can select any one of them according to your own needs.

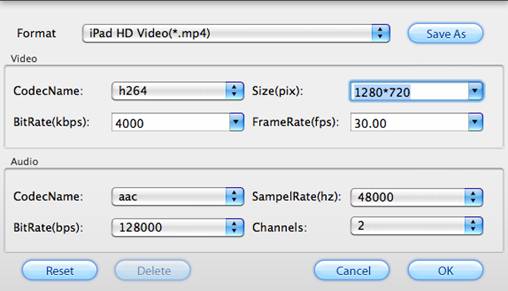
Step 3: Click "Settings" button to adjust audio and video parameters
You are allowed to adjust codec, aspect ratio, bit rate, frame rate, sample rate and audio channel in the popup window to optimize the output file quality. Following are the recommended settings to get best playback quality.
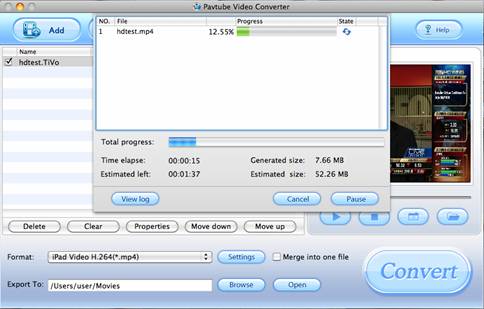
Step 4: Click "Convert" button to start conversion.
Once finished, you can get the output files for your iPad via clicking on "Open" button effortlessly. Afterwards, connect your iPad to your Mac, and then sync the videos to iPad via iTunes.
Provided that you prefer using PC to Mac, Pavtube Video Converter is a better choice for you to convert TiVo recordings to iPad.
 Free Trial Video Converter for Mac


