
 Home
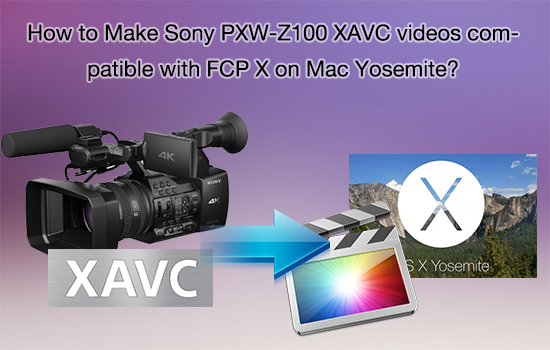
HomeOne of our users said "I just bought a Sony Z100 for 4K acquisition over MXF wrapped XAVC in FCP X, I have added all of the Sony plug-in options with no lick. Sony's content browser allows me to palyback the footage, but does not allow me to export to Final Cut. Sony 's "Camera Import Plug In Version 1.0 for Apple Final Cut Pro x" also did not work and didn't seem to make any noticeable changes to my system". This may be very annoying that you owned bunch of HD XAVC MXF files that you can't do anything on them.(Sony PXW-Z100 first impression review) So is there any easy and effective way to import Z100 XAVC MXF files into FCP X for nicely editing on Mac Yosemite?
Pavtube Video Converter for Mac can be your best choice, it can handle not only just MXF files in XAVC but also other formats like AVI,MKV,MOV,MP4,FLV,F4V, MP4, MTS,VOB can also be imported into FCP X without any problem. And with the build-in presets, you can save bunch of time to adjust your parameters before converting.


How to Convert Z100 XAVC Videos into FCP X on Mac Yosemite?
Step 1. Install, run and load Z100 XAVC videos
Free download this XAVC Converter on your Mac, then run it and go to the top of the main UI , click "File">"Add Video/Audio" to load your files. Or those two icons can also be used to do this step. Directly drag-and-drop can also available which will save you many times, or if the files are such "orphan" that don't have intact structure, they can be imported without any problem.

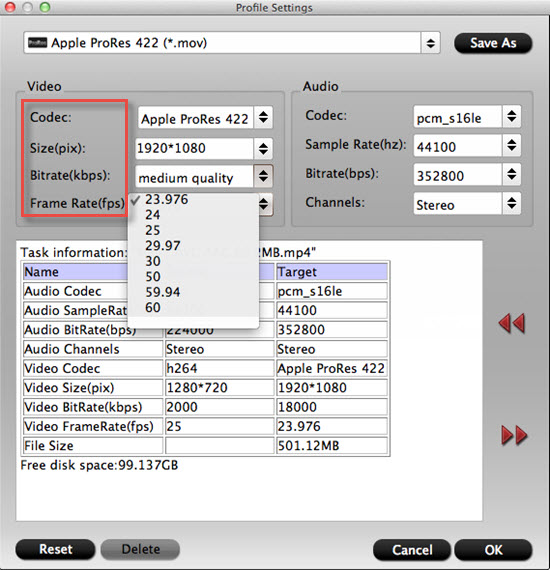
Step 2. Choose "Apple ProRes 422 (*.mov)" for FCP X on Mac Yosemite
Go to the format list then choose "Final Cut Pro">"Apple ProRes 422 (*.mov)" as your output format. That will fit the FCP X most.

Tips:
If you don't care about the output file size and want the best quality of your videos, then just go for Apple ProRes 422 HQ (*.mov). (Differences among Apple ProRes codec )
Step 3. Adjust your parameters to fit in different playback platform
If you just want the original videos without any changes, then you can skip this step. Or you can click "Settings" to adjust your parameters, Bit rate, Frame rate, Audio Channels can all be adjusted in this UI.
Tips:
If your FCP is 7 and when you output your files which load into this FCP 7 can't be read. Error message pop up as "Unknown file, access denied", then you can try to adjust your Frame rate from 23,976 to 25 which corresponding your sequence settings.
Step 4. Turn XAVC videos into unique short video(optional)
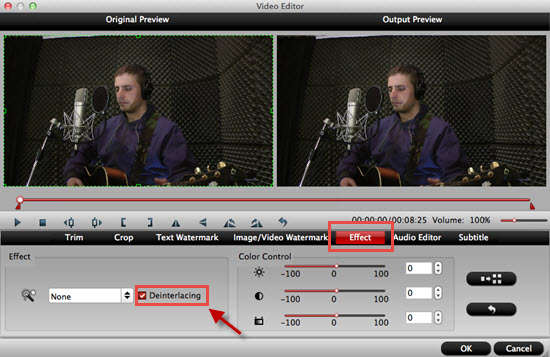
IF you want to playback your videos into several different platforms like iPad or other NLEs like Adobe Premiere Pro, which some edits must be done. Then with the build-in editor you can simply doing this job by several steps. You can click this "Pencil" icon to go to this UI. Trim , crop the part you don't need, add subtitles, watermark for fun, under "Effect", you can switch mode between "Interlaced" and "Progressive".
Step 5. Start to convert Z100 XAVC into Apple ProRes 422 (*.mov)
After setting the file location, then click the "Convert" on the main UI.After that , you can find your converted files in the file location. But if you forget to set the location, you can still find them from the default location by clicking "Open output folder".
Additional tips:
1. How to transfer media files into FCP X may be very useful for some newbie.
2. If your camera is Sony F5/F55, click here to know how to deal with XAVC videos for FCP X.
3. For Win users, XAVC can be handle without any problem by Video Converter. New features like output as H.265/HEVC will maintain the good quality of original ones at most.
 Free Trial Video Converter for Mac


