
 Home
HomeDavinci Resolve 4K video editing issues
I have a powerful laptop with an i7 Quad Core CPU, 16GB RAM and an nVidia 860 graphics card. My machine plays native 4K video clips fine recorded on my iPhone 6s. But in Resolve 12 they stutter badly and also after rendering stutter badly again. Tried Best and High MPEG settings and also .h264. Is this a known issue? Grateful for any advice.
I've been having a play with Davinci Resolve 12.5 due to it having powerful colour grading capabilities. However when I try to render 4k footage with it (footage straight from the H's SD card) the resulting footage is a bit jerky/choppy. Footage straight off the card is fine. Anyone who uses Resolve 12.5 able to tell me what setting they use please for export/ render? I'm fairly new to this editor...
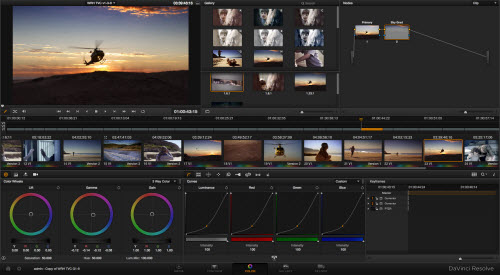
Davinci Resolve 4K video editing workflow
From Davinci Resolve official website, we get the information that the newest Davinci Resolve 12.5 only supports to import UHD video which means the 4K footage must be shot with a resolution of 3840x2160. If you try to load a 4K video footage with the resolution of 4096 x 2160, you will definitely suffer video playack choppy/jerky/choppy issues.
Compress 4K for Davinci Resolve Editing
To fix this resolution incompatible issue, it would be idea for you to perform a resolution downscaling process. Here, a simple to use and workable program called Pavtube HD Video Converter for Mac (best Mac HD Video Converter review) is highly recommended to you. The program not only assists you to compress 4K to UHD or compress 4K to 1080p for smooth editing workflow with Davinci Resolve, but also does you a great favor to transcode unsupported 4K formats to Davinci Resolve supported file formats such as QuickTime, Prores or DNxHD codec.
Trim/Merge/Split/Crop 4K video
Before loading 4K video into Davinci Resolve, you can do some simple video editing with the program's built-in video editing functions. You can trim or cut off video to remove unwanted parts or segments, split large video into small clips by file size, count or length, merge separate video into one, Crop video to remove unwanted black edges or unwanted area.
For editing 4K video on Windows platform, just download the Windows version - Pavtube HD Video Converter.


Step by Step Guide to Convert and Compress 4K Video for Davinci Resolve Editing
Step 1: Load 4K video into the program.
Open the program, click "File" menu, from its drop-down option, select "Add Video/Audio" to load 4K video to the program.

Step 2: Choose output file format.
Click "Format" bar, from its drop-down list, select Davinci Resolve best supported editing codec such as "Avid DNxHD (*.mov)" from "Avid Media Composer" main category menu extended list.

Step 3: Compress 4K to UHD or 1080p.
Click "Settings" to open the "Profile Settings" window, here you can change the output file resolution as "3840*2160" or "1920*1080" for smooth editing workflow with Davinci Resolve.
Step 4: Edit video. (Optional).
Check an item to active the "Video Editor" function, then click the pencil like icon on the top tool bar to open the "Video Editor" window, you can trim video length, crop video black bars, add watermark, apply sepcial rendering effect, remove/replace audio in video, etc.

Step 5: Begin the conversion process.
After all the settings are done, click right-bottom "Convert" button to begin to convert and compress 4K video to Davinci Resolve compatible UHD/1080p resolution with the codec of DNxHD.
When the conversion is completed, you will have no problem to import video to Davinci Resolve for smooth post video editing workflow.
 Free Trial HD Video Converter for Mac

Useful Tips
- Review of 5 Best HD Video Converter for Mac (macOS Sierra Included)
- Import DJI Mavic Pro 4K video to iMovie for Editing
- Import DivX to iMovie (iMovie 11 Included)
- How to Convert ASF to iMovie (iMovie 11 Included) on Mac?
- Superior iMovie Alternatives for Mac (MacOS Sierra)
- 2017 Top 5 Best HD Video Converters for Mac OS X El Capitan/Yosemite/Mavericks


