
 Home
HomeH.264 is a high efficient and highly-compressed video format that used by many cameras for capturing their images. When the shooting is completed, people may find that it can be frustrating to find the right tools to complete some simple H.264 editing such as trimming a long clip into smaller ones, cropping out the black borders or merge separate video clips into one file, etc. In addition, most video editors in hand may force video re-encoding upon export, which results in potentially-long render times as well as degradation in quality. Although some higher-end tools such as Premiere Pro CC can export in ways that minimize re-encoding, however, it only works with certain codecs and containers (for example, Prores in QuickTime).
Review of best H.264 Video Editor
For simple and quick H.264 Video Editor, we highly recommend downloading Pavtube Video Converter Ultimate. The program is available in both Windows and Mac version. It is very easy to use, no matter experienced user or fresh could handle it very well. You can efficiently complete the following basic H.264 video editing task with just few clicks.
- Correct video orientation by flipping video horizontally or vertically or rotating the video clock-wise or counter-clockwise
- Trim or cut video by removing the unwanted parts at the beginning or end of your video clips.
- Crop off video black edges or unwanted size area
- Add video/image/transparent text watermark as a logo to protect the copyright and help promote your brand.
- Apply special rendering effects such as Simple Gauss Blur, Flip Color, Invert, Aged Film to make the video more amusing.
- Correct color by by adjusting brightness, contrast, and saturation.
- Deinterlace interlaced video into progressive form to keep good image quality.
- Replace/remove original audio in video or set audio fade in/out effects
- Insert online downloaded external SRT/ASS/SSA subtitle files to the videos as hard subtitles.
- Arrange video footage order on the main displaying and merge video into one single file.
- Split large video into small parts or segments by file size, count or length.
Related article: Best 4K Video Editor | Best Free MP4 Video Editor | Best Subtitle Editor
Edit H.264 video without re-encoding
Once you've done above editing and got the desired H.264 video that you want, you can then either choose to export the H.264 to a variety of different file formats, but you can also choose to output the same file format as original H.264 file format while keep all other profile parameters unchanged. Then you can get an output H.264 video with almost no quality loss.
The program works with both HD and 4K H.264 video wrapped with various different container file format such as AVI, MP4, MOV, etc that's produced from various resources such as cameras, smartphones or other device recorders. Thanks to its batch conversion mode, you can load multiple H.264 video into the application for editing at one time to save your precious time.
A Simple Guides to Edit H.264 Video with the Best H.264 Video Editor
Step 1: Load H.264 Video.
Download the free trial version of the program. Launch it on your computer. Click "File" menu and select "Add Video/Audio" or click the "Add Video" button on the top tool bar to import H.264 Video into the program.
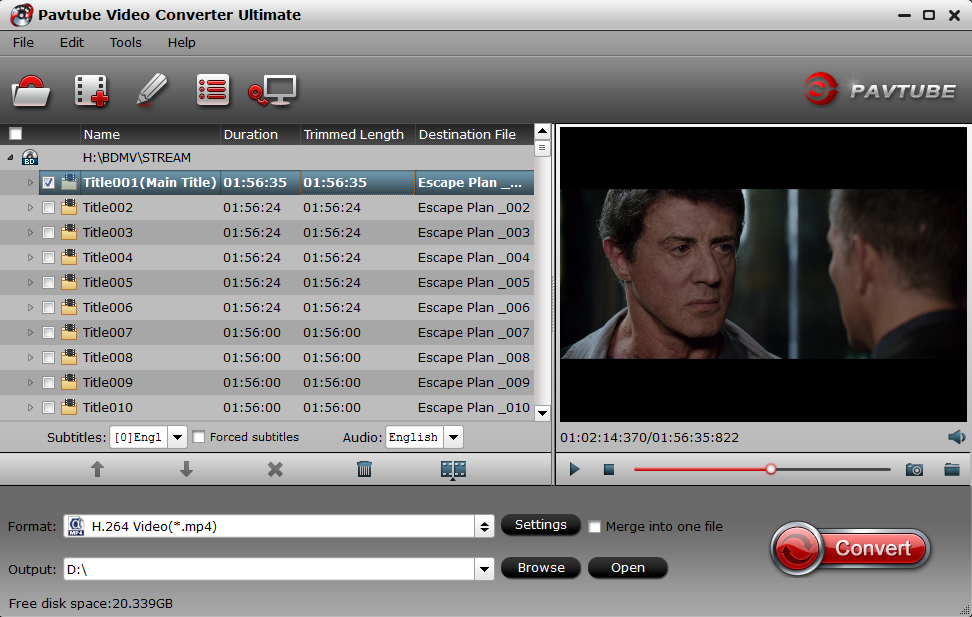
Step 2: Define the output format.
If you don't want to re-encode the H.264 video, just choose the output the same file format as original file format. If your original H.264 video is H.264 HD video, just choose "H.264 HD Video(*.mp4)" under "HD Video" main category. Make sure to keep other profile parameters such as video codec, bit rate, resolution, frame rate and audio codec, bit rate, sample rate, channels, etc unchanged. You can also choose other file formats to output according to your own needs.

Step 3: Flip/Trim/Crop/Watermark/Merge/Split H.264 video.
Check an item on the video displaying list on the main interface. When a video or movie is selected, click the pencil like Edit icon on the left top tool bar to open the video editor window, here, you can play and preview the original video and output effects. Also you can flip or rotate video, trim, crop, add watermark, apply special effect, edit audio or insert external.
Flip or rotate
Click the "flip" or "rotate" icon under the "video editor" previewing window to flip the image horizontally, vertically or rotate 90 degree towards left or 90 degrees toward right.

Trim
Switch to the "Trim" tab, drag the slider bars to set the start time or ending time to include the segments you wish to be converted or click the square brackets to set the start point or ending point when preview the video, you can also directly input specific value in "Start" and "End" box to select the converted clips.

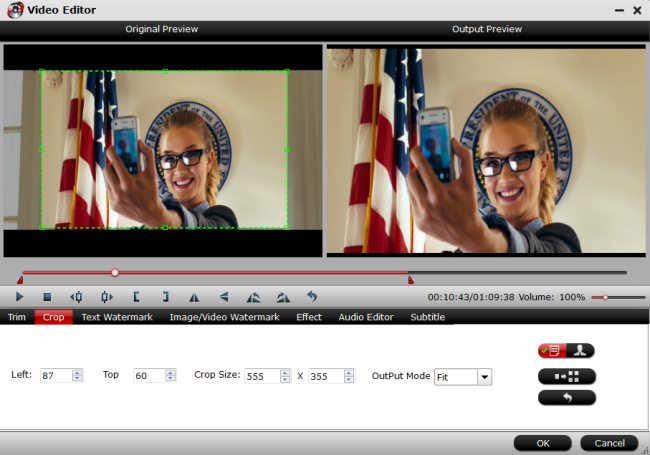
Crop
Click "Crop" tab, simply move your mouse cursor to drag and adjust the green frame to desired position or crop video be setting specific values in the box of "Left", "Right" and "Crop Size" under "Simple Mode" and type in specific values in the box of "Left", "Top", "Width" and "Height" under "Advanced Mode".
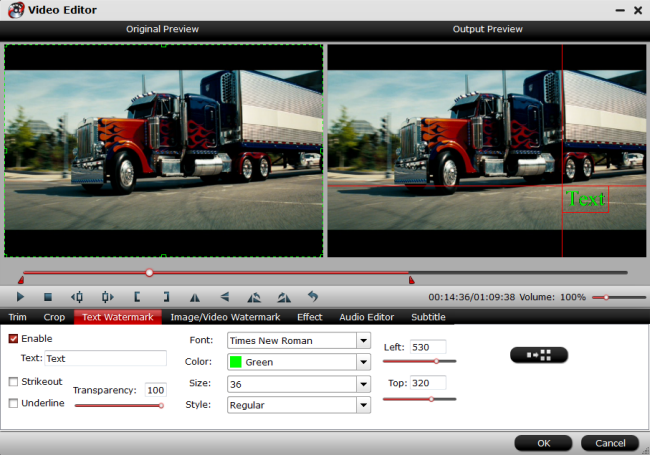
Watermark
Go to "Text Watermark", check Enable to add text watermark to selected video clip. You can either set parameters or drag the text on preview screen to set its location.
Switch to "Image/Video Watermark", Check Enable to add images or videos as watermark onto selected video file. The location can also be set by dragging on the preview screen.
Effect
Under Effect tab, you can add special effects like Simple Gauss Blur, Flip Color, Invert, Aged Film to your source video. In Color Control section, you can correct color by adjusting brightness, contrast, and saturation. You can also tick off "Deinterlacing" to keep good image quality.
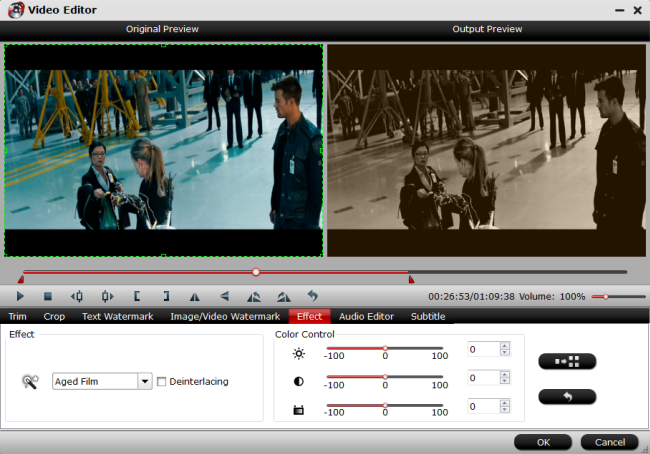
Deinterlace
In the "Video Editor" window, switch to the "Effect" tab, check off "Deinterlacing" option to transform the interlaced video into a progressive form to keep good image quality.
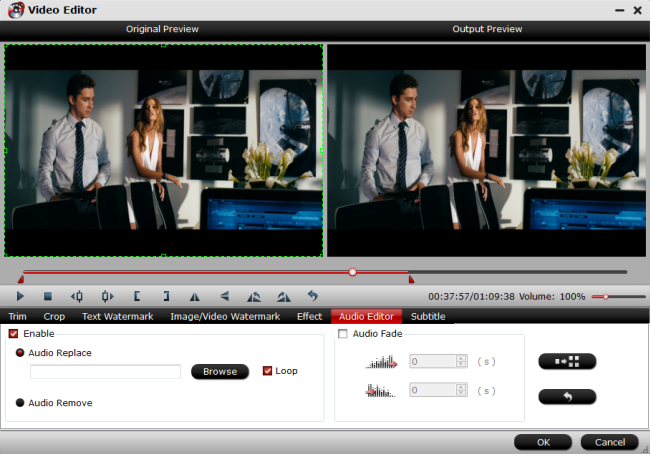
Edit audio
In the "Video Editor" window, switch to the "Audio Editor" tab, you can either replace/remove original audio from video or set audio fade in/out effects.
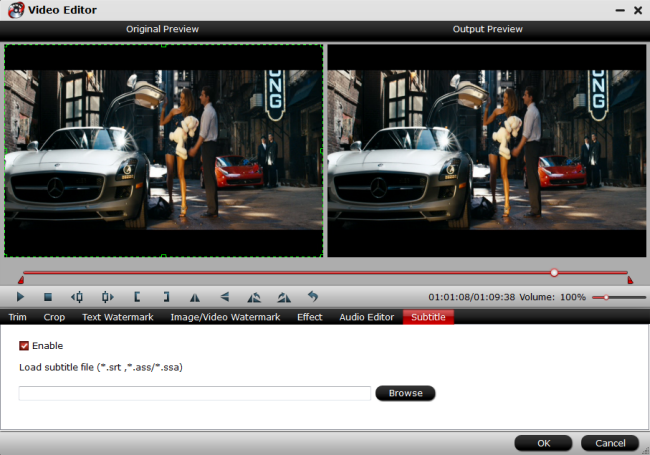
Subtitle
In this tab, click browse button to add *.srt or *.ass/*.ssa online downloaded subtitle-files to the video as hard subtitles.
Merge
By checking the "Merge into one file" option beside the "Settings" button, the program will join all the selected video into one single file.

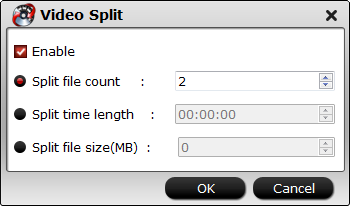
Split
Click the split button on the file list to launch the Video Split window. Ticking "Enable" option, you can split the file by file count, time length, or file size.
Step 4: Finish the H.264 video editing process.
Clicking the Convert button on main interface to pop out a Conversion window with conversion information such as Time elapsed, Time left, Generated size, and Estimated size.
After the conversion, you can click "Open output folder" to popup output directory with the converted files. Then you can get a finished H.264 video for better playing, sharing and editing.
 Free Trial Video Converter Ultimate


