
 Home
Home“I updated my iPhone 4S to iOS 7, after installation of iOS7 received a message that migration of my old data failed. Now my iPhone have the new iOS 7 system but I lost all the data else! I tried to reinstall old iOS 6 and restore last backup, still unsuccessful. Feeling highly frustrated, need HELP! How to restore the lost data after upgrading to iOS 7?
Since the released of iOS 7, iPhone users can’t wait to upgrade. Then data loss problems and more new problems are swelling up. I have heard many iPhone users complaining that the new iOS 7 killed their data on iPhone. Actually, If you have an iTunes or iCloud backup, you can easily recover lost data from iTunes or Cloud backup. However, if you failed restore the data, Don’t Panic!
Here I’ll recommend a powerful and easy-to-use iPhone data recovery which allows you to completely and quickly recover lost data from iPhone after iOS 7 upgrade such as photos, videos, contacts, text messages, notes, call history, etc. Pavtube iOS Data Recovery can solve data loss problems through two modes, one is detect and extract data from iTunes backup; another is directly scan and retrieve data from your iPhone.
Download trail version below to have a try. Following are two guides to teach you how to quickly recover lost data on iPhone iOS 7 with a few clicks.
Here we used windows version as an example, if you are Mac user, you can get the Mac version and do the same operation as below. Or refer to How to recover lost data from iPhone on Mac.
Notes: If you're planning to upgrade your iPhone to latest iOS 7, you'd better back up your iPhone before upgrading.


Guide 1: Scan and retrieve lost data from iPhone after upgrading iOS 7
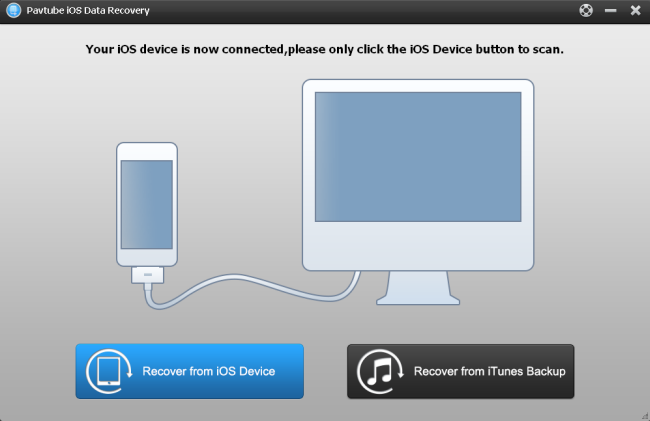
Step 1. Connect your iPhone with the computer
Launch Pavtube iOS Data Recovery on the PC, and connect your iPhone to the computer by using the iPhone USB cable. Choose “recover from iOS Device”
Step 2. Scan your iPhone for lost data
After a few seconds, when the program has recognized your iPhone connected to the PC, it will automatically scan your iPhone. Scanning time depends on the number of the files on your iPhone.

Step 3. Preview and backup your iPhone data
When the scan completes, all data found on your iPhone will be categorized and displayed in front of you. You can click every one of them to check which you want to backup and which you don't. Tick off those you want and click Recover. Now you can save them all on your computer with one click.

Guide 2: Extract iPhone lost data from iTune backup after upgrading iOS 7
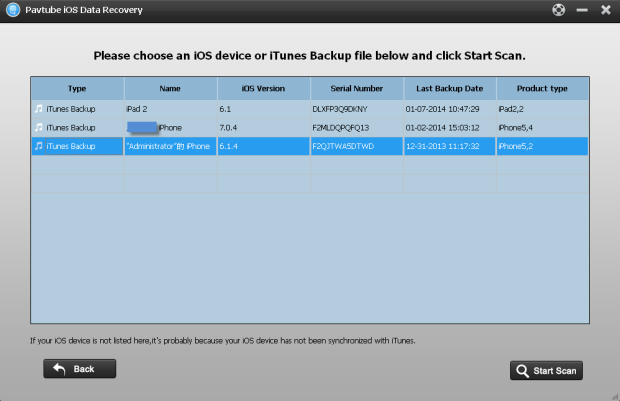
Step 1. Choose an iTunes backup and starts to scan
Run iOS Data Recovery on the computer, Choose "Recover from iTunes Backup" On the main interface.
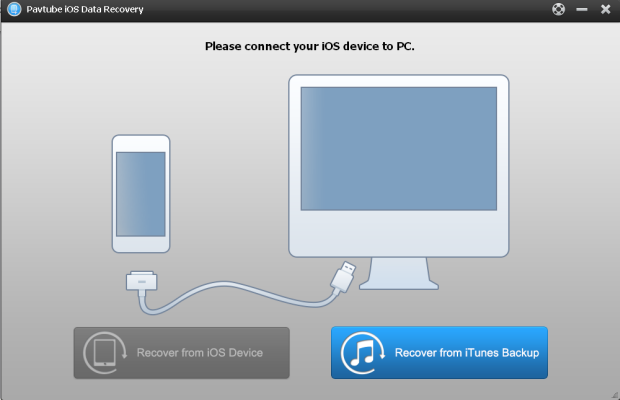
All the iTunes backup files of your iOS Device which has ever synced with iTunes on this computer will be automatically found and listed here.
Step 2. Preview and recover the data in the scan result
A few seconds later all data in the backup file will be extracted and displayed in the scan result. You can click on different tabs to preview items and selectively mark and recover those you want by click the “Recover” button at the top-left to save them on your computer.

Pavtube iOS Data Recovery help you not only recover lost iPhone data after iOS 7 upgrade, but also recover data lost due to iOS jailbreak, device crash, accidental deleting, restoring to factory setting and many other similar reasons.
 Free Trial iFonebox
Useful Tips
- Get back lost/deleted voice memos from iPhone
- How to recover lost contacts from iPhone4s/5/5s/5c?
- Selectively recover deleted messages from iPhone backup
- How to get back iPhone deleted SMS message?
- Extract iPhone Contacts from iTunes to browse them on computer
- Quickly get back deleted notes on iPhone


