
 Home
HomeThe PowerShot G7 X Mark II camera features a large 1.0-inch, 20.1 Megapixel* CMOS sensor that helps capture high-quality images and videos. Apart from recording still images, it also supports to shoot stunning 1080p Full HD video in MP4 format encoded with MPEG-4 AVC/H.264 codec.
Edit Canon PowerShot G7X Mark II on Mac
With the built-in Wi-fi technology, you can easily share the photos and videos with friends and family or post your video to social networking sites like Facebook, Twitter, YouTube, etc. To make your video impress more audience, it is ideal for you to do some professional or simple video editing work before the footage sharing. However, you may find that MPEG-4 AVC/H.264 codec used by Powershot G7X Mark II is not a good editing format for most Mac video editing software like iMovie, FCE, FCP, Davinci Resolve, Avid Media Composer. The following article will ofter you the solution for this problem.
Transcode PowerShot G7X Mark II for NLE editing on Mac
Want to get the best workflow of Canon Powershot G7X Mark II on Mac with all the NLE app? The good news is that you can easily make that with Pavtube HD Video Converter for Mac (support Mac OS X El Capitan), which helps to transcode Powershot G7X Mark II H.264 into all the professional video editing codec like Apple Intermediate Codec for iMovie and Final Cut Express, Apple Prores codec for Final Cut Pro 7/X, DNxHD codec for Avid Media Composer or Premiere Pro CC specially optimizied file formats.
Trim/Crop/Split/Merge Powershot G7X Mark II footage
Do not want to invest too much money on a pricey Mac video editing software, never mind, with the program’s built-in video editing options, you can complete some basic video editing work. You can trim or cut video to remove unwanted parts or segments from the video, merge separate video clips into one, split large video file into small parts by file size, count or length, crop the black bars around the video frame or adjust the output aspect ratio of the video to let it fit with your devices, add video/image/transparent text watermark to video.


How to Edit Canon EOS Rebel T6/1300D on Mac OS X El Capitan?
Step 1: Load Canon Powershot G7X Mark II footage.
Launch the program on your Mac computer, on the main interface, click "File"drop-down option, select "add Video/Audio"to add source Canon Powershot G7X Mark II footage to the program.

Step 2: Pick output file format.
Click "Format"bar, from its drop-down list, select your desired output format according to your own needs, for example, if you want to edit Canon Powershot G7X Mark II video with FCP, you can select "Final Cut Pro"> "Apple Prores 422(*.mov)" to output.

Step 3: Trim/Crop/Merge/Split/Watermark Powershot G7X Mark II footage.
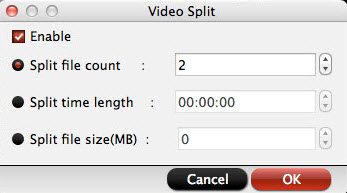
Split: Click the "Split" button under file list to launch the "Video Split" window. Checking "Enable" to enable it, and then you can split the file by file count, time length, or file size.
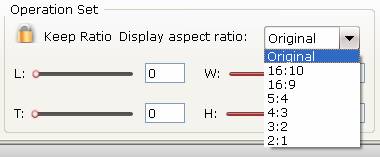
Crop: Open "Video Editor" window, under "Crop" tab, click "Advanced Mode" in the right panel, then select "Keep Ratio" option in the left panel, from "Display aspect ratio" drop-down list, you can either keep the original aspect ratio by choosing "Original" or keep the cropped aspect ratio such as 16:10, 16:9, 5:4, 4:3, 3:2, 2:1, etc from the aspect ratio lists.
Merge: On the main interface, check "Merge into one file" option to combine all your separate video clips into one single file.

Step 4: Start conversion.
Hit right-bottom "Convert" button to carry out Canon EOS Rebel video editing or codec transcoding process.
When the conversion is completed, you will have no problem to start the post-production work with Canon Canon Powershot G7X Mark II on NLE before sharing your great footage on smartphones, tablets, TVs, YouTube, Facebook, Vimeo, etc.
 Free Trial HD Video Converter for Mac

Useful Tips
- Review of 5 Best HD Video Converter for Mac (macOS Sierra Included)
- Import DJI Mavic Pro 4K video to iMovie for Editing
- Import DivX to iMovie (iMovie 11 Included)
- How to Convert ASF to iMovie (iMovie 11 Included) on Mac?
- Superior iMovie Alternatives for Mac (MacOS Sierra)
- 2017 Top 5 Best HD Video Converters for Mac OS X El Capitan/Yosemite/Mavericks


