
 Home
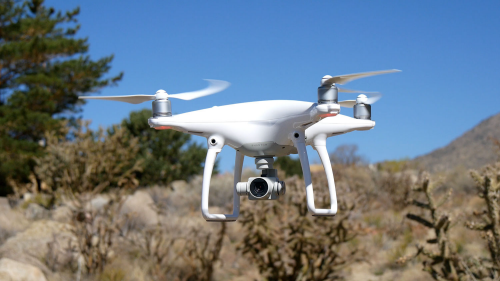
HomeThe DJI Phantom 4 utilizes high performance camera to shoot sharp, clear video in up to 4K at 30fps. When the shooting is completed, Mac users can iMovie to turn your great video footage into stunning cinema-quality films by inserting titles, effects or full sound track, etc. The following article will show you the basic requirements for editing 4K with iMovie and how to get the best workflow of DJI Phantom 4 4K with iMovie.
Basic requirements for editing 4K video with iMovie
To enable 4K video editing on iMovie, make sure to download the newest version of iMovie 10.1, in addition, your Mac should be from 2011 or later with at least 4GB of RAM. To play back 4K video in full resolution, you'll need an iMac with Retina display or Mac Pro connected to a 4K display.
Best workflow of DJI Phantom 4 4K with iMovie
Although DJI Phantom 4 is included in iMovie supported 4K camera list, however, the MPEG-4 AVC/H.264 codec used to compressed DJI Phantom 4 4K footage is a delivery codec but not an idea editing format for iMovie. If you wish to get a fast and smooth editing workflow of DJI Phantom 4 4K with iMovie, you are recommended to rewrap MPEG-4 AVC/H.264 to AIC codec, which features high performance and quality and beging less processor intensive to work with.
Rewrap DJI Phantom 4 4K to iMovie AIC Codec
To produce AIC codec, here a professional program called Pavtube HD Video Converter for Mac (review) is recommended to you. With the program, you can easily transcode DJI Phantom 4 4K to iMovie best favorable Apple Intermediate Codec, FCP native compatible Prores codec or Davinci Resolve most favorable DNxHD codec.

Besides that, you can also do some simple video editing on the DJI Phantom 4 4K footage with the program. You can trim or cut video to get off unwanted parts or segments, crop to remove the unwanted black borders, merge separate video clips into one, split large video into small parts by file size, count or length, add video/image/transparent text watermark, remove/replace audio in video, change video color effect like brightness, contrast, saturation, apply special rendering effects or insert external srt/ass/srt subtitles to video.
Step by step to Wrap DJI Phantom 4 4K to AIC for iMovie Editing on macOS Sierra
Step 1: Transfer DJI Phantom 4 4K video to Mac computer.
The DJI Phantom 4 records 4K footage on an SD card, you can remove the SD card from the camera, insert the SD card to a card reader, then plug in the card reader into your Mac computer SD card slot for transferring the footage to your Mac local hard drive.
Step 2: Add DJI Phantom 4 4K videos.
Start the program on your Mac computer, on the main interface, from "File" drop-down option, select "Add Video/Audio" to input source DJI Phantom 4 4K video files to the program.

Step 2: Select output file format.
Click "Format"bar, from its drop-down list, output iMovie best comaptible editing codec: "Apple Intermediate Codec(AIC)(*.mov)" to get a high performance and high quality editing workflow.

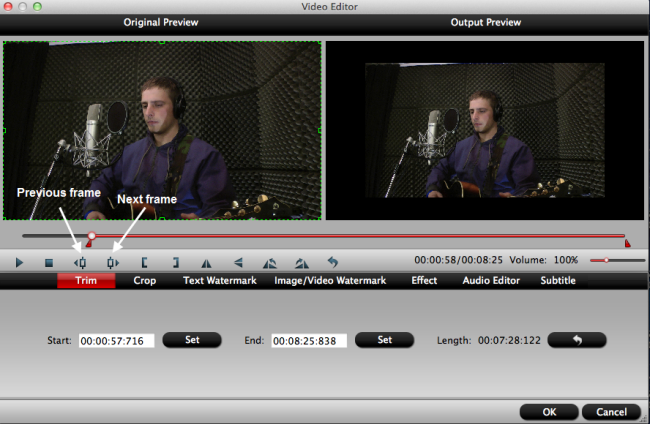
Step 3: Edit DJI Phantom 4 4K video.
Select an item on the main interface to open the "Video Editor" window, here you can trim video length, crop video black borders, add video/imag/watermark, adjust video color effect, remove/replace audio in video, add external srt/ass/ssa subtitles to video.
Step 4: Convert DJI Phantom 4 4K video to for iMovie.
Go back to the main interface and press the "Convert" icon on the right-bottom to start DJI Phantom 4 4K video to iMovie AIC conversion process.
When the conversion is done, feel free to import converted video to iMovie for furthering professional editing.
 Free Trial HD Video Converter for Mac

Useful Tips
- Review of 5 Best HD Video Converter for Mac (macOS Sierra Included)
- Import DJI Mavic Pro 4K video to iMovie for Editing
- Import DivX to iMovie (iMovie 11 Included)
- How to Convert ASF to iMovie (iMovie 11 Included) on Mac?
- Superior iMovie Alternatives for Mac (MacOS Sierra)
- 2017 Top 5 Best HD Video Converters for Mac OS X El Capitan/Yosemite/Mavericks


