
 Home
HomeHome video shooting is more and more popular these days. It seems that everybody can keep your wonderful memories in a video. But it still needs some skills to make good videos and keep nice quality. This article is to tell you the way to play your videos from JVC camcorder and share with others with the best quality. You can convert the JVC video to other formats and if you are using JVC GZ-HD7, JVC GZ-HD3, JVC GZ-HD5, JVC GZ-HD6, JVC GZ-HD30, or JVC GZ-HD40, you will get videos with .tod extension, and you will find this article especially for you. TOD video is high definition video which is stored in MPEG-2 transport stream container files with TOD extension. In most other systems these files have M2T extension. TOD format is comparable with AVCHD, but cannot be directly played on consumer video equipment. And besides, you will get some interlace flickers while playing on your computer. This article is to tell you the way to reduce these interlace flickers on your TOD videos from JVC camcorders, and play them on your Mac OS.
What is interlace flicker?

Interlace flicker is the narrow lines you see while there is a fast movement or panning on the video from your JVC camcorders playing on your computer. The reason why you get this is because the camcorder is using interlaced scanning to record and your computer is using progressive way to play it. The following is the detailed description of interlace scanning and deinterlacing from avchduser.
“A television set creates image on the screen line by line. In traditional television all lines on the screen are not drawn or scanned in sequence from top to bottom, instead every other line is scanned. This method of display is called interlacing. With interlacing, an entire single image called frame is shown in two interlaced scans, each scan constitute a video field. Compared to non-interlaced or progressive television, interlacing allows using higher scanning rate within a given bandwidth. Higher scanning rate reduces flickering and allows to portray motion more naturally.
Interlaced scanning produces a visual defect called combing when objects in the image move around. With a traditional CRT-based television combing is not noticeable because fields are shown as series of fast flashes, caused by moving electronic beam, and also because scanning lines overlap a bit.
Modern LCD and plasma displays work differently than CRT displays and cannot display interlaced video natively. To avoid combing, interlaced video must be converted to progressive before it is presented to a viewer. The process of converting interlaced video into progressive is called deinterlacing.”
-----from avchduser
How to reduce the interlace flickers?
In order to reduce the unwanted narrow lines on the video, you must deinterlace the video. There are several ways to deinterlace.
- You can use a video card with built-in deinterlacing;
- Use a video driver or codec that is capable of deinterlacing;
- Use a video player that has built-in deinterlacing engine;
- Convert interlaced video to progressive. This will allow you watching video on any computer with any hardware and uploading to different online sites. This is the easiest and most useful way which I’d like to recommend here.
What do you need?
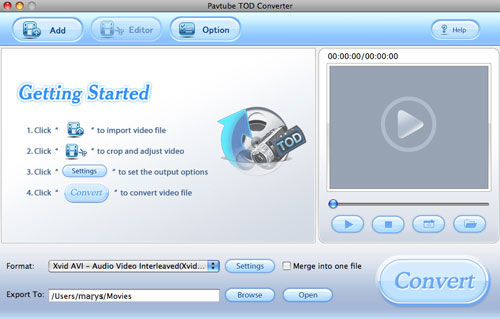
You need only one program, Pavtube TOD Converter for Mac.

You can convert TOD to any other video formats you can name for playback on your portable devices like iPod, iPhone, PSP, Zune, etc., editing on other editing programs like iMovie, Adobe Premiere, Final Cut Pro, etc., uploading online for sharing with your friends and family, importing to burning programs like Nero and burn as backup, and more. You can keep the HD quality by selecting HD formats as output.
Easy steps:
Save your TOD video to your Mac from your JVC camcorder.
Launch Pavtube TOD Converter for Mac.
Import the TOD video by clicking the Add button on main interface.
Click Editor and select Effect tab. You can see the original video on left and the output video on right. What you see is what you get.
Check the Deinterlacing option, and you can see the effect on the right preview pane.
Other tips to keep a better quality:
1. Reduce image noise.
If you got some image noises on your video, it’s easy with this TOD converter for Mac. Just select “Simple Gauss Blur” option under effect tab. And you can see the output effect.
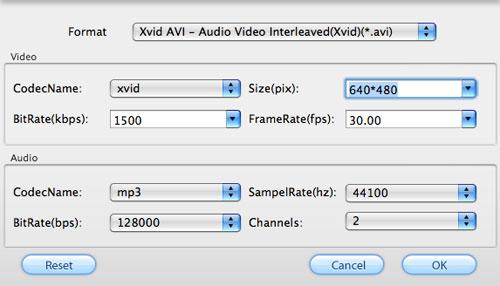
2. Select a higher bit rate and frame rate. You can select a higher bit rate and frame rate to get a better quality. You can click Settings button on main interface to pop up the window. But please note, the higher bit rate and frame rate you choose, the larger the output file will be.
3. Select HD video formats.
Since the HD video formats are using some advanced encoding techniques, you can retain the original HD quality in maximum.
HD formats you can select: HD AVI video (*.avi), HD H.264 video (*.mp4), HD MPEG-4 video (*.mp4), HD H.264 video (*.mov), HD MPEG-2 video (*.mpg), etc.
About the output selections
The fixed profiles make it easy to select for output, no matter you are planning to enjoy the video on your portable devices or share online (Flash video).
If you have selected *.mov, *.mp4, etc., you can play it with QuickTime on your Mac OS.
You can get more useful skills on editing your TOD videos from JVC camcorders by clicking here.
 Free Trial TOD Converter for Mac


