
 Home
HomeWhen you record some video files using HD cameras or video recording software applications, it is likely that you get AVI files. If it happens that you love to produce video files using Premiere Elements (15, 14, 13, 12, 11, 10), you will have a headache cause that there are so many issues when you import AVI files into Premiere Elements (15, 14, 13, 12, 11, 10): no audio, no video unsupported file.
Why will you meet troubles in importing AVI into Premiere Elements (15, 14, 13, 12, 11, 10)? AVI is a wrapper and AVIs can use any of thousands of codecs, which is supported by Premiere Elements (15, 14, 13, 12, 11, 10) while some not. If the codec in AVI is not supported by Premiere Elements, you will encounter these problems like below.
Various AVI Issues in Premiere Elements (15, 14, 13, 12, 11, 10)
Premiere Elements: Audio only imported with AVI files
This is absolutely madness. I have an issue with Elements 10 64bit version running on Win8 64bit. When i want to edit at video (avi) it is only imported as at sound. I'm able to play the video in windows media player and in elements organizor.
I can't get Premier Elements 10 to import an AVI file from my computer
I just bought Adobe Premier 10 two days ago, and I'm trying to import an AVI file from my computer. It says Add Media Failure. This type of file is not supported or the required codec is not installed. The program installed all right, so I don't know what to do since I bought this software to create movies with the video from my camera, which is in AVI format.
avi files import to premiere elements 14
I tried to import .avi files (recorded by a HD camcorder, manufacturer "MEDION" on a SDHC memory card) to a new premiere elements 12 video project. These video-files are mis-interpreted by premiere elements as audio-files -> I can only import them to the project on audio tracks (but non on video tracks). The same video-files can be played back using windows media player (win 8 64 bit) without encountering any problems.
Solutions to Solve AVI Can't Import into Premiere Elements Issues
You can use a tool like MediaInfo (http://mediainfo.sourceforge.net/en) to determine the codec used by the AVI file. Then determine which method you would try.
1. some cameras use H.264 to either AVI or some models to MOV wrapper. So use the MOV wrapper if your camera offers that option. Normally, Premiere Elements (15, 14, 13, 12, 11, 10) will support MOV better.
2. Check if you installed QT. In the report, some solve the issue by uninstalling and reinstalling Apple Quicktime.
3. In addition, Premiere Elements does not support H.264, DivX, XviD in an AVI container. We can fix this.
1) Download the latest 64-bit static build of FFmpeg from here: Zeranoe FFmpeg - Builds
2) Open the archive; you'll probably need 7-Zip since the archive is a .7z file. Extract the ffmpeg.exe file in the archive (it's in the "bin" folder) to the folder containing your AVIs.
3) Create a text document (Notepad is fine) called "avi2mp4.bat" (no quotes) in the same folder as the AVIs, making sure to change the default TXT extension to BAT.
4) Paste the following into the BAT file:
@ECHO OFF
for %%a in (*.avi) do ffmpeg -i "%%a" -vcodec copy -acodec copy -f mp4 -y "%%~na".mp4
5) Once you save the BAT file, double-click it; your AVIs will be rewrapped to MP4s without any conversion. The MP4s will correctly import into Premiere Elements (15, 14, 13, 12, 11, 10).
Easier Tool to Convert AVI to Premiere Elements (15, 14, 13, 12, 11, 10)
FFMPEG is good but it is not easy-to-use. For a person who is not tech-savvy, Pavtube Video Converter for Mac will be easier to use. It can convert DivX, XviD, H.264, MPEG-4 AVI to Premiere Elements supported DV AVI, H.264 MP4 and QuickTime MOV. Many video recording devices such as OBS, Shadowplay will use special video and audio codec in AVI, Pavtube Video Converter for Mac can accept these special AVI files and re-encode them to Premiere Elements.
You can configure audio and video settings regarding the frame rate, codec, size, bit rate, sample frequency rate and others to have the output video more compatible with Premiere Elements. Another feature found is that you can trim the AVI video to determine where to start and end and crop the black edge around the AVI clips. The interface of the program is clean and pretty intuitive. AVI video clips can be imported into by the "drag and drop" method. Batch processing is allowed.
For Windows users, please use Pavtube Video Converter. Now download the right version below to start to convert AVI to Premiere Elements 15, 14, 13, 12, 11, 10.


Steps to Transcode AVI to Premiere Elements 15, 14, 13, 12, 11, 10
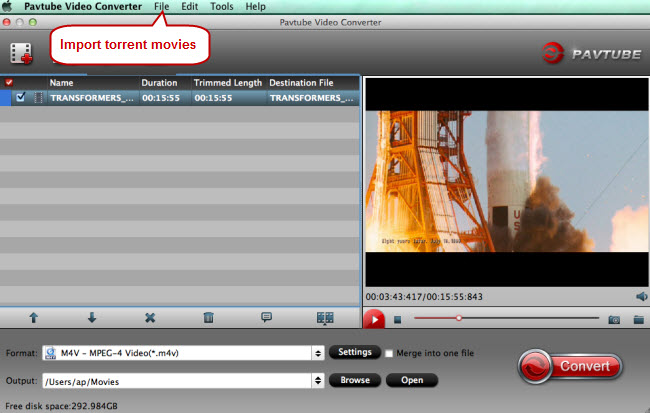
Step 1: Import AVI videos
Just drag and drop AVI files to AVI to Adobe Premiee Elements Converter for Mac. You can also directly drag the video files to the program for conversion. It supports batch conversion so you can import multiple files at a time.
Step 2: Choose Premiere Elements preferred format
Navigate to “Format’ > “Common Video” > “MOV – QuickTime(*.mov)”. You can see that here are hundreds of video formats for you choosing. You also can choose H.264 MP4, DV AVI, MPEG-2 for Premiere Elements. Click “Settings” button to go to “Profile Settings” screen where you can adjust audio and video parameters like size, bitrate, frame rate, sample rate, etc.

Step 3: Start AVI to QuickTime MOV conversion
Click the convert button under the preview window, the converter will start encoding AVI clips to QuickTime MOV for importing to Adobe Premiere Elements. When the AVI files to Premiere Elements conversion task is finished, click “Open” button to get the exported files for transferring to Premiere Elements with easy playback or editing.
Related: Exporting .avi Clips from Premiere Elements on Mac
You can export .AVI file from Premiere Elements. You don't use the Edit Export menu. The process is...
Click the share button in the upper right part of the screen.
Select Computer. There you will find export routes for Adobe Flash Video, MPEG, DV AVI, Windows Media, and Quicktime. You may not see the Windows Media and Quicktime choices until you scroll down to them at their lower locations on the list.
Most of the export choices have an Advance Button in its dialog section. Click on that if you want to change the settings that you see displayed.
Select AVI
Select the Preset you want to use.
Name the file.
Tell it where to put the file.
Select Save.
That's it.
You also can export other format file from Premiere Elements then use the aforementioned Pavtube Video Converter for Mac to convert the export the video to AVI.
 Free Trial Video Converter for Mac

Useful Tips
- MOV to M4V: How to Convert MOV to M4V on Mac OS (macOS High Sierra Included)
- How to Play AVI Videos on MacBook(Air, Pro, iMac)?
- How to Import Android Videos to iMovie for Editing?
- How to Play a WMV File on Mac Computer
- Play H.265 Files with QuickTime Player on Mac
- Convert YouTube to MPG/MPEG with Easiest Way


