
 Home
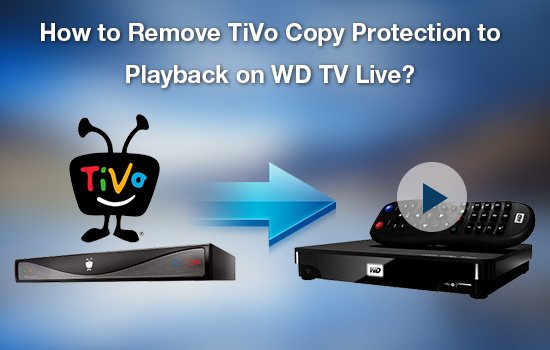
HomeTiVo has been the most widely used tool to record TV shows, Movies or stream videos on TV for enjoy. It is very convenient for users to have the chance to review the shows and movies when they missed them. You may want to stream your shows and movies on your devices like tablet, or smartphone so that you can enjoy them wherever and whenever you want. But we all know that the TiVo has its unique copy protection which forbid you to playback them smoothly on other devices. You can only review the shows via TiVo which is very limited when you are travel or out for work.
Most people will use WD TV Live to play their videos which may stream on all the devices when you access to the net. But for the protection, it just stops the streaming step. So is there any way to remove the TiVo copy protection easily then make full advantage for WD TV Live?
Here the Pavtube Video Converter for Mac comes to help. Just few simple steps , it can remove the copy protection of your TiVo files then make best use of it no matter you want to playback on your smartphone or your WD TV Live, or you want to load into some NLEs to do simple edits. All those can be realized by this all-in-one converter.


How to make TiVo videos available for streaming to WD TV Live?
Step 1. Download this TiVo Converter on your Mac
You can free download the trail version without any bundle apps in it. Except for the "Pavtube" watermark, the function between the trail and retail is the same.
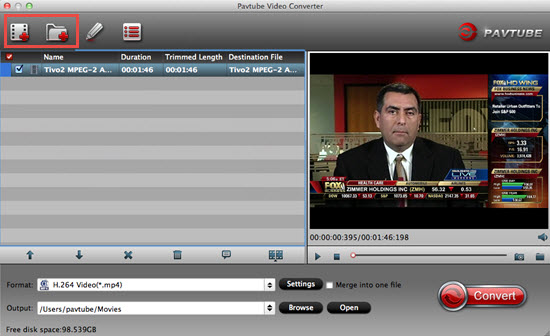
After launching your app , click "File">"Add Video/Audio" to load your TiVo files.
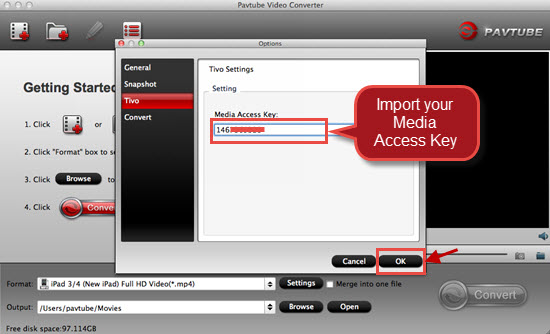
When you load your TiVo files, this converter will pop up a window to ask you to import the "Media Access Key".
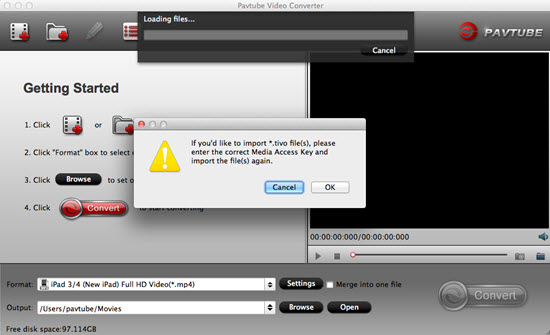
Click "OK" to import your keys. Once you have successfully imported your keys, Pavtube will remember the key so you don't have to retype the key everytime when you load your TiVo files.
After loading , double click the files, you can have a preview of your TiVo videos.
Tips:
How to find your TiVo"Media Access Key":
Simply head to your TiVo main menu. From there you'll key down to "Messages & Settings". Here you'll find several selections but we're interested in "Account & System Information". Scroll down and press your OK key. On this menu you'll see a selection for "Media Access Key". That's it!
Step 2. Choose proper format for your WD TV Live
Before choosing the output format, please check the supported format about WD TV Live.
File Formats Supported |
|
Video - AVI (Xvid, AVC, MPEG1/2/4), MPG/MPEG, VOB, MKV (h.264, x.264, AVC, MPEG1/2/4, VC-1), TS/TP/M2T (MPEG1/2/4, AVC, VC-1), MP4/MOV (MPEG4, h.264), M2TS, WMV9, FLV (h.264) |
|
Photo - JPEG, GIF, TIF/TIFF, BMP, PNG |
|
Audio - MP3, WAV/PCM/LPCM, WMA, AAC, FLAC, MKA, AIF/AIFF, OGG, Dolby Digital, DTS |
|
Playlist - PLS, M3U, WPL |
|
Subtitle - SRT, ASS, SSA, SUB, SMI |
If you want to make your TiVo becomes the most compatible ones, then you can choose H.264 codec. Go to "Format" list , choose "HD Video">"H.264 HD Video (*.mp4)" as your output format.
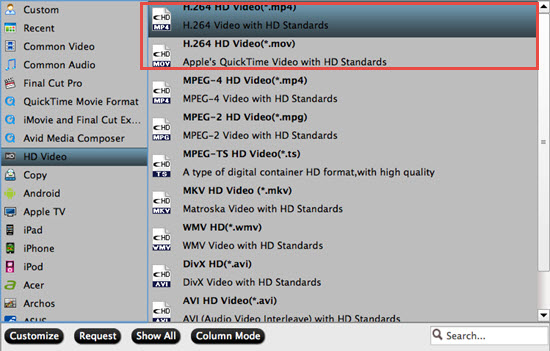
This format may allow you playback on almost every devices, like Samsung Tablet, iPad, Android phone, Windows Surface. Or if you want to load into NLEs like Adobe Premiere Pro, or Avid , etc.
Tips:
If you want to extract the audio of your video, you can go for "Common audio" option.
Step 3. Adjust parameters to fit your player better
If you want to improve the quality of your recorded videos, then you can go to this "Settings" UI by improving the Bit rate while the larger file size will created and longer converting time. Under the "Task Information", you can know the generated file detailed information here.

Tips:
Pay attention to the balance between Bit rate and Frame rate, If you adjust one too high while the other parameter too low, which may cause video and audio unsync problem.
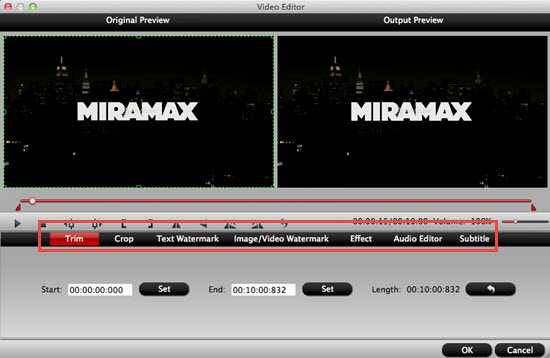
Step 4. Making your very own videos by build-in editor
Click this "Pencil" icon to make some changes on your videos, the build-in editor can help you to trim and crop the part you don't need, add subtitles or watermark for fun, change the Aspect ratio to fit better to your player.
Step 5. Start to convert TiVo into H.264 MP4 for your WD TV Live
After setting the file location, click "Convert" to start your conversion. The conversion time depends on your file size and your settings plus your Mac processor.
Then after it , you can click "Open output folder" to check your converted files.
Now you can freely enjoy your videos on WD TV Live or other player.
If you are a newbie, here is a tutorial for WD TV Live beginner.
 Free Trial Video Converter for Mac


