
 Home
HomeField video photographer may very familiar with Bushnell Trail Camera , for its high shooting resolution up to 1080*720 , which can totally handle every small details. The format shoot under this camera is AVI which is a common format you may think, for most NLEs and devices claimed they support this format. But the truth is always getting to the other way. Some unknown problems happen when you playback your videos on media player like QuickTime. In this case, we are going to introduce the way of converting Bushnell Trail AVI to MP4 for playback on QuickTime.
Brief introduction of AVI format:
AVI(Audio Video Interleaved) , is a multimedia container format which can contain both audio and video data in f file container that multiple streaming audio and video. AVI doesn't provide a standardized way to encode aspect ratio information, with the result that players can't select the right aspect ratio automatically. (detailed explanations go here)
In order to tackle those short comings of this AVI format and unfold the original video's quality, Pavtube Video Converter for Mac is a good solution. With the inner codec in this app , you can load your AVI files into this app without any problems , for the inner decoder will handle the real codec behind AVI properly. What's more, since this AVI can't adjust the aspect ratio automatically, under the "Edit" function, you can change this parameter as you want. Yosemite system can be handle by this app flawlessly.


How to Handle AVI Formats from Bushnell Trail Camera to MP4 for QuickTime?
Step 1. Download AVI to MP4 Converter on your Mac
Download the trail version of this Video Converter on your Mac to have a try first before purchasing. The professional converter can do much more beyond your expectation.
After installation, open your app then click "File">"Add Video/Audio" to load your raw AVI files. The loading progress may take a while if you have bunch files to load. Or you can drag-and-drop them into the main UI if they are on your desktop.

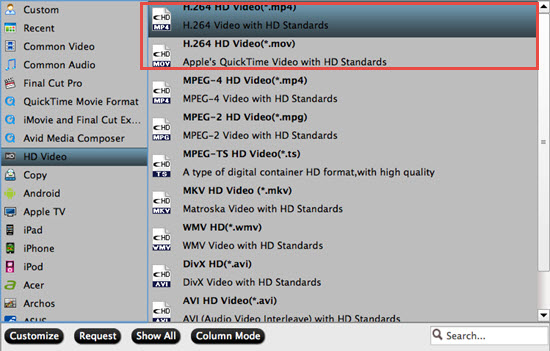
Step 2. Choose H.264 HD MP4 as your output format
After the loading , go to the format bar to choose "HD Video">"H.264 HD Video (*.mp4)". This format will be the best choice for compatible on various play platforms. No matter what you want to playback on iPad, or Android Smartphone, even Windows Surface may not be a problem.
Step 3. Adjust parameters in the Settings UI if you need
After choosing the proper format, you can click this "Settings" to make some adjustment. Some users may find that when they playback on this app, the picture in the preview window will be jerky or some audio and video unsync problems happen. No worry about that, all those can be solved in this UI.
You can lower the Bit rate into a 12000kbps or 10000 kbps to solve your problems. Also the whole file size will be reduced, which may helpful for online uploading and local storage. But for the lower bit rate, the quality of the videos may have some influenced.

Step 4. To make further editing by this app before conversion (optional)
For some videographers using this Bushnell Trail Camera, they may tie it on trees or other things in the wild to record the videos, which may not as convenient as other camera like Handycam that can take the videos when necessary. This small camera just take whatever it "saw" during the recording progress.
This may add some unnecessary parts in your original videos, if you don't want to load them into NLEs to do the following edits, and you just want to cut some no need parts and do some simple edits, then you can totally go for the build-in editor in this app. Trim or crop the parts you don't need, add watermark, subtitles for fun, switch "Interlaced" to "Progressive",etc.
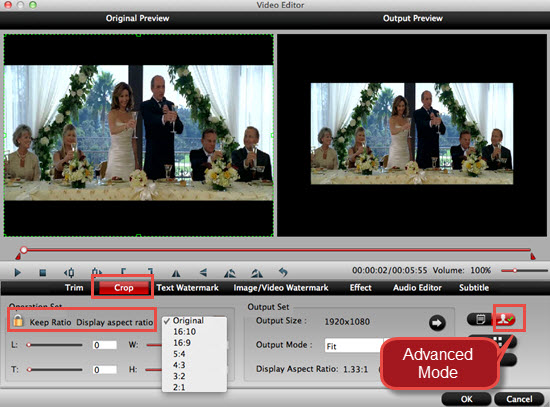
Tips:
If you want to adjust your "Aspect ratio", you can do it under "Crop">"Advanced Mode" for the no automatically aspect ratio AVI problem.
Step 5. Start to convert AVI to H.264 HD MP4
After all have been settled, just click this "Convert" button to start your conversion. And don't forget to set the file location , if not, click "Open output folder" to retrace them.
If the converting progress is too long, you can choose "Shut down the computer after conversion", then you can just leave it alone.
Now , you can have your most compatible videos at your hand and load into media player like QuickTime without any probles.
 Free Trial Video Converter for Mac


