
 Home
HomeA number of HD videos downloaded from the internet are wrapped up in MKV container and you can play them on Mac using a media player like VLC, or Quicktime with Perian plugin. But you will certainly stumble if you try to load MKV to iTunes for easy syncing with other iDevices. iTunes is very picky about what kind of formats can be imported into it, and only a few of media formats are supported by iTunes, including MOV and MP4.
So you will need to convert MKV videos to iTunes compatible format for syncing across multiple devices easily. Here is where the Pavtube Video Converter for Mac comes in, a powerful all-in-one MKV to iTunes Converter, it's really worthy a try.
PS: You can purchase the software or download a trial to make sure it works before making decision.


System Requirements for convert MKV and playback MKV movies in iTunes
· 1G Hz or above PowerPC G4/G5 or Intel processor.
· Mac OS X Leopard (10.5), Snow Leopard (10.6), Lion (10.7), Mountain Lion (10.8)
· 512 MB physical RAM (memory) or more.
· 1024*768 or higher resolution display.
Step-by-step guide to add MKV to iTunes movie library on Mac
Step 1. Run the Pavtube MKV to iTunes Converter for Mac. Click "add video" to import load your mkv movies. It allows you to add several video files at a time and convert them in one go by clicking "add from folder".
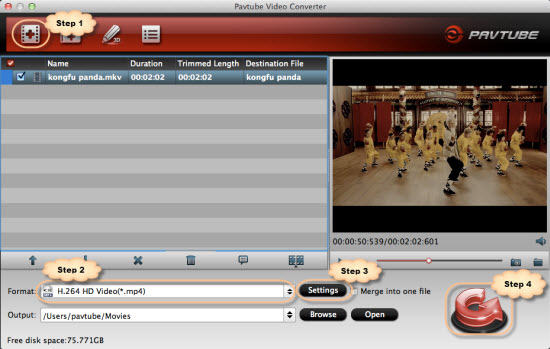
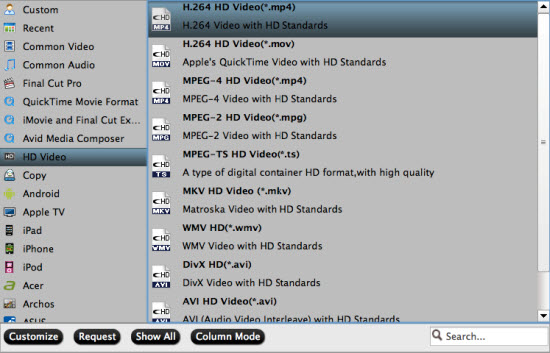
Step 2. Click the drop-down list of "Format" and select iTunes compatible video format, here the H.264 HD Video(*.mp4) is highly recommended for its good movie quality, and it can be synced to your iDevices without any problem.
Step 3. To further improve image quality and motion, click on "Settings" and set video bit rate up (better not exceed 18000kbps). In case of jerky picture, please set video bit rate down a bit or play the video on a more powerful Mac.
Step 4. Now click "Convert" button, start encoding and compressing MKV to iTunes support format and wait. The popup window will present you all the info such as conversion progress, conversion state, elapsed and ;estimated conversion time, and generated and estimated conversion file size.
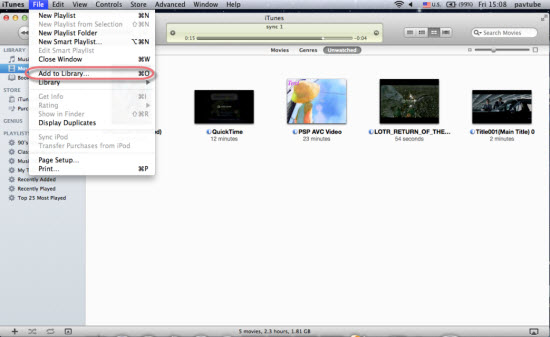
Step 5. Now you can you could click the "Open" button next to output box to locate the converted files and add converted videos to iTunes Library ;for playing back. Open up iTunes and follow "File > Add file to Library..." to sync these hd mp4 movies to iTunes.
For more details, pls refer to: How to add files to iTunes library
Tips:
If you would like to combine all the chapters into one file, please check Merge into one file. If you'd like to split a video, find more details in; Trim and Crop Video.
 Free Trial Video Converter for Mac


