-
How to replace the original audio of your video files on Mac?
As far as I know, to let videos reveal personal characteristics as much as possible, more and more video editing fans have been thinking of replacing the original audio of their on hand videos. The resource audio files that used to replace the original are various, they can be audio files recorded by people themselves, or some audio files downloaded online, or from other ways. All in all, the original audio can be replaced with whatever audio files user specify. To fit people’s needs, this article aims to show you how to realize audio replacement via Pavtube Video Converter for Mac in detailed instruction.
- Download Pavtube Video Converter for Mac, install and run it.
2. Add the video files, which you want to take the place of their original audio, to this program.
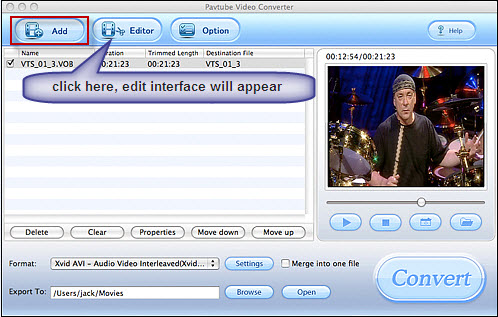
3. Press icon “Editor”, it is showing in the above picture, and click button “Audio Replace” in the pop-up window.
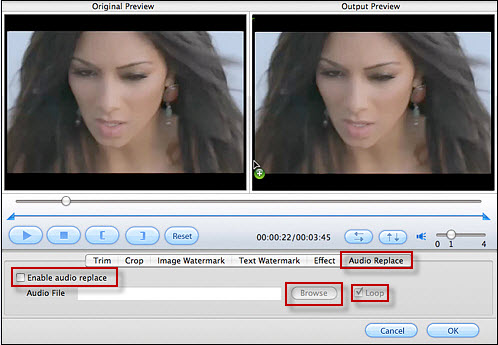
After that, an interface as following will appear. Hit the checkbox “Enable audio replace” and click “Browse” to specify which audio file will be selected to displace the original one. In addition, if the audio file you selected is not as long as the original, you need click checkbox “Loop” to let it restart from beginning, otherwise the rest video will be left without sound as soon as the audio you specified ends off in the first round.
4. Convert
After audio replacement is finished, you can then start converting. Once the conversion is done, you will get an amazing video file with certain special background sound which is totally directed by yourself.
Free Trial
Video Converter for Mac(9.0 MB)Buy Now
Video Converter for Mac(Only $35)
Products List
- DVD Ripper Mac
- Blu-Ray Ripper
- DVD to iPod Converter Mac
- DVD to iPhone Converter Mac
- DVD to Apple TV Converter Mac
- DVD to Blackberry Converter Mac
- DVD to MP4 Converter Mac
- DVD to 3GP Converter Mac
- DVD to PSP Converter Mac
- DVD to Gphone Converter Mac
- DVD to Mobile Phone Converter Mac
- DVD to AVI Converter Mac
- DVD Audio Ripper Mac