-
Guide: How to Convert DVD to your Apple TV
To better enjoy DVD videos with your family, you can transfer DVD videos to Apple TV, which is a network device designed to play digital content onto an enhanced-definition or high-definition widescreen television. Apple TV can function as either a home theater-connected iPod device or a digital media receiver, depending on the needs of the user. To output quality video that can be played on Apple TV, you’d better choose a quality DVD to Apple TV Converter. I recommend you to try Pavtube DVD to Apple TV Converter. This DVD to Apple TV converter can export high quality videos with resolutions ranges from 1280x720, 640x480 to 320x240. The programs advances with super fast conversion speed, various parameters settings, plus different ripping/cropping modes give you everything you need to load output video onto Apple TV.
Here I would like to show you how to rip DVD to Apple TV and how to transfer the export video on to your Apple TV.
Step 1 Install and run the application of Pavtube DVD to Apple TV Converter. If you don’t have the setup program, you can download it by clicking here.
Step 2 Add DVD videos by clicking DVD Rom, DVD Folder or IFO files.
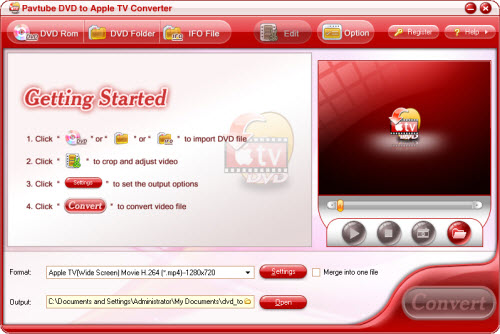
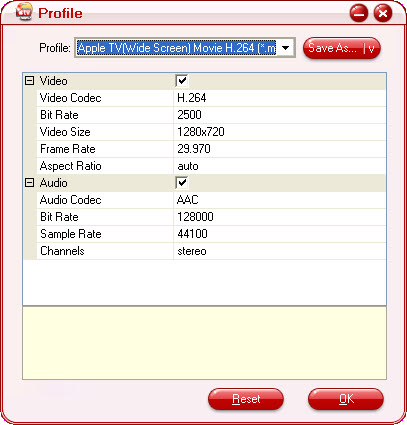
Step 3 Choose an output format and specify an output folder, if you choose you can do some advanced setting by clicking on the button of “setting” next to the box where you choose the output video format.
Step 4 Customize the Output video through selecting a file, and click on the "Edit" button, then you can change the visual and audio effect directly.
4.1 Change brightness, contract, etc. under the "Effect" tab:
Drag the slider bar for Brightness, Contrast, and Volume to preview the effect on the right pane.
If the DVD image does not display correctly, you can tick the checkbox for "Flip" to get it right
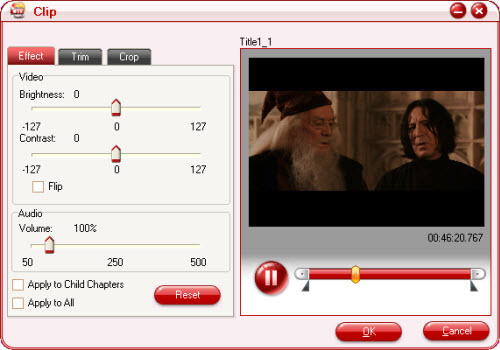
Tick the checkbox for "Apply to Child Chapters" if the file you select is a title, or "Apply to All" if the file you select is a chapter. Otherwise, you may click the "Reset" button to gain the default settings.
4.2 Change duration under the "Trim" tab.
Click on the "Trim" tab, and you will face the window below.
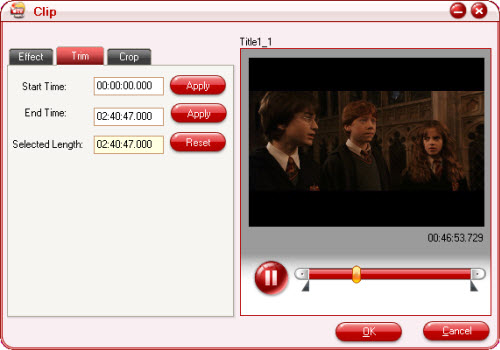
Enter the time point for the start time and the end time. You shall click the "Apply" button after changing. Otherwise, the change will not be valid. Alternatively, you can drag the slider bars to change the start time and end time.
4.3 Crop image
Click on the "Crop" tab, and you can change the image pixels with the following window.
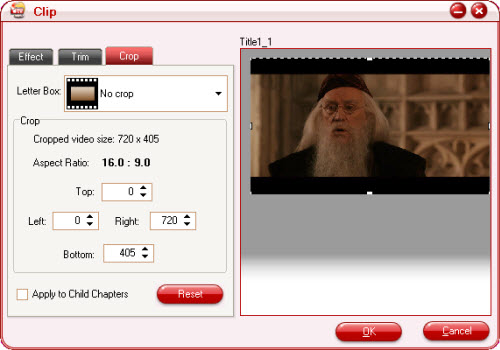
Select an option under the drop down list of the "Letter Box", drag the dashed frame on the preview pane, or enter value on the boxes for the four positions to set the pixels you want to cut off. If the file you select to customize is a title, you can tick the checkbox for "Apply to Child Chapters" to get other files with the same settings under the "Crop" tab.
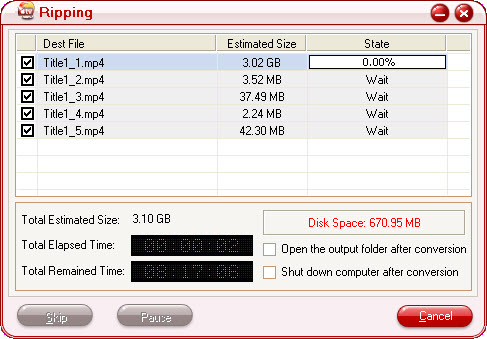
Step 5 Start conversion
When you get all the settings to your choice, click on the "Start" button and the checked files will be listed on the "Ripping" window for conversion.
Now that you have got the output video and the next thing is to transfer the export video to Apple TV.
To connect your computer with Apple TV box you need the bulit-in 802.11 wireless capability, you can directly transfer your movies, TV shows, music from iTunes to Apple TV if you have built a wireless network. If you don’t have this, you can build up one or connect Apple TV to PC via an Ethernet cable.
To connect Apple TV to your widescreen TV, you need an HDMI cable or component video and audio cables; you can connect the TV box to your widescreen TV with ease.
Related Article: How to Import, Sync, or Stream Your Content to Apple TV
Free Trial
DVD to Apple TV Converter(5.68MB)Buy Now
DVD to Apple TV Converter($29)
- Operating System: Windows 2000/XP/2003/Vista/Windows 7
- DirectX Version: 9.0 or above
- Memory: 64MB at least
- Processor: Intel Pentium Ⅲ processor at 500 MHz
- Hard Disc Space: 512MB or above
- Optical Drive: DVD-ROM
DVD Ripper Quick Learn
Pavtube Catalogue


Why choose Pavtube?
- Fully functional
- Free technical support
- Five-Star awards
- Free updates
- Excellent service