-
Guide: How to convert DVD to 3GP format vidoe for your mobile phone.
This guide shows you the way to play the related DVD videos on mobile phone, such as Nokia, Sony Ericsson, LG, Samsung, Blackberry, and so on with converting DVD to 3GP format. Pavtube DVD to 3GP Converter is a choice to get the great work down.
About DVD
DVD generally stands for Digital Video Disc or Digital Versatile Disc. There are VOB, IFO, BUP files in the folder named VIDEO_TS, under the DVD folder. The VOB files generally contain showing data like video, audio, subtitle, etc. The IFO files contain the navigation information of how the data show up. The BUP files are the backup of the IFO files.
About 3GP
3GP is a multimedia container format defined by the Third Generation Partnership Project (3GPP) for use on 3G mobile phones. There are generally two extensions for 3GP: 3GPP (*.3gp) for GSM-based phones and 3GPP2 (*.3g2) for CDMA-based phones. Both are based on MPEG-4 and H.263 video, and AAC or AMR audio. 3GP movies can be viewed on a computer with programs such as RealPlayer, QuickTime, Media Player Classic, etc.
Step1: Download and install Pavtube DVD to 3GP Converter; run the program and you will see the main interface:
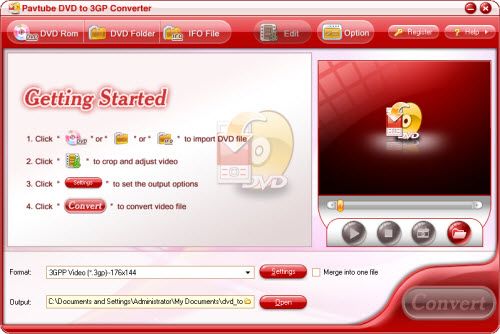
Step2: Choose the output format and the output path

| Output Format | Click the Format drop-down menu to select the needed format. |
|---|
| Output Path | Click the browse button to change the output folder, or click the "Open" button to open the output folder. |
|---|
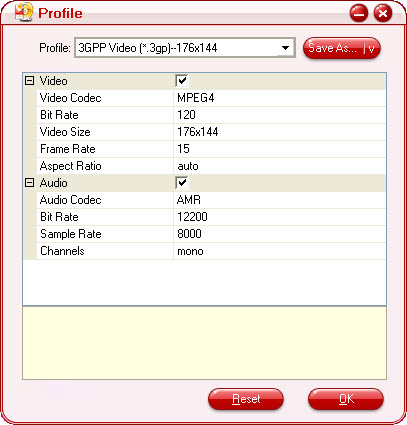
Step3: Click "Settings" for advanced settings
Step4: Preview and take a snapshot of the movie

| Preview DVD | Select a title or a chapter, and then click on the play button; or double click on the file to preview. |
|---|---|
| Capture Images | Take snapshots of the previewing DVD images for thumbnail or wallpaper. |
Step6: Change subtitle, audio track and angle
![]()
![]()
| Subtitle | Select the subtitle of the movie if the DVD itself has more than one language. |
|---|---|
| Audio Track | Choose the audio track of the DVD movie. |
| Angle | Choose a preferred angle to enjoy if the DVD was recorded with different angles. |
| Merge into one file: Merge the checked titles or chapters into a whole one. | |
| Note: Most of DVD movies do not include multiple angles, as it takes much work to do and the angles occupy disc space. | |
Step7: Select a file, and click on the "Customize" button, and then you can change the visual and audio effect directly. (Effect, Trim, and Crop)
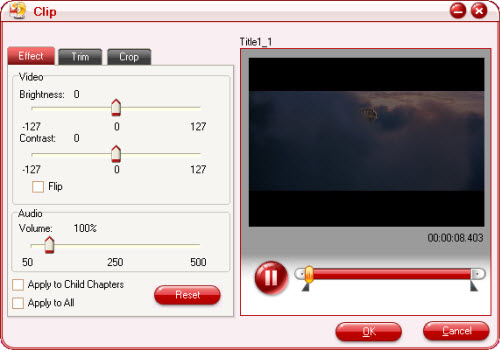
| Set Brightness | Drag the slider bar to change the video brightness with the direct effect on the preview pane. |
|---|---|
| Set Contrast | Drag the slider bar to set the contrast of DVD movie with the direct effect on the preview pane. |
| Flip | If the DVD image does not display correctly, check the box to get it right. |
| Change Volume | Change the audio volume, and get it comfortable for your listening. |
| Apply to All | Apply to all the files on the list. If the video on the preview pane is named with "Title" (not a chapter), you can choose to apply the settings to the sub-chapters. |

| Start Time and End Time | Enter value for the time and click to apply the change of time. |
|---|---|
| Drag Two Slider Bars | Drag the slider bars to get the start time and end time. |
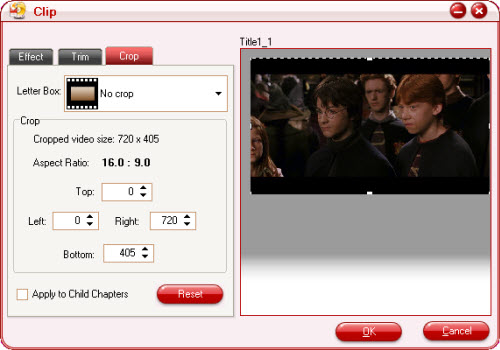
| Letter Box | Select an effect under the drop down list of the "Letter Box ". |
|---|---|
| Drag to Crop | Drag the dashed frame on the right pane. |
| Exact Value | Click arrow box or scroll value in the box for the four positions to set the ratio. |
| Apply to Child Chapters | Get sub-chapters with the same settings. (Only valid when the video on the right pane is named with "Title".) |
Step8: Set Preferences for General and Thumbnail. (Options﹥Preferences)
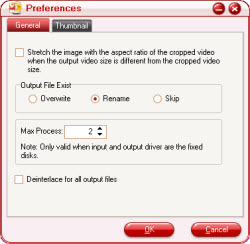
| Stretch Automatically | Check to stretch the image with the aspect ratio of cropped video automatically. |
|---|---|
| Output File Exist | Overwrite, rename, or skip the output file when there is same file name in the output folder. |
| Max Process | Change the Max Process. (See Note below) |
| De-interlace | Deinterlace the video for a perfect playing of all the output files. |
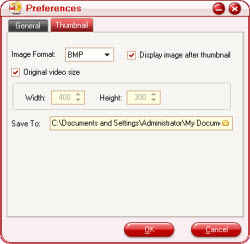
| Image Format | Save image as JPEG, THM or BMP. |
| Image Size | Use the original video size or set the width and height for the wanted size. |
| Note: The change of Max Process is only valid, if the source DVD is from a DVD folder on your hard disc, rather than a DVD on the DVD-ROM, while the output folder is a folder on your hard disk, not a portable device. | |
Step9: Change output file name.
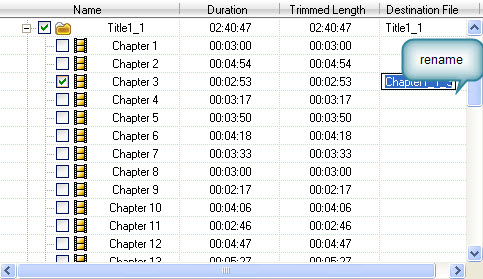
| Rename Destination File | Click the file name of chapters or titles on "Destination File" to enter a new name. |
|---|---|
| Note: The file name is only available when you keep the title/chapter checked in the front of the "Name". | |
Step10: Start conversion.
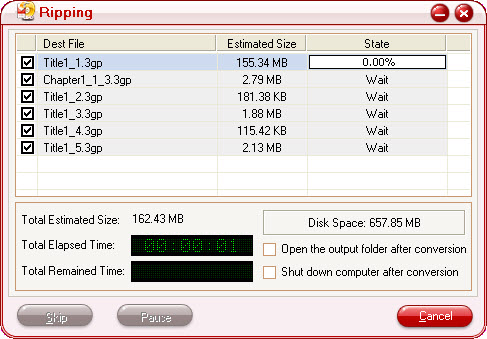
| Start Conversion | Click on the "Start" button, while all the settings are ready. |
|---|---|
| Open Output Folder | Open the output file after conversion, so that you can find the files quickly. |
| Auto-shut Down Computer | Set to shut down computer, if there is no other task you want to do with your computer. |
Finally, you can transfer the output files to your mobile phone and enjoy the DVD movies freely.
Free Trial
DVD to 3GP ConverterBuy Now
DVD to 3GP Converter
- Operating System: Windows 2000/XP/2003/Vista/Windows 7
- DirectX Version: 9.0 or above
- Memory: 64MB at least
- Processor: Intel Pentium Ⅲ processor at 500 MHz
- Hard Disc Space: 512MB or above
- Optical Drive: DVD-ROM
DVD to 3GP Quick Learn
Pavtube Catalogue


Why choose Pavtube?
- Fully functional
- Free technical support
- Five-Star awards
- Free updates
- Excellent service